Why You Need a Router Plane
This underappreciated tool will make you a better woodworker.

Synopsis: If you have a router, do you really need a router plane? Dan Faia says yes. Router planes, which are more like shoulder planes than routers, are invaluable for cleaning up and trimming tenon cheeks and other joinery, hinge mortises, inlay mortises, and more. But to do its best work, this small plane must be properly tuned. Because its primary purpose is cutting a surface parallel to its sole, the cutting edge must be parallel to the sole. Learn how to get it that way, and how best to use this handy plane.
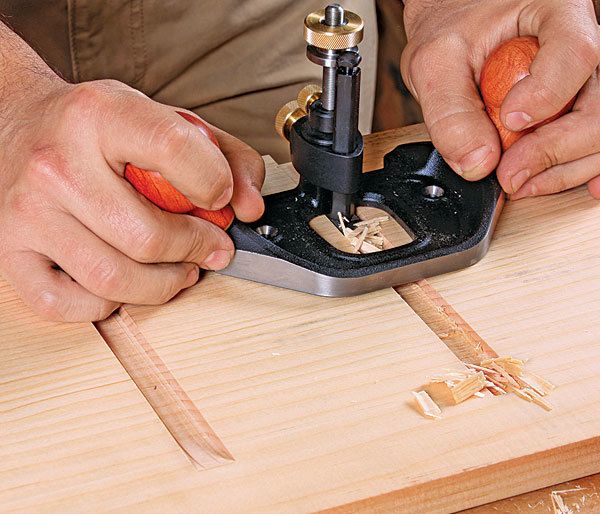
The router is one of the most common tools in the modern shop. You probably have one (or three). So you might wonder why anyone would need a router plane. After all, isn’t a router plane just an obsolete, less-versatile ancestor of the router? In short, no. Router planes were never meant to perform those tasks where routers excel: cutting joinery and profiling edges. They are more like shoulder planes than routers, because their specialty is cleaning up and trimming the work of other tools.
The unique appeal of the router plane is that it planes one surface parallel to another and that its depth of cut can be controlled with precision. So, it’s a great way to trim tenon cheeks, with the sole of the plane resting on the rail’s face. And if you’ve routed a hinge mortise just a hair too shallow, you can grab your router plane and remove that last bit of material. I also use mine to create mortises for inlaid panels (like those on Federal-style legs), to trim half-lap joints, and to correct the depth of dadoes cut into slightly cupped boards (dado sets and routers might not cut the dado to a consistent depth across the board).
There’s no other tool that can do those jobs as well, so I find one indispensable. Actually, I find two indispensable: a large one for joinery work and a small one for inlay and hinge mortises.
Flatten the sole
To do its best work, a router plane must be properly tuned. Because the plane’s primary function is cutting a surface parallel to its sole, the cutting edge itself must be parallel to the sole. It often isn’t, so I prep the plane as soon as I get it.
Start by flattening the sole. Use sandpaper attached to a flat surface with spray adhesive. Start with 80-grit paper and work up through the grits to 220-grit, switching grits when the scratch pattern is consistent.
Prepare the blade for parallel planing
Now that the sole is flat, you need to ensure that the cutting edge is parallel to it. If it’s not, you won’t get flat-bottomed dadoes, mortises, and so on. Surprisingly, not all blades are flat across the bottom, but truing the edge isn’t hard. Here’s the key: If the bottom of the blade is out of parallel, a trued-up cutting edge might actually look crooked from the top.
From Fine Woodworking #229
For the full article, download the PDF below:
Fine Woodworking Recommended Products

Starrett 4" Double Square

Veritas Micro-Adjust Wheel Marking Gauge

Veritas Precision Square


Log in or create an account to post a comment.
Sign up Log in