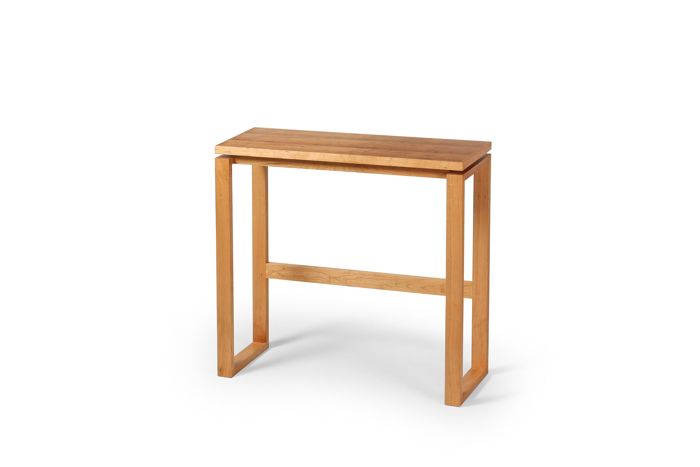
Modern, but strong, table. The rectangular legs contain an apron and stretcher to create a base that can resist the rigors of normal use. (Please, no dancing on top.)
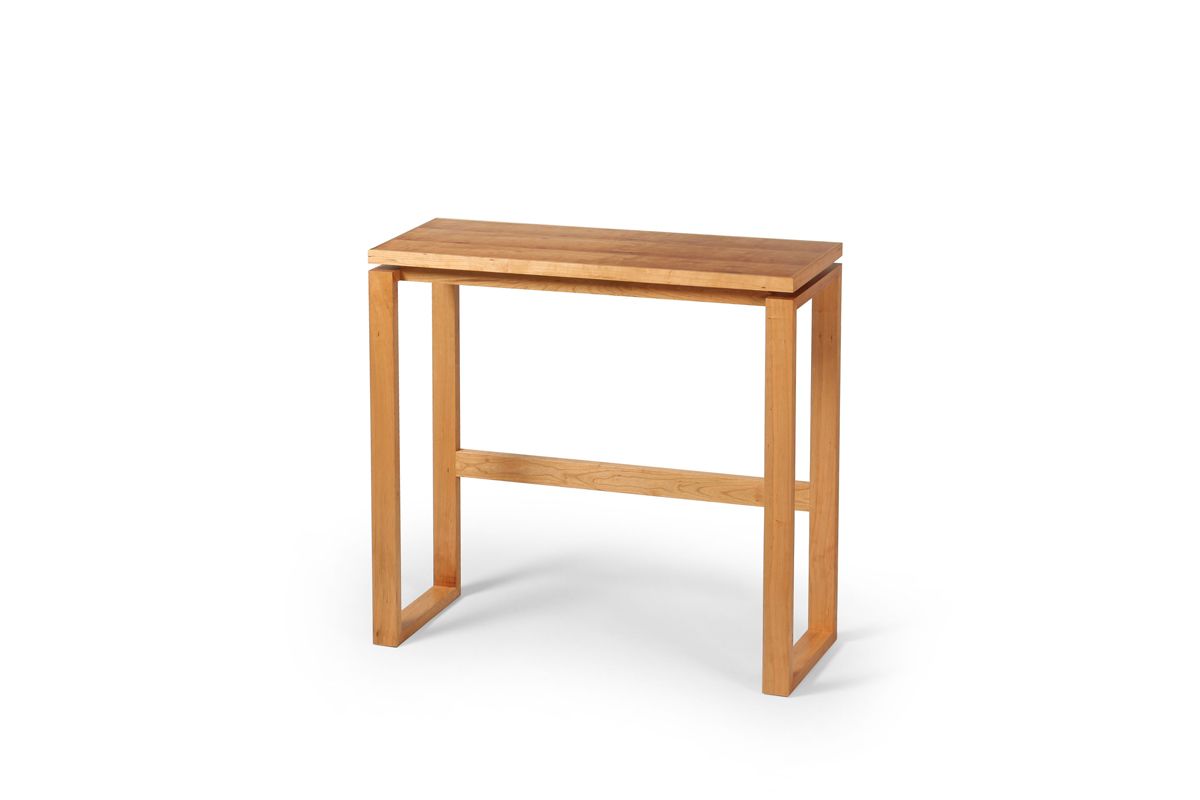
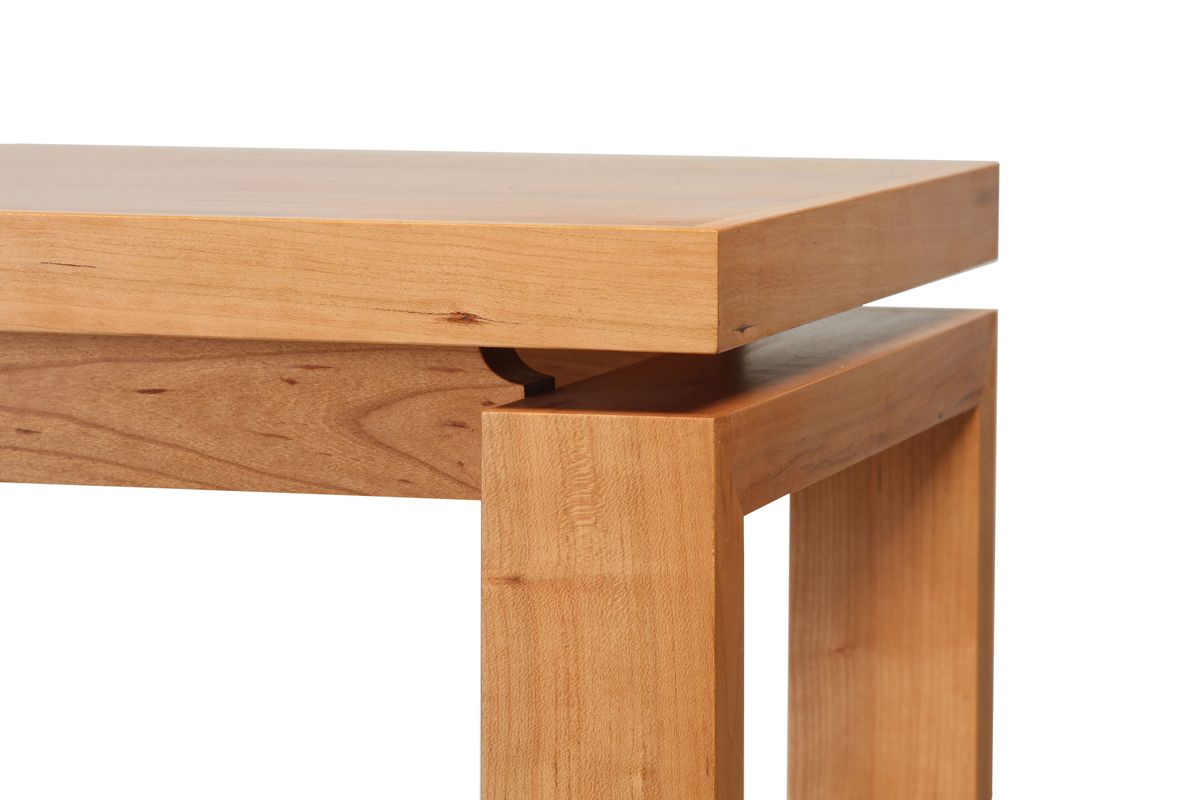
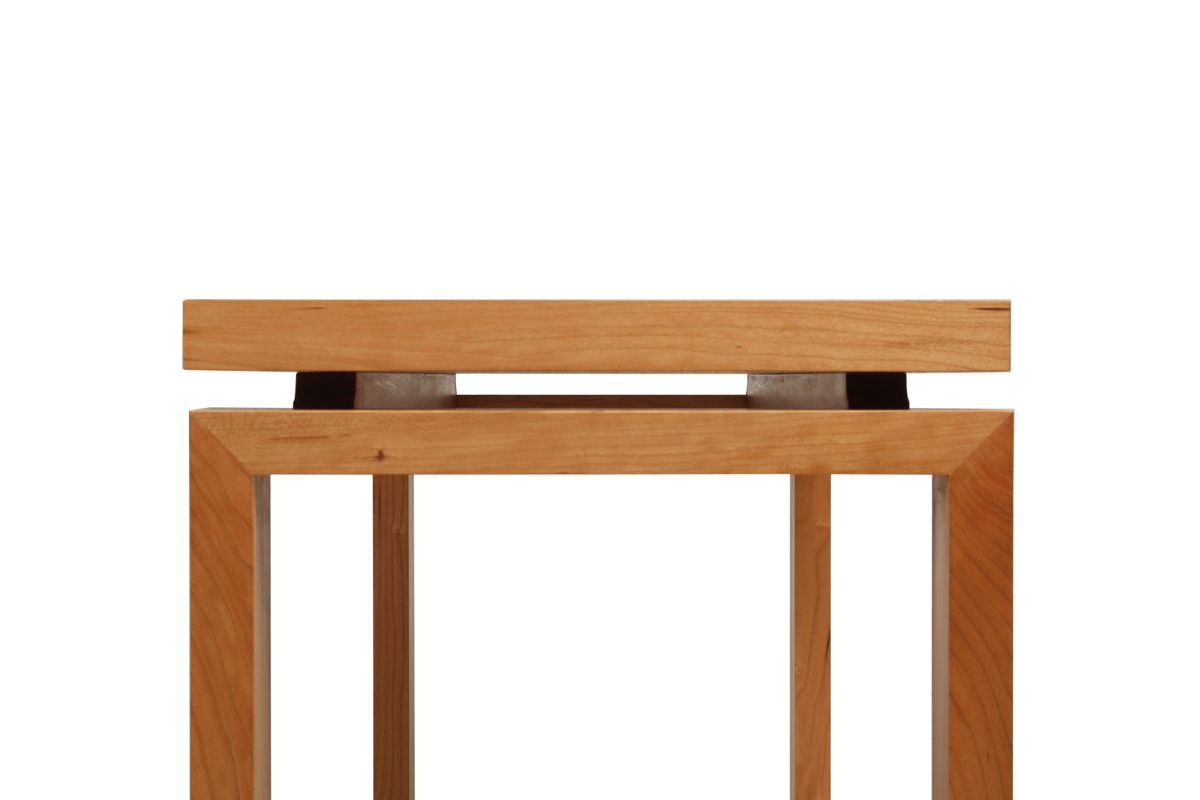
I made this table for a gallery/collective in my hometown, Reworx. I’ll risk stating the obvious: It’s a modern design. I took the side aprons and stretchers you would find a more traditional table and joined them to the legs with miters to create a rectangle at both ends of the table (a strong visual that I really like). The bottom stretcher on the back is joined to the legs with mortise-and-tenon joinery. The top floats on two stretchers that run the between the legs, similar to what Tim Rousseau did for the article “Float the Top.”
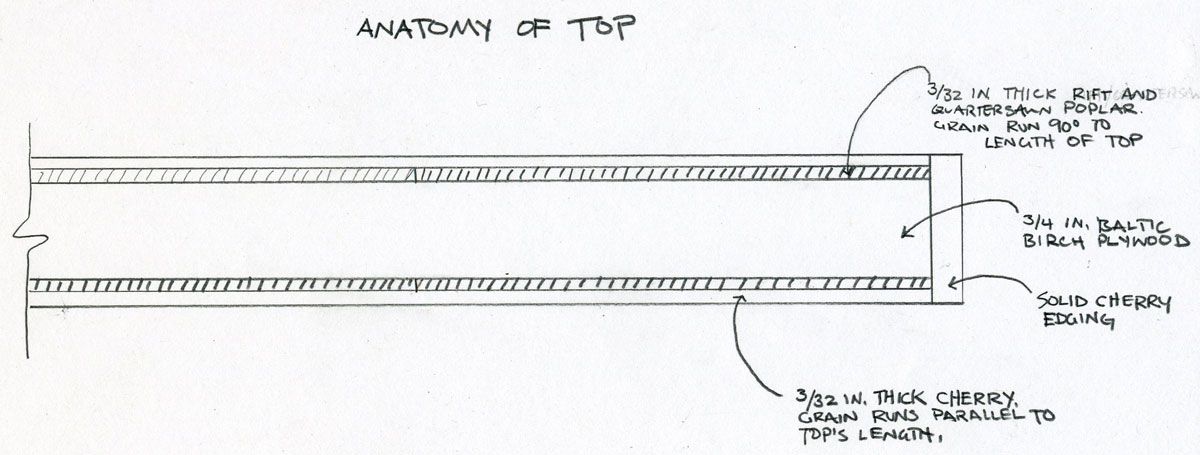
The construction of the base (made entirely from locally harvested cherry), which has a very limited number of structural elements, left me with a problem: How to make and attach a top that won’t be prone to cupping, warping, expanding, contracting and ultimately tear itself apart? My solution was to make a veneered top, but I wanted it to have the look and feel of solid wood. So, I used shopsawn veneer. Then I got into the more detailed problems presented by the top. What should I use for a substrate? I chose a high quality Baltic birch plywood, so that I could screw into the top to hold it down to the base (MDF doesn’t take screws very well). Next, I had to figure out a way to get the top to the final thickness that I wanted (a bit over 1 in. thick). The plywood was just under 3/4 in. thick. So, I first laminated a layer of poplar to the top and bottom of the plywood panel (one at a time in my vacuum press). For each layer, I edge glued 10 pieces of 4 in. wide popular together to create a panel that is 40 in. across its grain and about 15 in. along it’s grain. Why make it that way? So that I could glue down the popular with it’s grain running 90 degrees to the plywood’s length and the grain on it’s outside plies. In essence, I was adding another ply to the plywood. That makes it more stable and stronger than if I had glued the poplar down with it’s grain running parallel to the plywood’s length.
Next, I glued the face veneers (one at a time) to the poplar. Those were made from a very old table my mother-in-law had given me (with the express intention of having me use it for lumber). I didn’t know what type of wood the table’s top was until I ran it through my planer (old knives) to remove the thick, dark, paint-like finish. Low and behold: beautiful cherry. It has a very deep, rich color (not oxidation, because it went all the way through the board). I slipmatched three pieces and edge glued them. The grain runs the length of the top, just as it would if it were solid wood. (Note: I was expecting the top to be made from birch, because the legs of table were very highly figured flame birch.)
I’m very happy with how the table turned out. And making the top was a great adventure. I’d never done anything like this before, but many others have. So, I have them to thank.
Note about the miter joints
Some of you might think that the miter joints aren’t strong enough for use in a table base. I think they are, at least for a table like this. The reason? Tons of glue surface on the joints, because the legs are wide and thick. And it’s good glue surface, because I treated all of them with glue size before gluing up the legs. And based on my experiece, sizing the joints does make them much stronger than miter joints that aren’t sized.



Comments
So you mean to say that those miter joints kept the table from racking? I would have thought at the very least it would need to my reinforced with a spline or that it had hidden joinery of some sort. Interested to hear your thoughts.
Love the table, nice work. I too am wondering about the strength of the miter joints. I am not familiar with "glue size" and was wondering what you mean by this. A quick google search looks like it is either a 1:10 dilution of regular yellow glue or perhaps a specific product?
http://www.randomhouse.com/wotd/index.pperl?date=20000317
Jasonhass: I make my own glue size by mixing yellow glue 50/50 with water. I got that ratio from the folks at Titebond (we ran a Q&A about this a year or so ago). I put it on the joints and let it dry overnight. The glue size is pulled into the fibers and drys there. That prevents the fibers from absorbing the glue when I apply it the next day.
Nathan_C: I could be wrong about this but racking is a force that is applied to a piece of furniture by an outside agent, like your uncle leaning back in his chair after thanksgiving dinner, or everyone using the dinner table as a rest/push off when they get up. I don't think this table, meant for a hall or behind a couch, would experience that type of racking. Would the joints hold up to someone really pushing on one end of the table? Not if they really wanted to tear the table apart, but I don't think that's the table's fault.
You're certainly right about racking and it makes sense that it's intended function would not put it up against too many stresses. I asked because I really like the clean look of the whole piece and was wondering how it would stay together. I've never heard of glue size either so that is interesting that it can prevent glue from being absorbed into what is essentially end grain. I'll be interested to hear what my teacher has to say on the matter (Peter Fleming of Sheridan College). All in all though, very nice piece (I love the floating top and will certainly be trying that in some future projects).
So you are saying that poplar is popular for veneer backing.
Just couldn't resist the opportunity to chide the editor who relies on the spell checker. After all, if this detail is incorrect by poor oversight, is it not conceivable that important details may also be stated incorrectly?
Log in or create an account to post a comment.
Sign up Log in