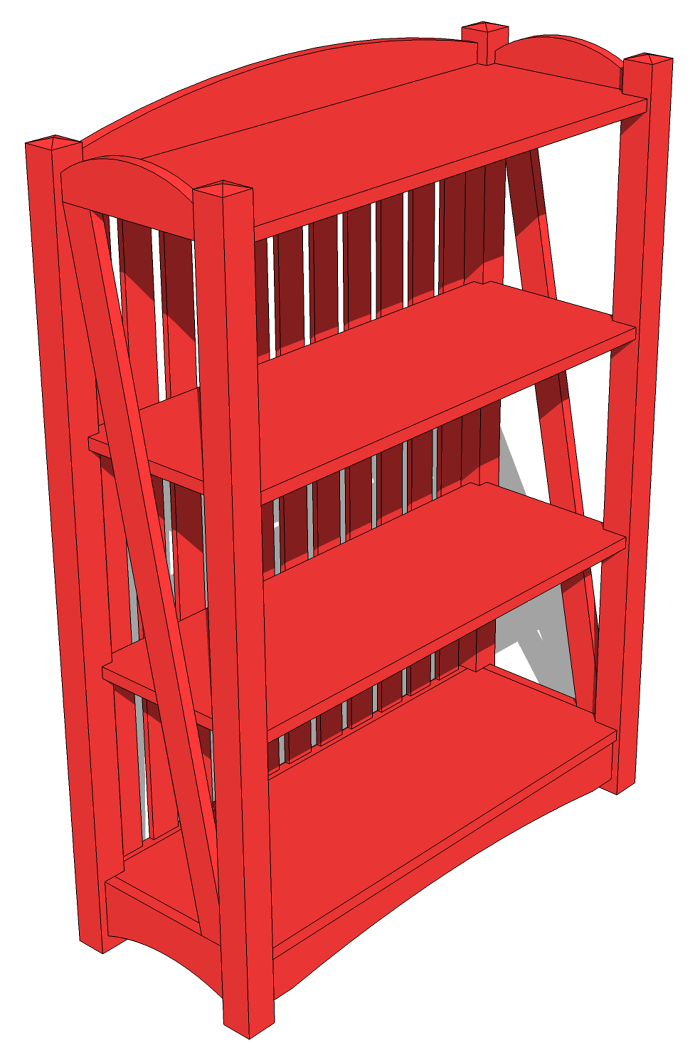
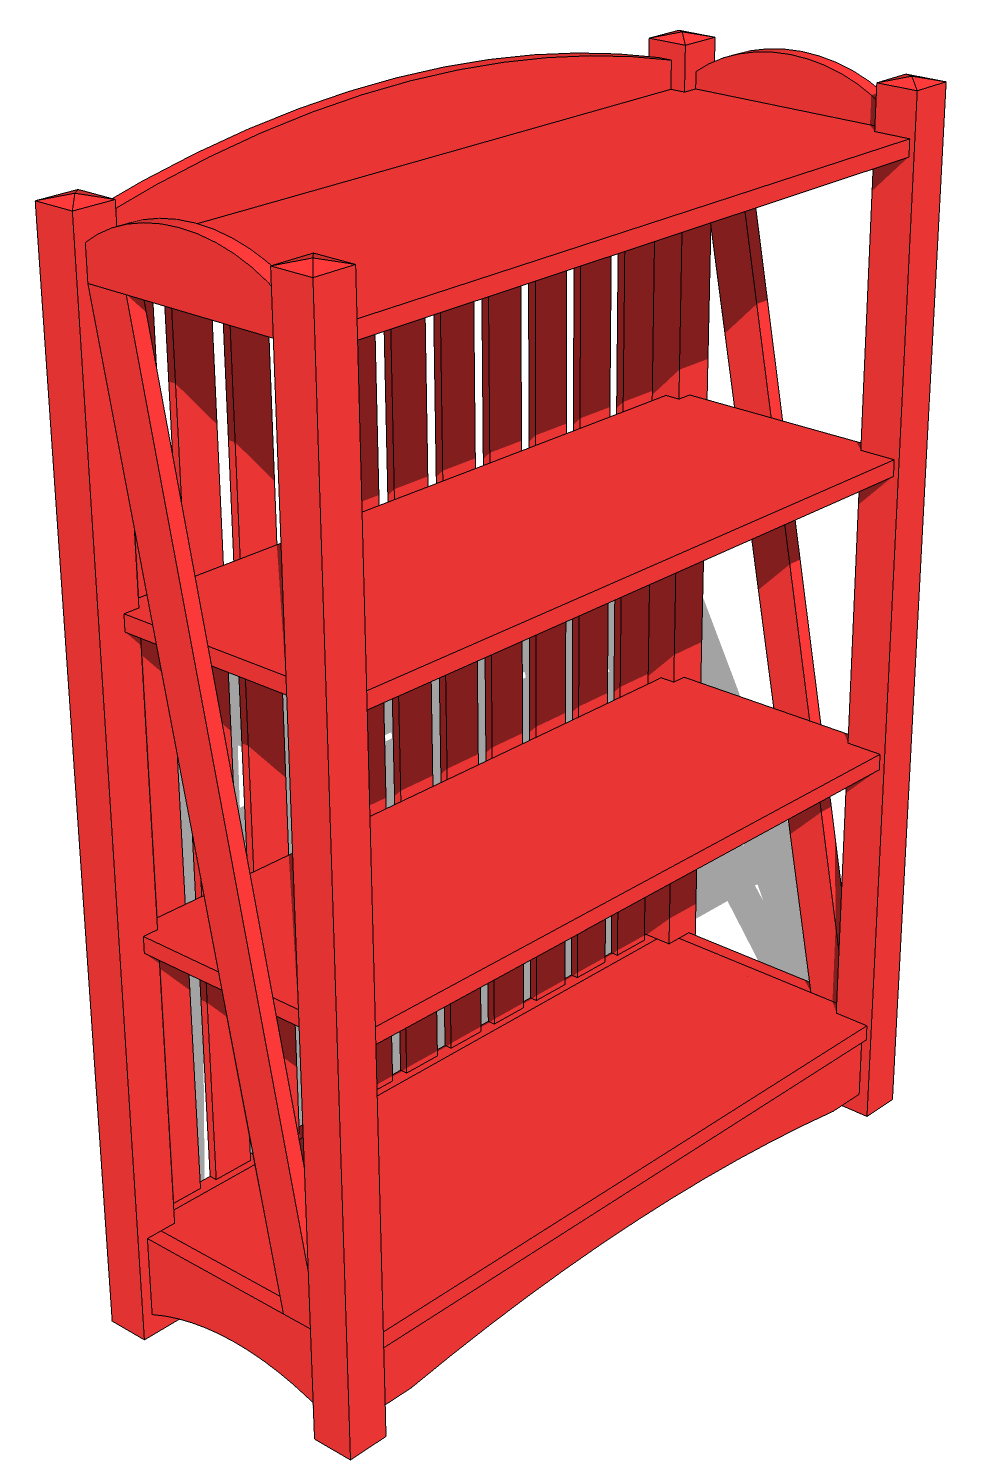
Every so often I have a need to add diagonal bracing to a project. The braces on the side of this book shelf are a good example of that. In the shop you would make the brace longer than needed, offer it up to the shelf and mark for cutting. In SketchUp, though, it is kind of tricky to draw these pieces in accurately. The native Rotate tool doesn’t make this simple. You could lay out guidelines but getting it precise is a challenge and takes a lot of time. You could do some trigonometry which would probably be good for the brain but it still takes some time. Fortunately there is an easy way thanks to a tool in the FredoScale plugin. Fredo developed it specifically for this task. Here’s how it works.
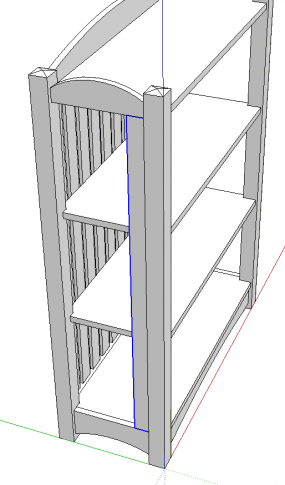
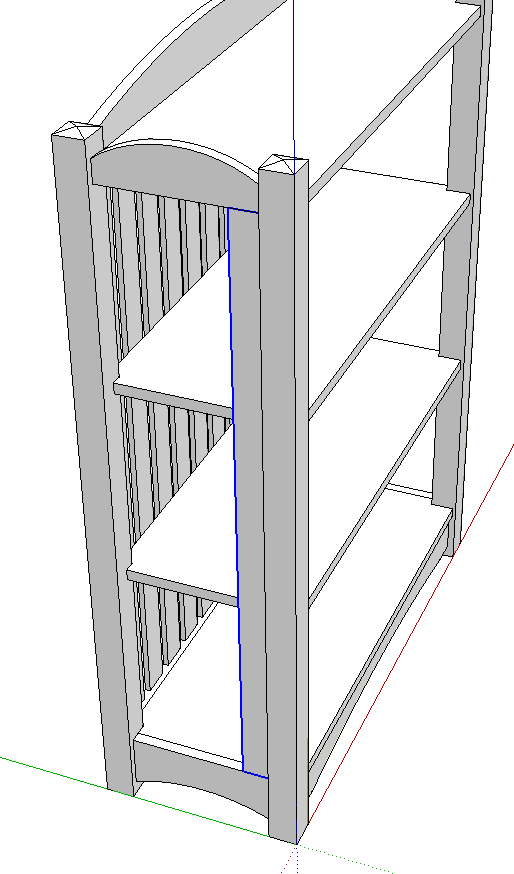
I’ve got my book shelf model mostly complete. I’ve drawn in the brace and made it a component. It’s not long enough yet but that’ll be fixed with the “board stretcher” later. I’ve placed it so the bottom front edge is in its final position.
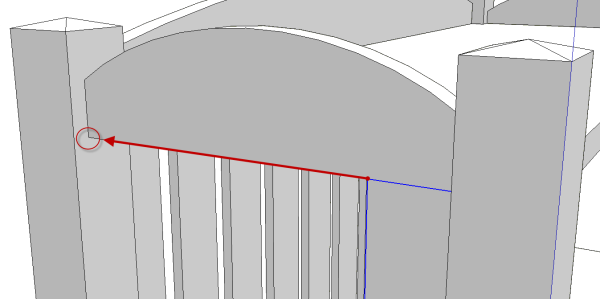
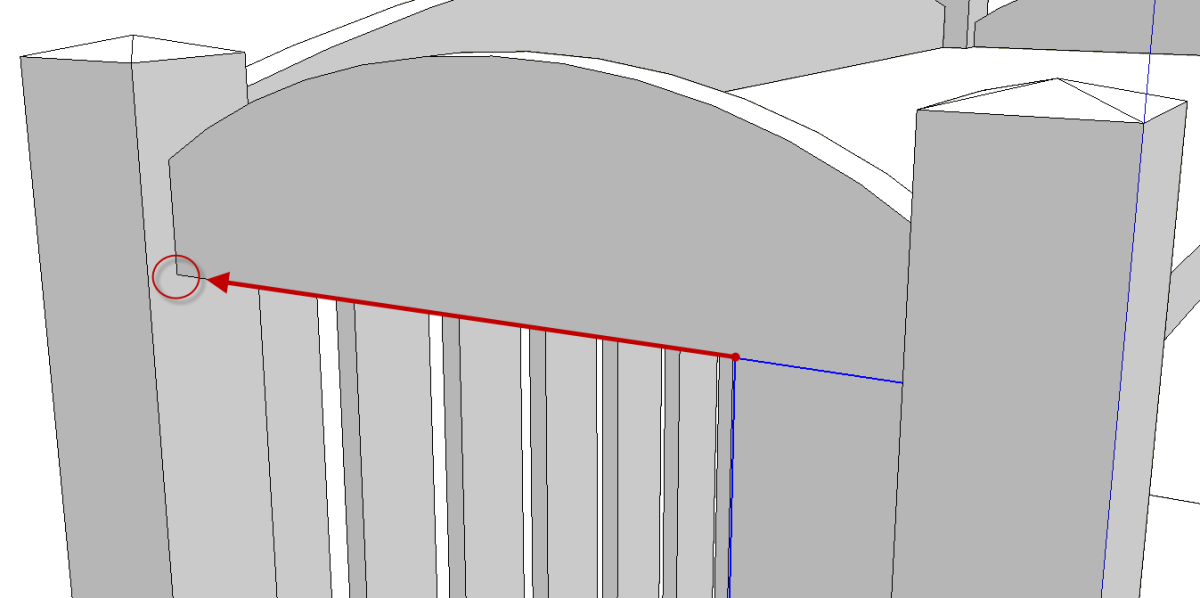
The top back edge of the diagonal needs to fall at the corner in the red circle, above.
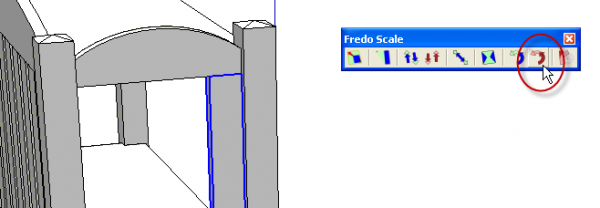
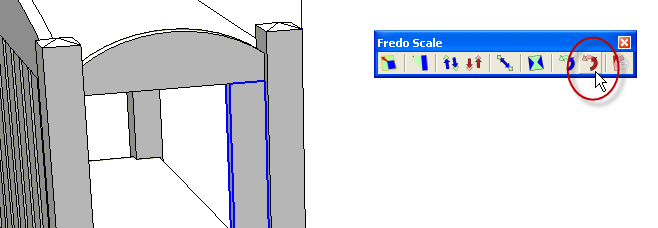
With the brace component selected, choose the tool indicated, above. It is called “Rotation by selection of plane and angle.” You’ll get a protractor and some nice on-screen prompts to guide you along.
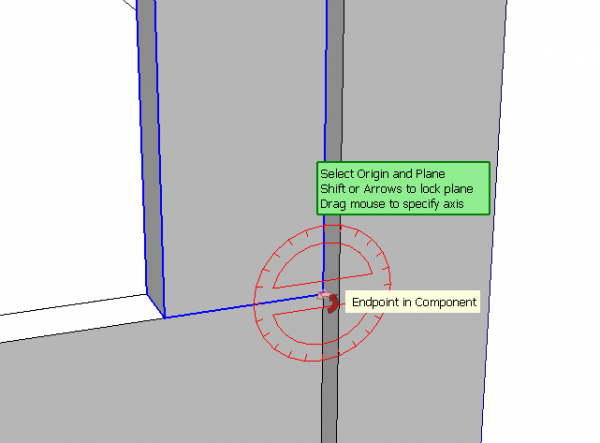
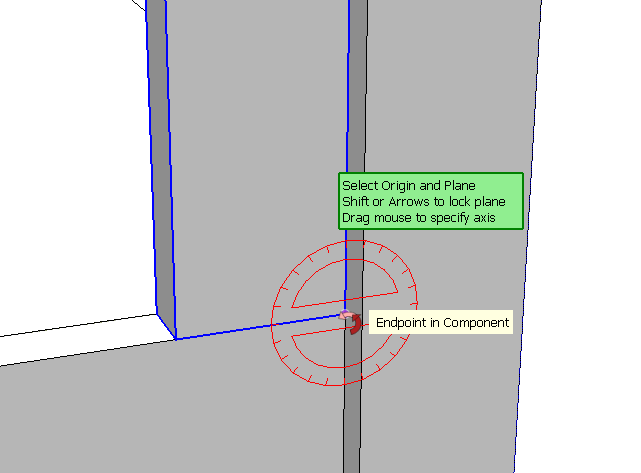
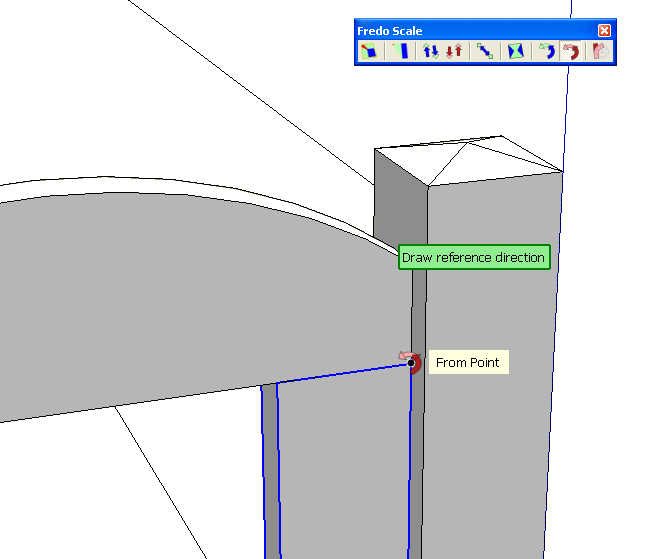
Make sure the protractor color matches the desired axis of rotation. As indicated in the green box, you can change the axis or rotation with the cursor (arrow) keys or by clicking and dragging along the edge about which you want to rotate the component.
Click at the center of rotation.
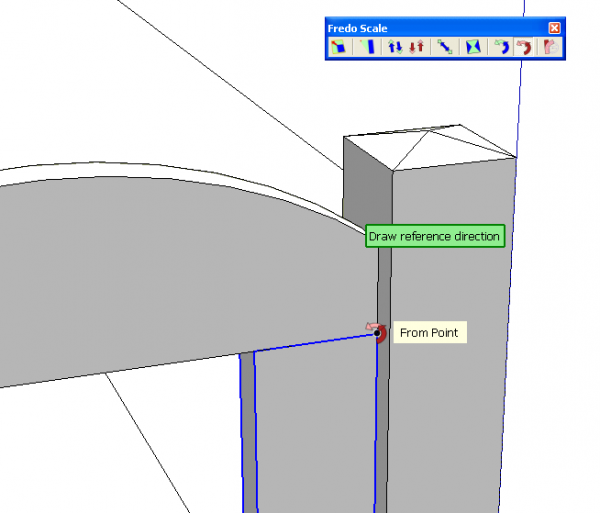
Move the cursor up along the edge of the component and click to set the “Reference Direction.”
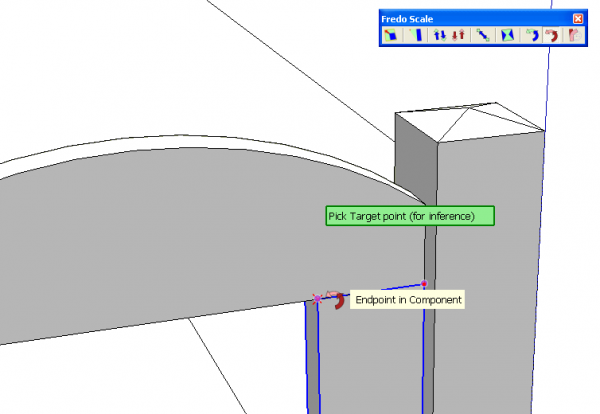
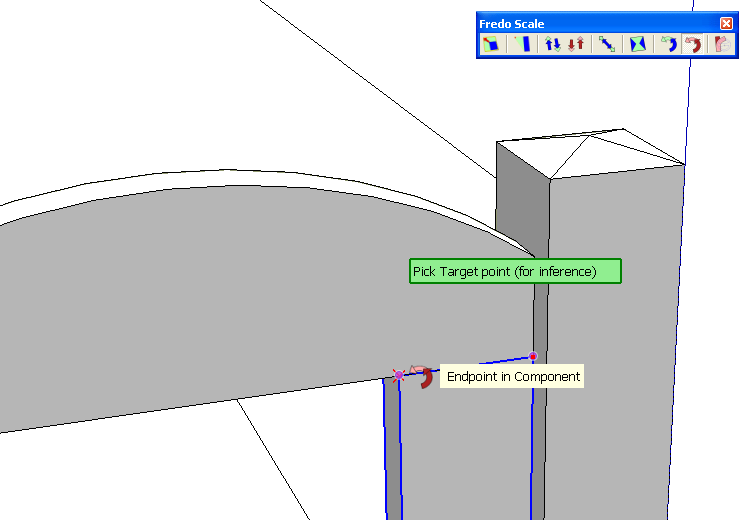
Click on the corner that needs to be aligned with the desired endpoint.
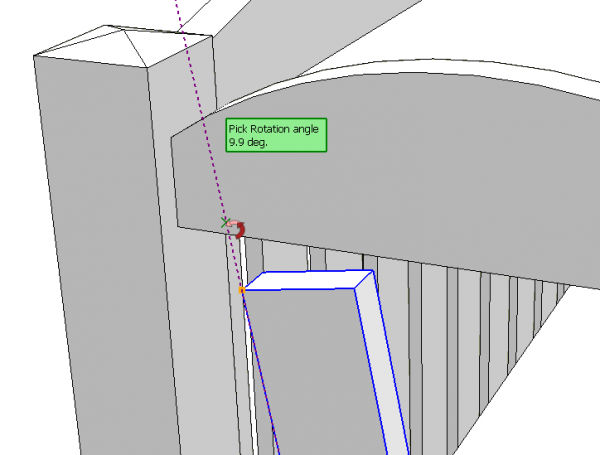
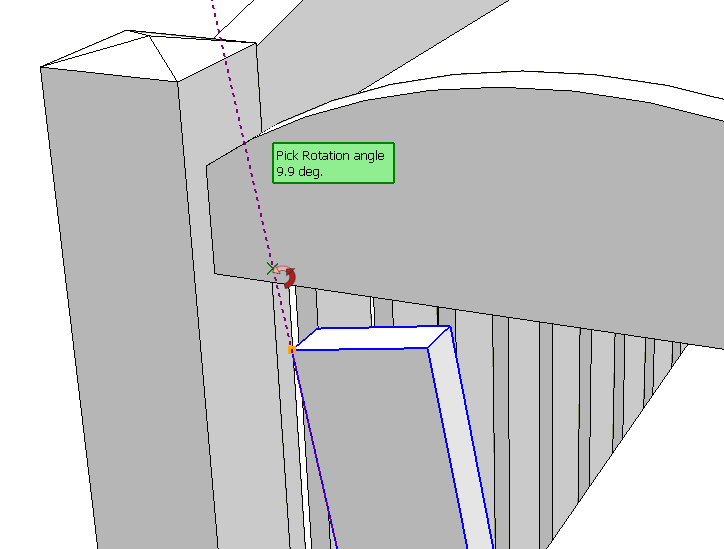
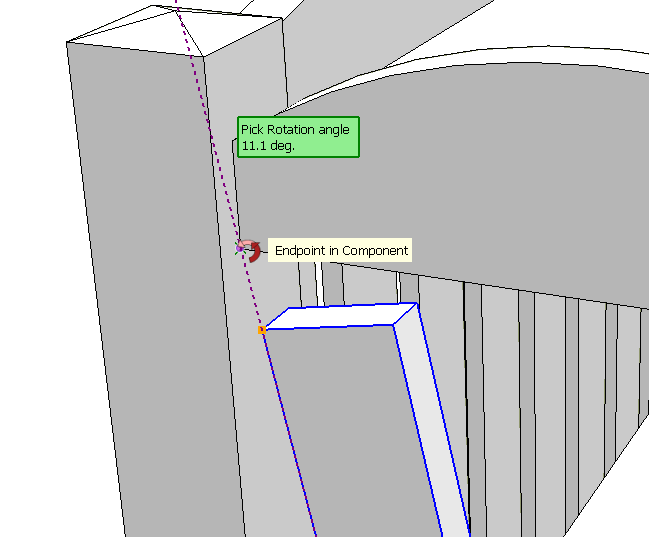
Move the cursor toward the desired endpoint. Notice there’s a purple guideline acting as an extension of the edge of the component and a display of the rotation angle. If you knew the final angle you could type it but then you probably wouldn’t need to use this tool.
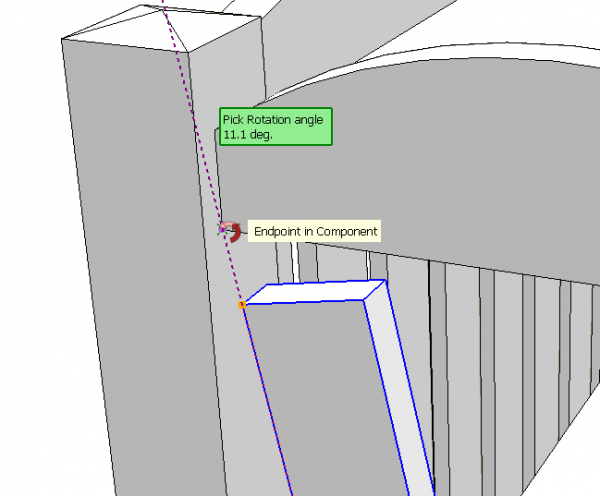
Bring the cursor over to the point at which you want the corner of the diagonal to fall and click there.
To make this whole process easier you’ll want to be able to navigate around the model with the center mouse wheel/button. This will allow you to zoom in and orbet as needed so you can see what you are doing but without dropping the tool.
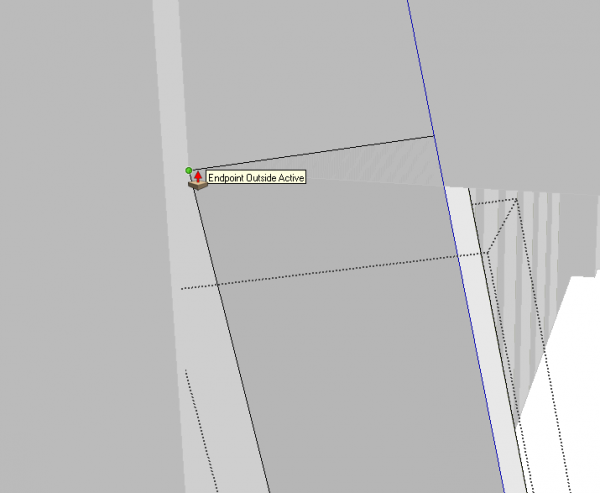
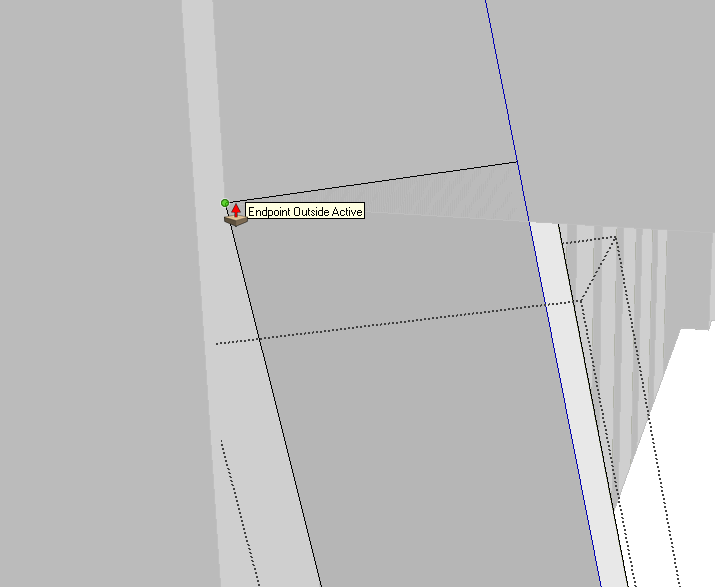
Now it is time to apply the “board stretcher” so we can make this brace fit. Open the component for editing and get the Push/Pull tool. Use it on the top face of the component and click on the corner as shown above.
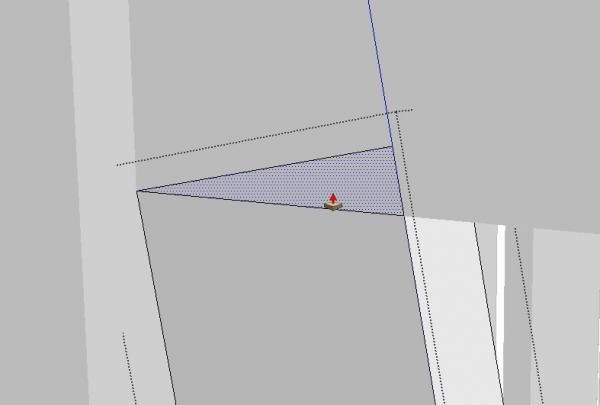
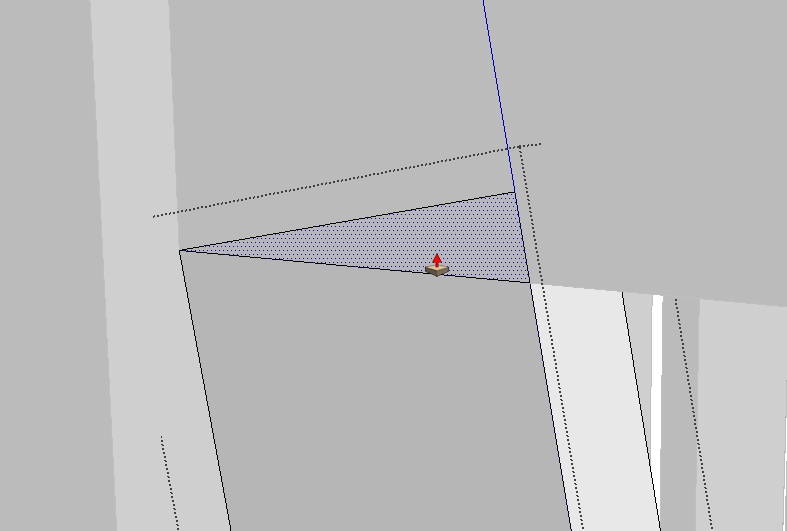
To trim the diagonal to the right angle we could use the Move tool on that top front edge or, as I did here, draw a line and use Push/Pull to trim of the waste. Repeat at the bottom and close the component. Finished!
This is a whole lot faster than it might appear from this blog post. Give it a try and see what you think.
—Dave



Comments
I tried this after reading the problem but prior to reading the solution. I was not familiar with the plugin, so I came up with a different method.
I created the brace in the same position as yours, but mine was 3" too long. I then drew a circle with 96 sides, with the center in the same spot as your rotation axis, and the radius at the opposite corner of the frame. I was then able to rotate the brace into position using the appropriate intersection point on the circle.
I don't think it's quite as accurate as your solution, due to the segmented circle, but it's pretty close if you use lots of sides on the circle.
Carl, you're right. That does come pretty close and it is the method I used before this plugin. Now with the plugin you could just about have the diagonal positioned in the time it would take you to make the circle.
--dave
You convinced me. When I got home (I couldn't install the plugin on my work computer) I tried it. Very slick! Thanks!
Log in or create an account to post a comment.
Sign up Log in