Frame-and-Panel Doors that Stay Flat
How to ensure that your frame-and-panel doors come out flat—and stay that way
Synopsis: It may sound obvious, but if you want your cabinet doors to swing freely and stay true, they have to be flat. And if you follow the proper techniques, they will be. For a basic frame-and-panel door, the process starts with choosing straight stock and milling it carefully. Then, you have to use the right orientation when cutting both mortises and tenons, to ensure that the doors will be flush. A bit of fine-tuning and the proper glue-up technique, and you are on your way to flat doors, every time.
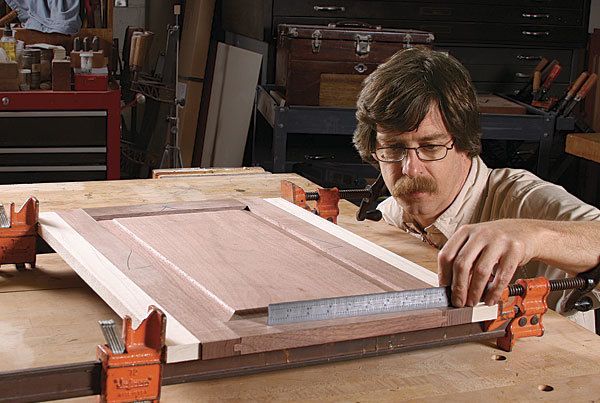
For doors to hang easily and swing true, they need to be flat. It sounds obvious, but making doors that stay flat is easier said than done. No matter how much I emphasize proper techniques with my students, there are always doors that end up with a twist. In almost every case, the problem could have been avoided.
Flatness is the result of a painstaking process that starts with choosing the right stock, followed by patient milling and careful joinery and assembly. While building a basic frame-and-panel door, I’ll share the techniques I use to make sure my doors come together flat and stay that way.
If you want your door to stay flat, the rails and stiles have to be resistant to twist. The best way to avoid problems is to use dimensionally stable, straight-grained stock for the frame. As you mill any board, you release internal stresses that can cause wood to move out of flat. But figured grain is more prone to unpredictable movement—so save figured stock for the panel or elsewhere.
While milling the frame parts, remove material slowly and equally from both sides to minimize and balance wood movement. Throughout the process, keep stock neatly stickered on a flat surface to further discourage bows, cups, and twist.
Start with stock that is 1⁄4 in. to 3⁄8 in. thicker than the final dimension and rough-rip the stiles and rails about 1⁄4 in. to 1⁄2 in. heavier than final width if the stock allows. Larger doors need more buffer than smaller doors, so size parts accordingly. rip a few extra pieces in case parts need to be replaced. The extras also can be used to set up joinery cuts.
Take stiles and rails to final thickness gradually. Take light passes on the jointer or planer. The dimensioning process might take a week for large doors, or overnight for small doors. After each milling session, it’s important to sticker the parts and let them sit overnight. Letting the parts sit allows the newly exposed grain to acclimate to the shop and lets the wood move. If a piece keeps warping severely, replace it with one of your extras. If it won’t stay flat during rough-in, assume it won’t later on.
Approach solid-wood panels just like the frame parts: Size them down slowly over time, and check often for twist, bow, or crook. Distorted panels can pull the frame out of flat during glue-up.
For the full article, download the PDF below.
Fine Woodworking Recommended Products

Jorgensen 6 inch Bar Clamp Set, 4 Pack

Dubuque Clamp Works Bar Clamps - 4 pack

Estwing Dead-Blow Mallet


Log in or create an account to post a comment.
Sign up Log in