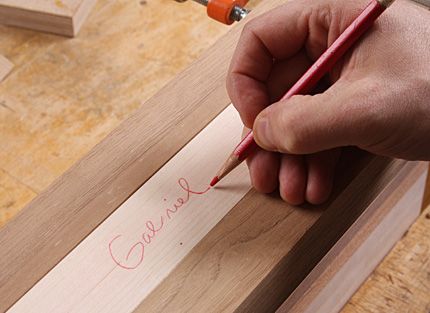
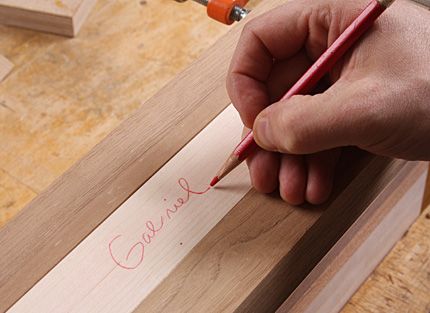
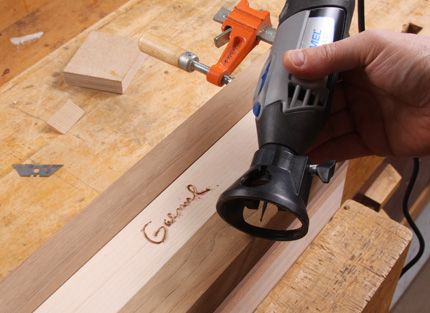
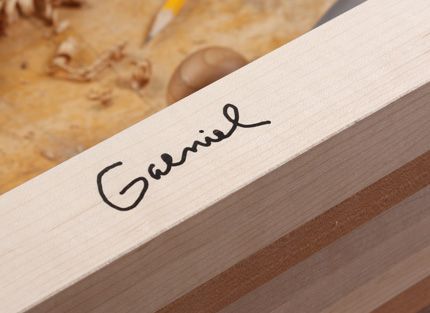
1) I began the process by signing my name to the edge of my cutting board. Notice the two pieces of scrap walnut on either side of the maple-edged board? Those are there to increase the real estate available for my Dremel's base plate.
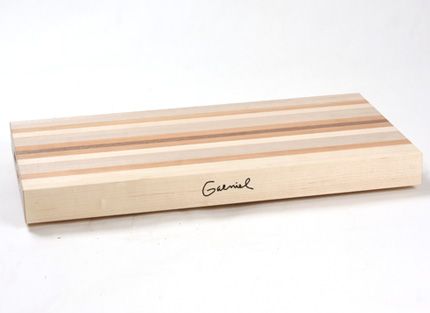
A few days ago I decided to put some of my smaller scraps to use by building a simple cutting board. Since this wasn’t a piece destined for anyone in particular, I thought it might be appropriate to use it as a test subject for a simple inlay technique I’ve always wanted to experiment with. Truth-be-told, this isn’t technically an inlay but rather, a way of faking one-sort of.
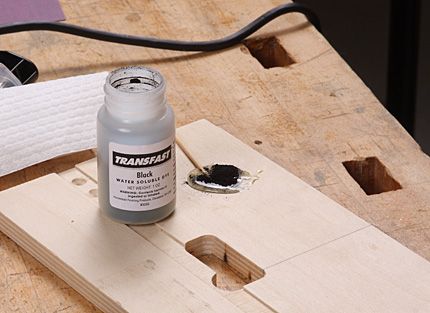
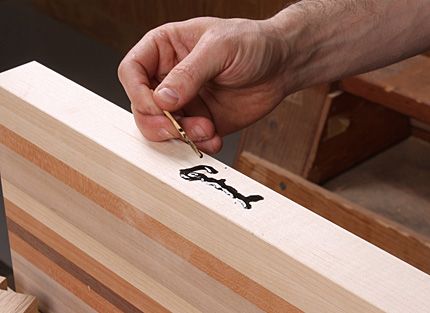
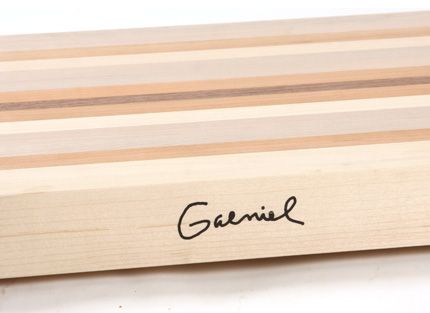
I typically sign all of my work using my middle name, Gabriel, and I’ve often wondered if I could use a Dremel tool with a router base attachment to trace around a signature and then fill the void with tinted epoxy for a sleek, permanent branding of my pieces. Turns out I can. While I’m not completely satisfied with the final product (my routing was slightly shaky at points, leading to curves that aren’t as smooth as I’d like), I’d say I’m pretty close.
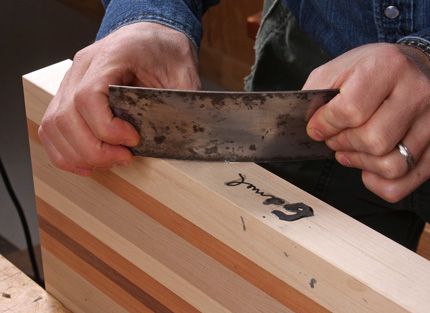
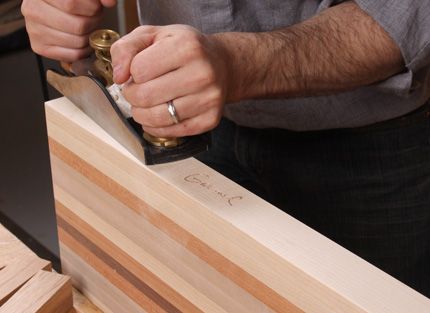
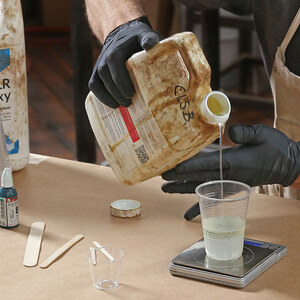
Watch the process, step-by-step, in the gallery photos above. This only took me about an hour-not including the drying time for the epoxy. A better attachment for the Dremel would certainly help in controlling the cut, but that will have to wait until the arrival of my next paycheck. Enjoy, and if you’ve experimented with a similar technique, I’d love to hear about it in the comment section at the bottom of this post.





Comments
I have been working on a similar concept but have been using a 2mm carving gouge rather than a Dremel (tried the Dremel once but had a hard time controling it and thought the cut was a little fuzzy). The gouge takes a little longer but leaves a very clean cut.
Thanks, jdm92562 for writing: I believe my next step will be to build a custom base for my dremel - complete with hand-holds that will make it easier to control the cutting. I also plan on making the cut (next time) even shallower than this one - so that the bit doesn't bog down and wander as much. This experiment was shallow but I can get even shallower, I'm sure!
Best,
Ed
The Stewart McDonald router base for Dremel is a much better base.
I like it Ed....it makes heirloom pieces that much more special
I like it Ed....it makes heirloom pieces that much more special
Thanks, Pickingrin1!
Cheers,
Ed
Great idea Ed. I like. The Dremel is a handy tool.
AL
http://www.woodworkingwithajo.com
I believe I would rather use a blade, hand held or in a router (the kind without the motor!) plane. Dremel is too shake because the spinning of the blade and the gyro effect of the spinning motor is always going to put the cut in directions you can not control very well. Nothing says "heirloom" like a blade and the error it shows mimicks the "error" in your normal handwriting. A good carving knife or gouge is much better and I know because I am low on artistic talent and must look for bulletproof techniques. Unplug the electric and step back from the dremel slowly so I can see the hairs on the back of your hand (modified from "The Outlaw Josey Wales") Interesting article, thank you.
This may be new for Ed, but we did this stuff in Cub Scouts back in the early 1960's. Of course, we didn't have anything like colored epoxy. We used a product called Water Putty and added tempera paint pigment to color it. Nor did we have routers or even chisels. We sort of scratched our names using our official Boy Scout pocket knives. Pretty rudimentary, but it's one of the things that set me on the road to woodworking 50 years ago. Have fun with this and share the experience with a kid.
Instead of having to mix and make the black epoxy I suggest using the Black CA Glue. Put a small amount in the area desired and spay with accelerator. Keep adding the black CA glue until a little proud of the surface. Give a final spray with the accelerator and wait until glue sets. This also works well in filling in small blemishes in wood unless you are trying to match the color of the wood. I have found sometimes it is better to accent the blemish rather than try to hide. It is almost impossible to match the color exactly so this method works very well. I use it extensively in repairing small blemishes such as knots, season cracks, etc. For larger repairs I use Apoxie Sculpt purchased from http://avesstudio.com. It comes in 8 colors and a true black. It is a true two part epoxy with a setting time of 3 hours. It can be turned, filed and sanded like wood and when put on a buffing wheel it will take on a beautiful shine. The size of the repair with this material is unlimited. After the initial 3 hour curing time it becomes as hard as a rock. When mixing the black be sure and use gloves. It will stain the hands if you don't use the gloves.
Good Morning,
I may have a simply solution for you. For quite sometime, I've been signing my work using an accessory I purchased for my Dremel Model 395 MultiPro. It is a Flex Shaft Model 225 made for the Dremel. It's reasonably comfortable pen-like head allows me to handwrite the signature. It has taken some practice but I now am able to re-create my signature. I use a ball head drill, many sizes available, and just found a size that allowed me to work easily. Hope this helps.
Bob Johnson
Bonsall CA
Good Morning again,
That's a simple solution, not simply solution..sorry. Also, need to explain my name. My wife signed me up and got confused when asked for a name, thus at Fine Woodworking I'm known as "Horselady". I'm in touch with my feminine side but not really that much! Will try to change the name.
Bob Johnson
Bonsall, CA
I met a Pakistani shop owner in Dubai who sold me a 6' long bar and four chairs made from solid cherry wood in Pakistan. His family owned shops in Pakistan and the one he managed in Sharjah, another emirate near Dubai. The artisans used knives to carve traces into the wood, and then pounded copper or brass wire of varying diameters into the patterns. They also inlaid thin brass and copper into larger cutouts to form flower petals, geometric patters, and "specially for you Mister", fishing flies and small trout and salmon pictures. Hand sanding with blocks and sandpaper was all that was required to get the surface level to which they applied a shellac. The bar and chairs as well as drink coasters are now 20-years old, show no signs of aging or splitting, and are happily residing in our daylight basement entertainment area staring out onto Montana's Kootenai River. Your article has inspired me to use this technique to try to sign my next pieces of woodwork.
I've been signing my boats (strip-built canoes & kayaks) with much the same (Dremel on a router base) technique.I find that ebony & padauk sawdust in the epoxy make for a nice-looking contrast to the cedar or ash. To avoid bleeding color into the surrounding wood, I insert the epoxy slurry into the groove with a dental pick, one drop at a time. It's pretty tedious but looks good, even in a porous wood.
I like the copper/brass wire idea too. Will have to try that.
Lee
I use a Foredom flexible shaft rotary tool with a small 1/8 round tip bit, just like writing with a pencil.
Cool. Better than lacquering over indelible ink. CAUTION: you might want to seal the carving with finish before laying in the epoxy--it can bleed into end grain and ruin your work!
BTW, not sure how expensive the dye powder is, but charcoal dust works well--I've used artist's charcoal. I suppose pencil graphite would work well too.
Ed
I like the idea...very elegant. I wonder if you could make a template of your signature and then rout it with the dremel instead of freehand. The first photo looks like the dremel really bounced around...then I saw the second photo of you signing the piece. You'd have made a great doctor! :)
ctsjr82: Indeed, it was a little difficult to control the dremel with the base as well as I had hoped. The solution I think will come with building a wide, flat base - maybe out of Lexan- and then making an even shallower cut so that the bit just sales through the stock. Still, I'm fairly happy with the result.
Cheers,
-Ed
I have made two wood boxes/earns for my parents and had an engraver laser name, date of birth, death, then filled with acrylic epoxy for a nice smooth surface to finish.
Rather then a larger base why not use a very simple pantograph.
Just write your name and enlarge it 3-10 times. You can then make a very simple panograph with some left over wood sticks to shrink the picture to the size you want on the wood. It also will be much smoother curves because you are shrinking any hand movement off following the line 3-10 times and isolating the router bit movement with the lever arms. I have not used this idea for my name, but I did do it for a repeating inlay pattern. It worked very well.
Dremel makes a mini plunge base that looks like it would be a lot easier to control. I think that it goes for around $25 or a little less.
I was a jeweler for many years. When we needed a colored epoxy to secure a bead, cab, pearl, etc., we used plastic model paint to dye the epoxy. Lots of colors available-just mix it in.
I can post here but I can't post anything new, Why?
I have seen this method used for "inlay" work, but never thought about it for my signature. I usually sign and date my work in an inconspicuous place with a wood burning iron. Now that I know how to really set them apart from the rest, it looks like I will have to make those cutting boards for my family. Thanks for the great idea!
I've used my dremel to do this, but freehand with an attachment for detailed work. I was wondering why you chose to use the base. Was it just for the evenness of depth?
Nice effort. Thanks for sharing, it gives me an idea.
Very cool technique. Thanks for sharing.
Download over 16,000 WOODWORKING PLANS at here woodworkingplanspro.weebly.com Woodworking guide offers anyone of any skill level the ability to build amazing projects. The guide is extra helpful because it offers more detailed explanations, videos and blueprints then your typical woodworker magazine .
Hope it will help you next time !
Log in or create an account to post a comment.
Sign up Log in