excerpted from FWW #231
by Matt Kenney
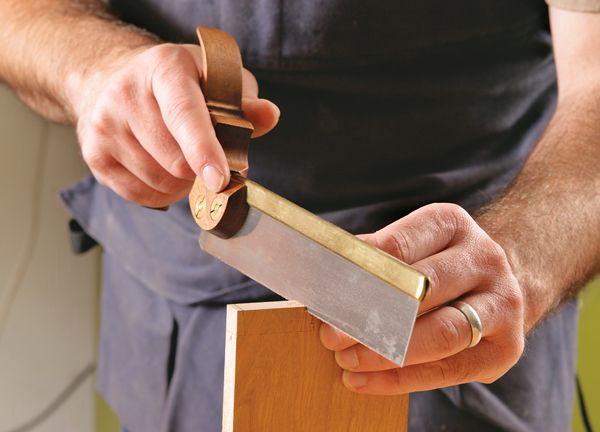
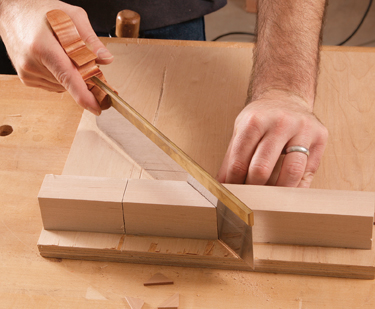
I regularly use four handsaws in my shop, not because I’m a hand-tool nut but because a handsaw is often the smartest, most efficient choice for the job at hand. Take the job of crosscutting or mitering delicate moldings and miter keys. you could do those tasks at the tablesaw or miter saw, but you’d need to devise a jig to hold the workpiece during the cut, and there’s no guarantee that the spinning blade won’t chew up the workpiece. It’s much quicker, safer, and cleaner to make the cut with a backsaw.
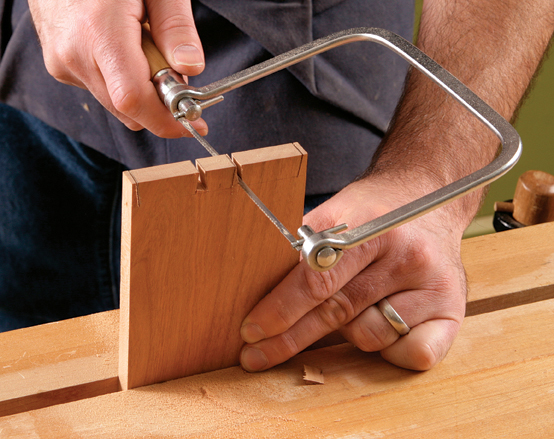
Handsaws are great for getting into tight spaces, too. a coping saw is the perfect tool to cut out the waste between dovetails. The thin blade can fit into even the tightest pin socket and make a turn along the baseline, removing the waste in seconds. Chopping out waste with a chisel takes much longer, and routing it out is possible only when there’s enough clearance between the tails to fit the bit.
And then there are jobs that a power tool simply couldn’t (or shouldn’t) do, like cutting pegs flush. The only power-tool option is a router, and you have to make an auxiliary base to raise the router and then dial in the bit’s cut depth so that it doesn’t ruin the surface. not to mention that pegs are often used on narrow parts, like legs, where the router can tip and ruin the part.
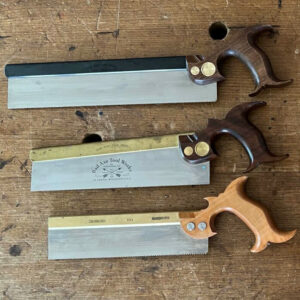
There are lots of handsaws out there, but I think the four you need most are a dovetail saw, a backsaw set up for crosscuts, a dozuki, and a coping saw. I’ll show you some tips on getting the best from each one.
1. Dovetail Saw
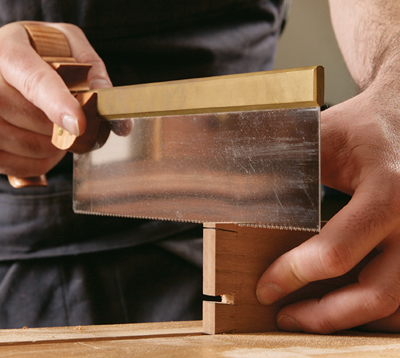
I bought my dovetail saw to make handcut dovetails, but over the years I’ve found that it’s good for other tasks, too, such as notching a shelf or drawer divider to fit in a stopped dado cut in a case side. For a smooth cut, I’d recommend a saw with about 19 teeth per inch (tpi), sharpened for a ripcut. Western-style saws cut on the push stroke and come with two different handle styles-pistol grip or straight. I prefer a pistol-grip handle, which makes it easier to push the saw and control the cut.
2. Crosscut Saw
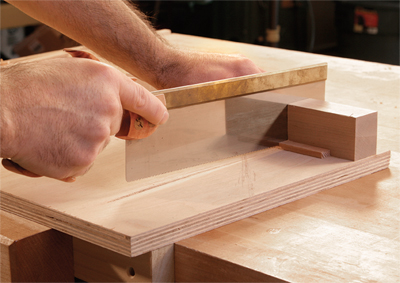
When you’re making furniture, there are always small parts-like moldings, pulls, drawer stops, and pegs-that need to be cut to length. Instead of using a tablesaw, which could destroy those delicate parts in a flash, I use a Western-style carcass backsaw. A crosscut saw with about 12 to 14 tpi and a blade that’s a bit taller and longer than on a dovetail saw can easily make clean, accurate cuts in parts up to 1 in. thick and 3 in. to 4 in. wide. To increase accuracy, I use the saw with a sawhook, which is simply a flat board with a square fence (and a cleat that goes in your vise). The hook is great because it gives you a way to hold the workpiece still during the cut (both you and the saw press it against the fence) and helps to keep the saw cutting straight and square.
 |
A sawhook is great for small parts. The saw cuts on the push stroke, which helps keep the part against the fence while you cut. A large fence with two kerfs in it-one at 90° (above) and the other at 45° (left)-improves the accuracy of your cuts and prevents tearout. Locate the kerfs so that the fence will support a workpiece on either side of each one. |
3. Dozuki
A dozuki saw has a thin, flexible blade, with fine teeth and a straight handle, which makes it well-suited to flush-cutting pegs. The flexible tip helps it get close to the base of a pin, and the straight handle is easier to hold and control with the saw on its side than a pistol grip would be. Get a crosscut dozuki with about 20 tpi. So why not just use a flush-cut saw? Their teeth have no set, so they clog and don’t cut as well. Dozukis don’t have those problems. The thin blade can kink, so get a saw with a replaceable blade.
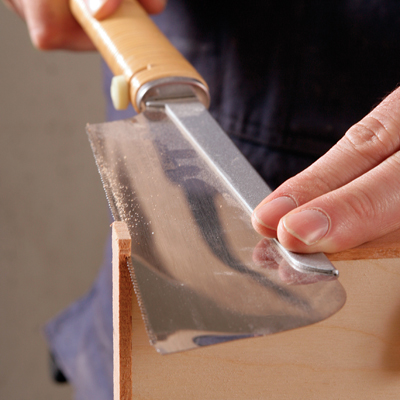 |
Ride the spine. As you saw, press down on the spine to keep the teeth away from the surface. Use a chisel or block plane to flush the edging. |
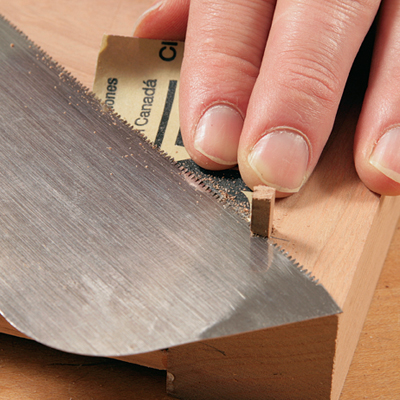 |
Sandpaper prevents scratches. Where the spine trick won’t work, fold a small piece of sandpaper (abrasive side in) and put it under the blade to prevent the teeth from marring the wood. |
4. Coping Saw
With its thin blade and tall frame, the coping saw is adept at cutting curves. It was used in the past to cope molding to get perfect miters. But I use it when cutting dovetails. I was taught to chop out all of the waste with a chisel-a tedious job. When I tried sawing out the waste with a coping saw, it was a watershed moment for me and I’ll never go back. You don’t need a superexpensive frame, but don’t go with a hardware store cheapy, either. I spent about $20 on mine and it’s easy to tighten and adjust the blade. The handle is comfortable, too. As for blades, get ones with a fine cut. They cut slower, which means the saw is less likely to jump the kerf at the end of the cut and damage the tail or pin.
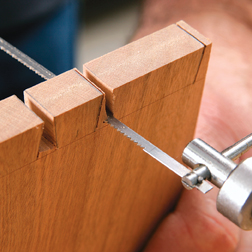 |
The teeth face the handle. This means the saw cuts on the pull stroke, which puts the thin, narrow blade under tension so it won’t buckle. |
One more worth having around
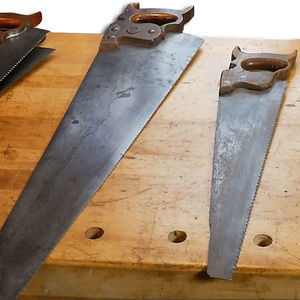
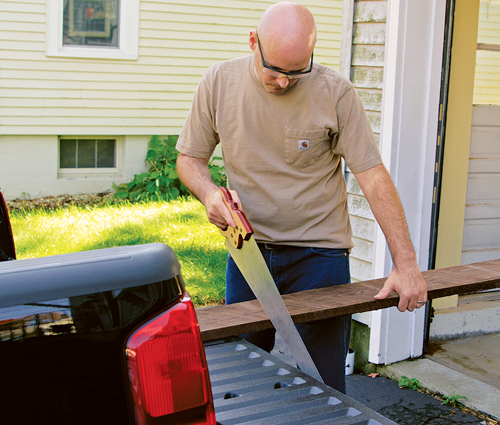 If you’ve ever found yourself at the lumberyard with several boards that are too long for the bed of your truck, you’ll appreciate having a panel saw. Carrying around a circular saw and hoping to find an outlet is more hassle than it’s worth. But leaving a panel saw (8 to 12 tpi) in the truck is no problem. Lay the boards in the bed with the gate down, and cut them to fit. I even use a panel saw in the shop to cut a board to rough length when it’s too big for my chopsaw.
More on FineWoodworking.com:
- Japanese-Style Dovetail Saws
- Tool Test: Coping Saws
- Tool Test: Backsaws that Can Do It All
- Mark Harrell: Sharpen your own backsaw






Comments
Then you only need THREE saws. Your Dozuki will perform a lot easier than your Western Dovetail saw.
You can buy them with either cross-cut or rip teeth.
A good Japanese pull saw isn't cheap, perhaps $60-75, and they have to be replaced when dull. They also tend to be brittle and teeth can break off if you nick them on your vice. Also, after trying to improve my technique for 9 years, I still can't follow a straight line, the saw goes where it wants to. My newest Japanese saw came with instructions that said to grip the handle with two hands, which I had never thought about nor read anywhere. Could you comment on that, Matt? Thanks.
Stranded,
Because the Dozuki has such a finely produced blade (if it is a quality saw) then the smallest of deflection while using one hand allows it to track away from your intended cut. Note: If you hold one hand out in front of you with no saw in it, and your hand folded as if you were holding the saw, then pull your hand back as if you were cutting (without trying to keep it straight), you will notice that your hand will twist usually to the inside, but not always--there lies the problem--since you need only one stroke to throw the tracking off.
The Japanese, as I was told by my Sensei (Teacher), developed this technique through the accurate use of the Samurai sword; where two hands balance each others inaccuracies (in fact this is where he introduces "Mindfulness Practice".) He also said "perhaps the application to both tools may have developed around the same time".
Best of luck with your Mindfulness Practice of the "Two Hand Technique"
Mainewood
You all need to learn gun safety lessons, when asked the question what is the "Best' gun for defense, I always respond with the answer "MY" instructor taught me. The one you have in your hand when you need it, stop being snobs.
Thanks, Mainewood. I have been trying relaxation techniques because I know that I grip my tools too tightly, but I still could not follow a line. I'll get a cheap pine board and practice sawing with a two-hand grip. I assume you would pull the saw straight back to your mid-section as opposed to your side, now that's a radical change.
Stranded; That is correct about pulling back to you mid-section. If you find the correct video it should show the starting-cut-position, through-the-cut positions and the final-cut-position. In many cases the traditional cutting takes place on the floor and sometimes with unique fixturing.
I believe there are demos on the use of the Dozuki on a number of sites, but you would, do best watching some from Japan. Also, I think the sites of Japanese Woodworkers Tools and Lee Valley Tools might have some information or you could search "using dozuki saws" or using Japanese saws". If I can locate a good site I'll post it here--Good luck, Mainewood
Stranded: Here is a link; http://www.leevalley.com/US/shopping/Instructions.aspx?p=41059 to some info for the various Japanese saws where they briefly discuss using two hands and also mention Westerners having a problem with that technique? Just to take the topic a little further: If you are doing small dovetails or small tenons, you might get away with one hand because the depth of cut is usually shallow. And if you are using a Japanese dovetail saw with back stiffener that will help with tracking. Personally I like to start my cut with one hand (1/16-1/8" depth), usually on the corner closest to me then switch to two hands always with a gentle grip to let the saw do the cutting, sometimes with a dusting of pounce on my hands for a better grip, but not tight. I have been using this technique for many years and still find little subtleties (mindfulness) that provide improvement. Practice, Practice, Practice--Enjoy, Mainewood
I read these articles and sometimes learn and sometimes not. That said, the trick of using your finger nails to start a saw cut was fantastic. I had to stop and run out in the garage to try it and can say it works beautifully.
“Carrying around a circular saw and hoping to find an outlet is more hassle than it’s worth.” Well, this article is six years old. Batteries have come a long way.
Log in or create an account to post a comment.
Sign up Log in