Make Your Own Chisel for the Lathe
Introduction
You can expand you arsenal of shopmade tools using rectangular bits. The expansion to rectangular includes two additional requirements. These are grinding a tang and modifying the blade mounting hole to accommodate it. I typically grind the tang length to about 20-25% of the overall blade length and to a safe width commensurate with the leverage I intend to apply when in use and/or to a width that will fit inside the ferrule that I want to use. To support the leverage and to provide a more finished appearance, I make a slotted insert that I epoxy into the mounting hole.
As an example of this process, I describe how to make a small round-nose chisel that is used for turning spindles and shallow hollowing of end grain. The inserted video gives a visual explanation of the steps listed below for this technique.
The Process
Click any of the photos below for a larger view.
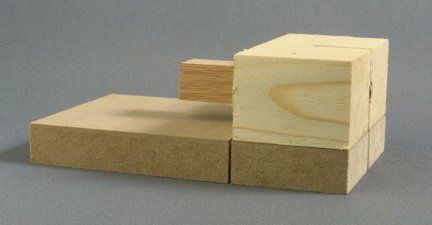
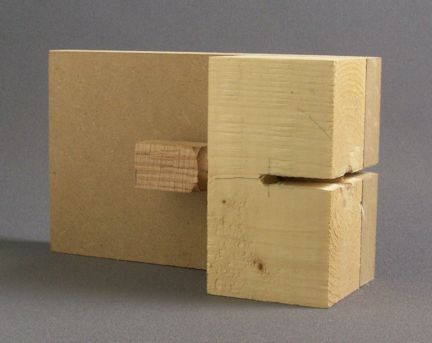
 1. Build a simple jig (Photos 1 & 2) to slot the tang insert using a band saw. This is just a piece of white pine stuck to MDF that is cut wide and long enough to keep your hands away from the band saw blade. The block is cut as long as the final length of the insert. I use carpet tape to secure the block to the MDF.
 2. Turn a dowel to a diameter that matches the cross-section measurement of the final tang using an approximately three inch piece of stock. The final dowel length will be at least one and a half the tang length or greater. In this example, I planned for a one inch tang and a two inch mounting hole which required a final dowel length of two inches.
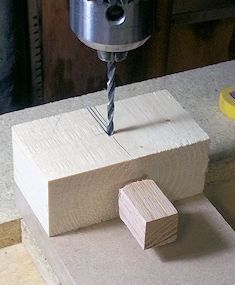
 3. Beginning with the unattached block of pine, drill a centered hole the diameter of the insert along the length. Tape the block to the MDF and mark the tang length from the front of the jig centered on its top. Place the insert in the horizontal hole and then bore another hole 1/32″ smaller than thickness of the blade at this length perpendicular to the previous hole (Photo 3). Draw two lines tangent to hole’s diameter to the front of the jig. These serve as guides when cutting with the band saw ensuring a slightly undersized notch that improves the fit of the tang once everything is assembled. Drill the vertical hole each time you use the jig so that cutting along the guide lines will free the slot waste limiting the number of cuts to only two.
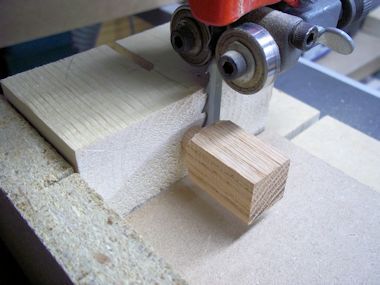
 4. Cut just inside both guide lines, using the band saw, back to the vertical hole. Turn the jig 90 degrees and then cut just through the excess portion of the tang insert flush with the backside of the jig block (Photo 4). This will leave a kerf to follow when cutting other inserts.
 5. Clean up and chamfer the cut end of the tang insert. I reverse chuck the insert, but a vertical belt sander works too. You now have a slot for the tang of the tool blade that is just undersized and ready for assembly.
6. Using the 20-25% rule of thumb for length, grind a tang narrow enough to securely fit inside of the handle ferrule using your bench grinder.
7. Turn the tool handle and mount the ferrule. Drill an insert hole, epoxy the insert into the handle, and finish assembling the tool – a thin coating of epoxy secures the insert, but will also assist in tightening the tang fit as the insert fingers are pushed away from the hole wall by the addition of the epoxy. Finally, round over the bottom blade edges to improve the sliding characteristics along the tool rest and shape/sharpen the blade.
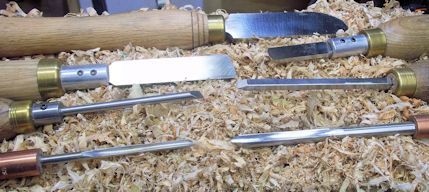
I think you will find this method a very simple way to expand your tool arsenal. There a several sizes of high speed steel tool bits available that can be used. Photo 5 shows several I have made including shear scarpers for bowls, a large asymmetric scraper for boxes, and some gouges. Enjoy!
Find more information on toolmaking at The Pragmatic Woodturner



Log in or create an account to post a comment.
Sign up Log in