Essential Milling Machines
A successful woodworking project begins with stock prepared at the jointer, planer, and tablesaw.
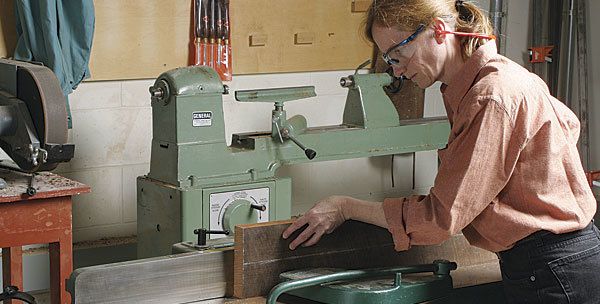
Synopsis: Before you can begin any woodworking project, some preliminary work is in order. That work, called milling, is done with the jointer, planer, and tablesaw. When you’re done, the six surfaces of each board—two faces, two edges, and two ends—should be flat and straight, with all the corners perfectly square. Learn how to use these essential machines to turn rough lumber into beautiful boards worthy of your projects.
Imagine trying to build a skyscraper from bent or twisted beams. It would be an overwhelming challenge, if not downright impossible. Woodworkers face the same dilemma when they try to work with boards that have more curves than straight lines. It’s a common problem because almost all boards we bring home from the lumberyard or home center have at least some measure of warp. And once they acclimate to the humidity level in your shop, they tend to warp even more.
So before you begin any project, some preliminary work is in order. That work, called milling, is done with the jointer, planer, and tablesaw. When you’re done, the six surfaces of each board—two faces, two edges, and two ends—should be flat and straight, with all the corners perfectly square.
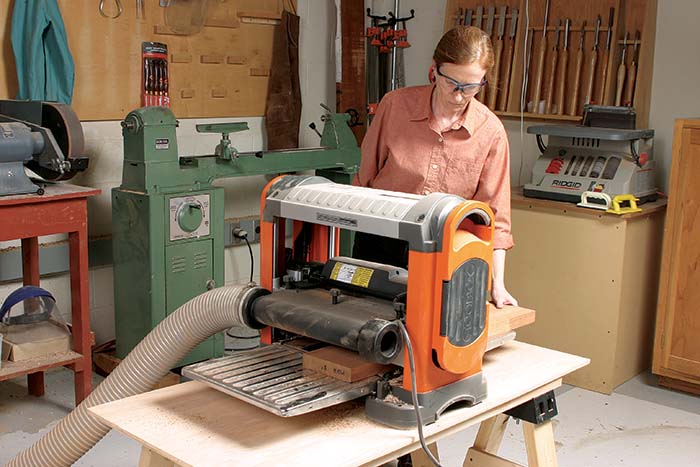
By the way, that is Marcia Ryan in the photos, a former editor.
Select flat, square stock and cut it longer and wider than you need
To make the milling process as easy as possible, begin thinking about flat, straight, and square stock when you’re selecting the wood, no matter if it has been planed already or is still rough-sawn. Avoid badly warped stock. You’ll have to remove far too much material from a board with a big bend or a substantial twist to get it flat, straight, and square.
And even if the boards look good, buy them somewhat thicker, wider, and longer than the final dimensions you need. That way, when you do mill away some extra material to remove whatever warp is there, you’ll have enough stock remaining to provide the right-sized board.
As a general rule, I start by cutting each board to a manageable length and width. I cut the board about an inch longer than its approximate final length. Then I use a bandsaw to rip the boards to their approximate final width. The bandsaw is safer than the tablesaw when cutting warped stock. Depending on the width, I allow an extra 1⁄4 in. to 1⁄2 in. of stock during this initial cut. Keep in mind, though, that the maximum width is limited by the size of your jointer. If you need to end up with a 10-in.-wide board and you have a 6-in. jointer, you’ll want to rip two pieces of stock to about 5-1/2 in. wide and edge glue them after they’ve been milled.
1. Flatten a face on the jointer
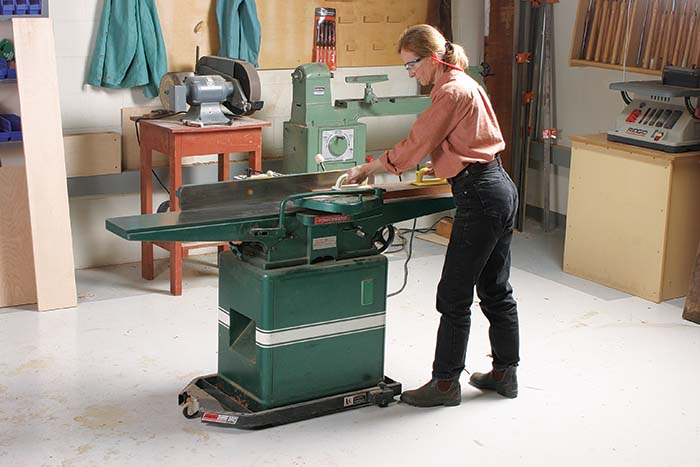
The next step is to flatten one face of each board. The jointer gets that job. For safety, always use push blocks when planing a face surface.
I generally take light cuts, no more than 1⁄32 in. If I have a lot of material to remove, I might increase the next couple of cuts by an additional 1⁄64 in., but rarely do I remove more than a fat 1⁄32 in. with a single pass. A cut that’s too heavy requires you to exert more pushing force on the board and is likely to produce tearout or splintering.
 To plane the face, place the board on the infeed table with one edge against the fence. Using a push block in each hand, feed the board into the knives. Once the knives start cutting, I use the push block in my left hand to apply downward pressure to the lead end of the board, pressing it against the outfeed table while pushing it forward.
As soon as I get 12 in. or so of the board on the outfeed table, the push-block in my right-hand joins the one in my left at the outfeed table. Then, with both hands in line on the board, and positioned toward the front of the outfeed table (but not over the knives), I push the boards forward. At this point, all the downward and forward pressure from the push block is over the outfeed table, just past the knives. To keep the board moving, I pick up my lead hand and place it behind the other one and keep repeating the process until the board has cleared the knives. Use extra care as the board exits the infeed table because, for an instant, the guard doesn’t cover the spinning knives.
Keep making passes until the entire surface is planed. At that point, your stock is perfectly flat on one face.
2. Square one edge to the jointer
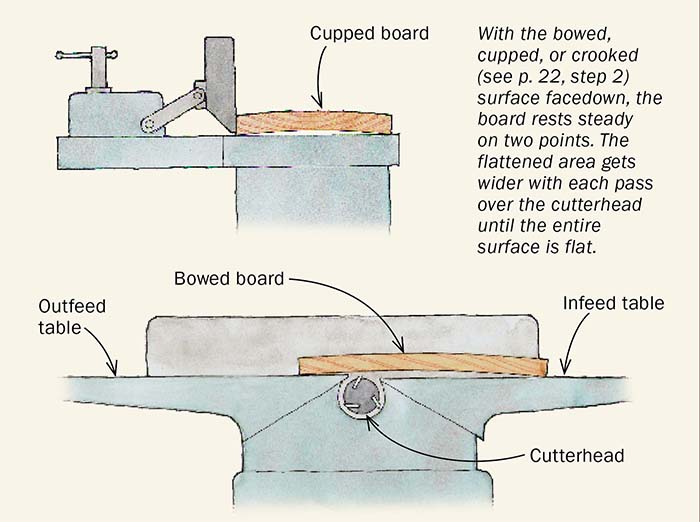
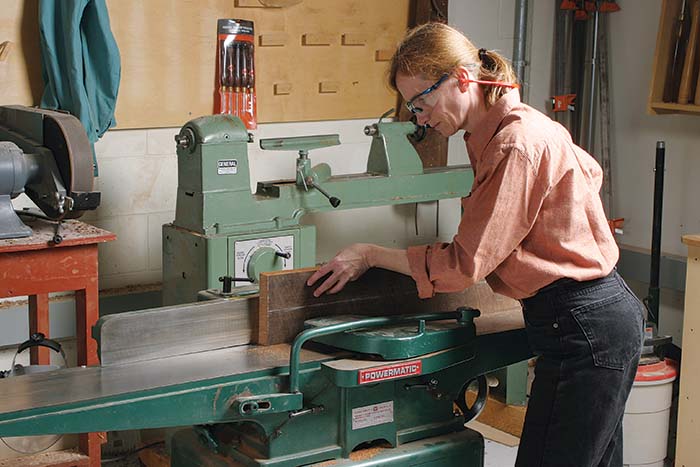 Now, use the jointer to straighten and smooth one edge of the board, making it square to the face you just planed. The planed face goes against the fence. If the edge has a front-to-back bend (called crook), be sure to place the concave edge against the jointer table. This ensures that the board won’t rock because two points are always in contact with the table.
For safety’s sake, I never push with my fingers over the blade area. Continue making passes until the board is planed along its entire length.
3. Plane the second face parallel to the first
Now it’s time to work on the remaining face. It should be flat and straight, parallel to the opposite face. Your first instinct might be to use the jointer again. After all, it excels at making boards flat and straight. But unless you are very lucky, the jointer won’t make the second face parallel to the first. Only a thickness planer can do that.
 Once again, check the grain direction. I make light cuts, typically no more than 1⁄32 in. Feed the board with the unplaned surface face up. Make passes until the entire surface is planed and reduced to the desired thickness.
4. Rip to width on the tablesaw
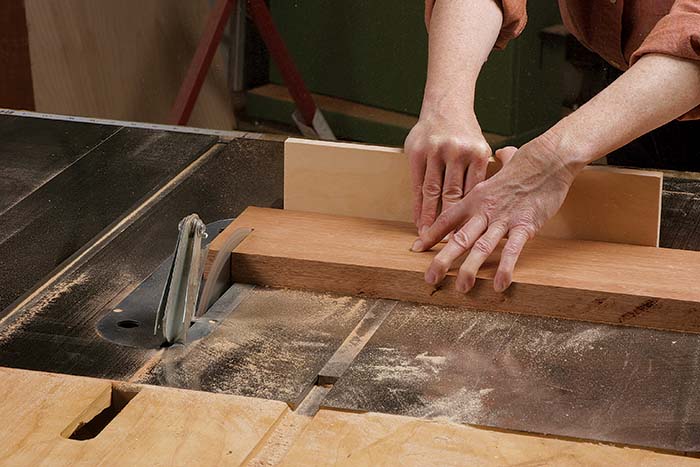
The board now has both faces flat, straight, and parallel, and one edge that’s flat, smooth, and square to the faces. The tablesaw handles the last assignment, cutting the second edge parallel to the first and square to the face surfaces.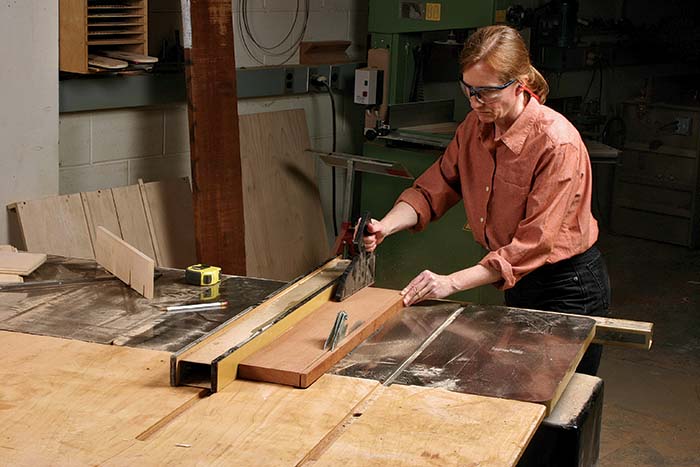
Make the rip cut first. If you want a smoother edge, cut the board a little wide and then edge-joint it to the final width.
5. Cut to length
With two faces and two edges of the board now flat, straight, and square to each other, you can cut the board to length. First, trim one end to make sure it’s square. Then, measuring from the trimmed and squared end, mark the final length. Now, crosscut the second end at the marked line. The board is ready to be used on your project.
How the jointer flattens lumber
The infeed and outfeed table surfaces are flat and parallel to each other. All the cutterhead knives are flush with the top of the outfeed table. The infeed table is set slightly below the outfeed table. As the board travels from the infeed table to the higher outfeed table, the knives shave an amount equal to the difference in table height.
For the full article, download the PDF below:
Fine Woodworking Recommended Products
Freud Super Dado Saw Blade Set 8" x 5/8" Bore
Ridgid R4331 Planer

Shop Fox W1826



Log in or create an account to post a comment.
Sign up Log in