Turn a Carver’s Mallet
Shopmade tool is the perfect fit for hand-carved details
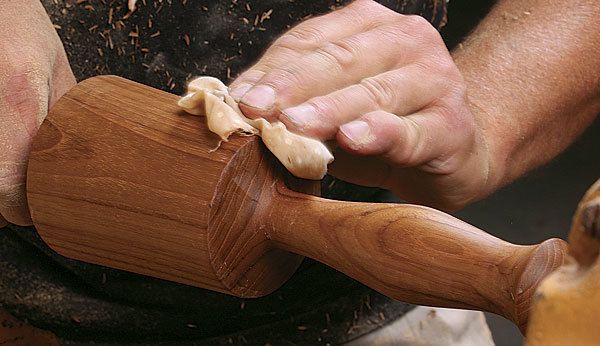
Synopsis: Every workshop needs at least two mallets, Michael Cullen says. Flat-sided mallets are extremely useful, but when it comes to carving and other tasks where a light touch and much movement of the chisel is required, a turned mallet is the best choice. Its tapered, cylindrical head and compact size permit you to approach the chisel handle from any angle while still ensuring perfect contact. And yet it’s not a light-duty tool. The solid, one-piece construction packs enough power to drive a large chisel or gouge. Here’s how to make one.
Every woodshop needs at least two mallets. A traditional square-faced mallet like the one I described making in FWW #230 (handwork: “Make a mallet”) is great for dovetailing and mortising, where heavy striking is required and the chisel moves only slightly between blows. But when it comes to carving and other tasks where a light touch and much movement of the chisel is required, a turned mallet is the one to use. Its tapered, cylindrical head and compact size permit you to approach the chisel handle from any angle while still ensuring perfect contact. And yet it’s not a light-duty tool. The solid, one-piece construction packs enough power to drive a large chisel or gouge. And turning your own mallet means you can contour the grip to fit your hand exactly.
Pick the wood and make a blank
Look for a chunk of dense wood that is relatively easy to turn, such as hard maple, black locust, oak, or eucalyptus—species that will stand up to the rigors of banging against tool handles year after year. I used teak for this mallet. I save cutoffs from other projects for this type of turning, but logs or firewood can also yield great mallet wood. Be sure to choose a piece of wood that is straight-grained, since slanting grain could create weakness in the handle.
When you’ve found just the right piece of stock, saw out a blank that is at least 3⁄4 in. longer than the finished mallet will be and at least 1⁄4 in. wider than the finished diameter of the head. Chuck the blank between centers in the lathe and start turning. Even if you’re not much of a wood turner, this mallet is straightforward to make.
The head comes first
Turn the square stock to a cylinder using a 11⁄2-in. or 2-in. roughing gouge. Then, for a finer cut, switch to a 1-in. spindle gouge and turn the entire cylinder down to its largest diameter, 31⁄4 in. At that point, turn off the lathe and make pencil marks at the four key spots that will guide your transitions: the two ends of the mallet, the base of the head.
For the full article, download the PDF below:
Fine Woodworking Recommended Products

Veritas Micro-Adjust Wheel Marking Gauge

Veritas Wheel Marking Gauge

Tite-Mark Marking Gauge


Comments
Thank you for this fine article! It's exactly what I needed for my next step in better dovetails. I made a square-ish mallet a few years back and it works great for chisel work, but I found myself Jonesin' for a round one like this - especially now that I bought a lathe a couple months ago! :) That's why I had the square one to start :)
Log in or create an account to post a comment.
Sign up Log in