Synopsis: Knife hinges are great for curved cabinets because they are elegant and unobtrusive, so they won’t draw attention away from the piece. But they can be a challenge to install. The mortises must be located precisely, and much of the layout and mortising has to be done before the cabinet is glued up. Learn how to mortise for knife hinges and mount them precisely for doors that hang true and close flush.
I chose knife hinges for my bowfront cabinet for several reasons. The hinges are unobtrusive and elegant. They don’t interrupt the curve, or pull attention away from the piece itself.
But installing knife hinges can be a challenge. The mortises must be precisely located to ensure that the doors close flush to the cabinet front. And much of this layout and mortising must take place before the cabinet is glued up.
Adding a curve to the front complicates things, but only a little. I’ll walk you through it.
Start with the cabinet mortises. The L-shaped hinges I used on this cabinet are intended for full inset doors. Their offset pivot point allows the door to swing free of the case and avoid binding. There are three keys to layout: Establish the correct distance between the hinge and the case side, center the hinge pin on the front edge of the case, and make sure that each mortise is set back the same distance from the front of the case.
The case mortises must be cut before the cabinet is glued up because there is no room to rout them when the case is together. Dry-assemble the case and place it, top down, on your bench.
Set the gap between the hinge and cabinet side first. To do this, use a shim the same thickness as the washer that separates the two hinge leaves (the washer can be too small to handle easily). In this way, the gaps on the sides will match the gap created by the hinge itself at the top and bottom.
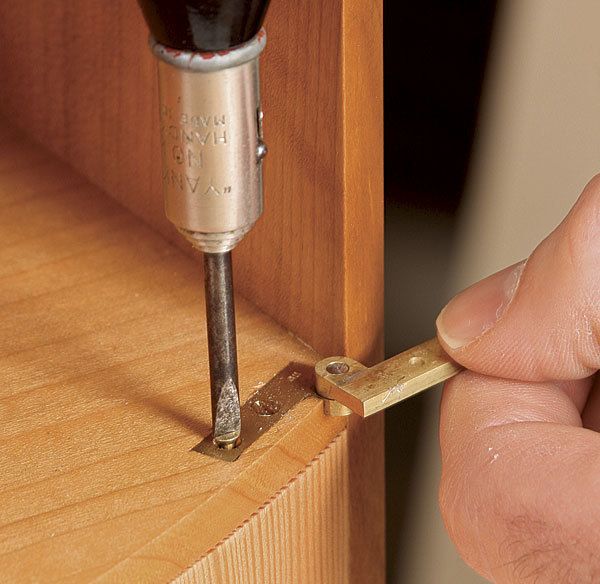
Put the shim against the cabinet side and push the hinge leaf—backed with double-sided tape—against it. The leaf should be angled so that it roughly parallels the front of the case. now adjust the position of the leaf backward or forward so that the hinge pin is centered over the front edge of the case, and press the leaf into place. The hinge pin should sit half on and half off the cabinet so the door won’t bind. With the leaf secure, use a marking knife to scribe its outline on the cabinet top, and then remove the hinge.
For the doors to hang true and close flush, it’s important to achieve a matching layout for the remaining mortises. To help do this, set a combination square off the back line you just scribed to capture the crucial distance between this line and the front of the case. you can then use the setting for laying out the other mortises at the same depth from the cabinet front, once again using the tape-and-scribe method. Once you’ve laid out the other mortises in the case, disassemble the cabinet and set up a trim router to remove the waste.
For the full article, download the PDF below.


Log in or create an account to post a comment.
Sign up Log in