Add a Gallery to Any Desk
Universal tips for increasing storage and adding charm to any desk design.
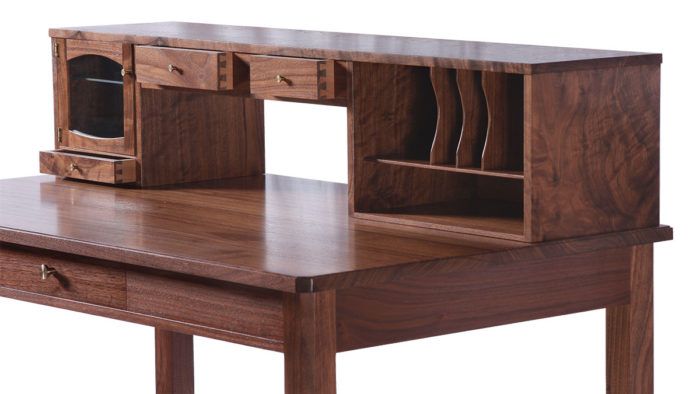
Synopsis: There are many creative ways to build storage into a desktop. A gallery, which sits on the top and combines drawers, shelves, doors, and compartments, can turn a flat surface into a personal space great for reading, writing, or other work. This article explains the basics of construction, plus gives tips on how to customize your gallery to fit any desk. Barty’s version goes together using several different joinery techniques—dowels join the top and uprights, while stopped rabbets, dadoes, and splines secure the bottom shelves and other dividers. The gallery is secured to the desktop with screws driven from the underside of the top.
It all started with a guy.
He liked to fly-fish and to tie his own flies, but he left feathers and thread and hooks strewn everywhere. I inadvertently got hooked too many times. My solution was to build a space for him to work and to store all those loose parts: a fly-tying bench with lots of small compartments within arm’s reach.
 As so often happens, though, the guy realized there were other fish in the sea. With him out of the picture, and having just started milling the European beech for his bench, I reworked my vision into a desk for myself, with a gallery for my stuff.
We all recognize a gallery—that piece of light casework that sits atop a desk, housing a combination of drawers, shelves, doors, and possibly a secret compartment or two. A gallery provides room for stationery, pens, small electronics, and plenty of other stuff. It can also do something much more profound—turn an ordinary flat desk into a partially enclosed, personal space that is great for reading, writing, and quiet reflection. I’ll show you the basics for building any gallery. The one I built for this article is designed to fit a specific desk, but the construction can be adapted to any desk or table.
Design considerations
A gallery should look intentional and integrated with the desk, not just stacked on top of it. For this reason, I designed mine with the outer sides landing on top of and in line with the end aprons of the desk. The gallery’s height is critical. The taller it is, the more stuff it can hold, but if you make it too high it can start to feel like it’s looming, rather than embracing the user. Likewise, the depth needs to accommodate envelopes, paper, and other items without taking up too much space.
The thickness of the gallery parts should be proportionate to those of the desk. In my case, I discovered that the partitions and dividers can be especially thin and yet remain strong. This lends a visual lightness to the piece and provides more storage space. I also built in a well of open space beneath the bridge of drawers. This lets me push a laptop underneath when I’m not using it or use the open area as an additional work area.
Tips for happy doweling
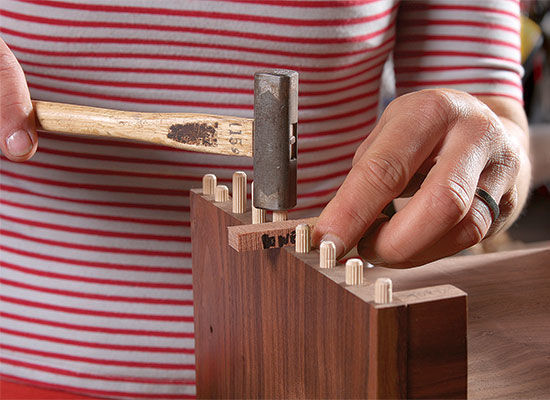
The gallery goes together using several different joinery techniques—dowels join the top and uprights, while stopped rabbets, dadoes, and splines secure the bottom shelves and other dividers. The gallery is secured to the desktop with screws driven from the underside of the top. dowels offer the best approach for sturdy joinery in the thin stock of the top, sides, and uprights. They provide plenty of glue surface and are easy to lay out and drill using a shopmade jig.
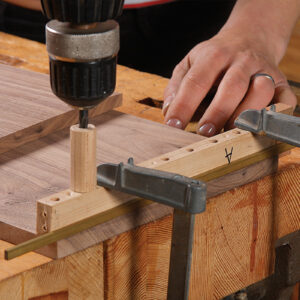
Holding wide pieces together with dowels involves drilling lines of multiple dowel holes in the mating pieces. Each must align perfectly with its mate so that the parts come together the way they are supposed to. The jig goes a long way toward making this happen, but it isn’t perfect—a guide hole that is even slightly off-center will yield an imperfect row of dowel holes. So, when you drill the mating holes, you have to make sure the imperfections line up, too. The solution is easy—just flip the jig over when drilling the mating line of holes. This ensures that each stray hole is off center in the same direction as its mate.
To help with this, I label one side of the jig “a” and make sure that the “a” side is always facing me, right side up when doweling the sides and upside down when doweling the top.
It’s also important to make sure the line of holes starts and stops in the same place on each piece so that when the pieces are joined, everything lines up. This calls for consistency in choosing a reference face or edge for the jig. I used the back edge, but it could just as easily have been the front. The important thing is to use the same reference face each time.
Join the sides and top
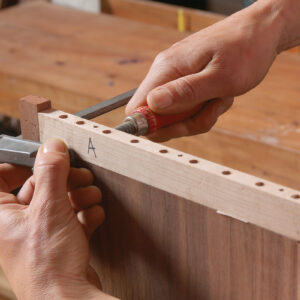
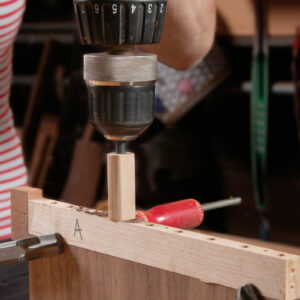
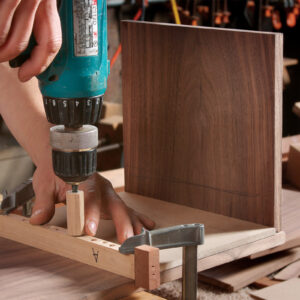
I bore dowel holes with a handheld drill, relying on the jig, a depth stop, and a careful eye to keep the holes perpendicular to the surface. Start with the sides and uprights. with the workpiece held in a vise, hook the jig on the back edge, making sure that it is oriented in the correct direction, and secure it with strips of double-sided tape and clamps.
The depth of the dowel holes into the sides and uprights should be about 1 in. an unintentional shallow hole will hold up the entire top during glue-up. So, to ensure consistency, make a stop block that fits over your drill bit to control the depth of each hole.
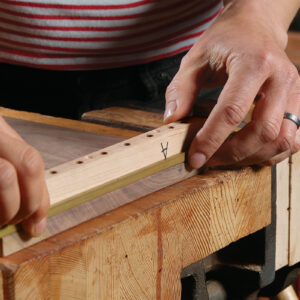
Now lay out the holes in the top. If there’s no overhang, align the jig flush with the top’s edge. If there is an overhang, first determine the top’s overhang relative to the sides. I bumped my sides in about 1⁄8 in. To locate the dowel holes, I taped a brass spacer to the “a” side of the doweling jig and aligned it flush with the edge of the top. These dowel holes have to be shallower since the top is only 1⁄2 in. thick, so ad-just the bit in the chuck so that only 3⁄8 in. protrudes beneath the depth stop.
Dry-fit the sides to the top with a couple of dowels in place. Then use MDF spacers that butt against the sides to help align the dowel holes for the uprights.
I like to use shadowlines to create visual interest along the front of the gallery, so after I finished doweling, I ripped the sides 1⁄16 in. narrower than the top to create a step.
No room for dowels? Use rabbets
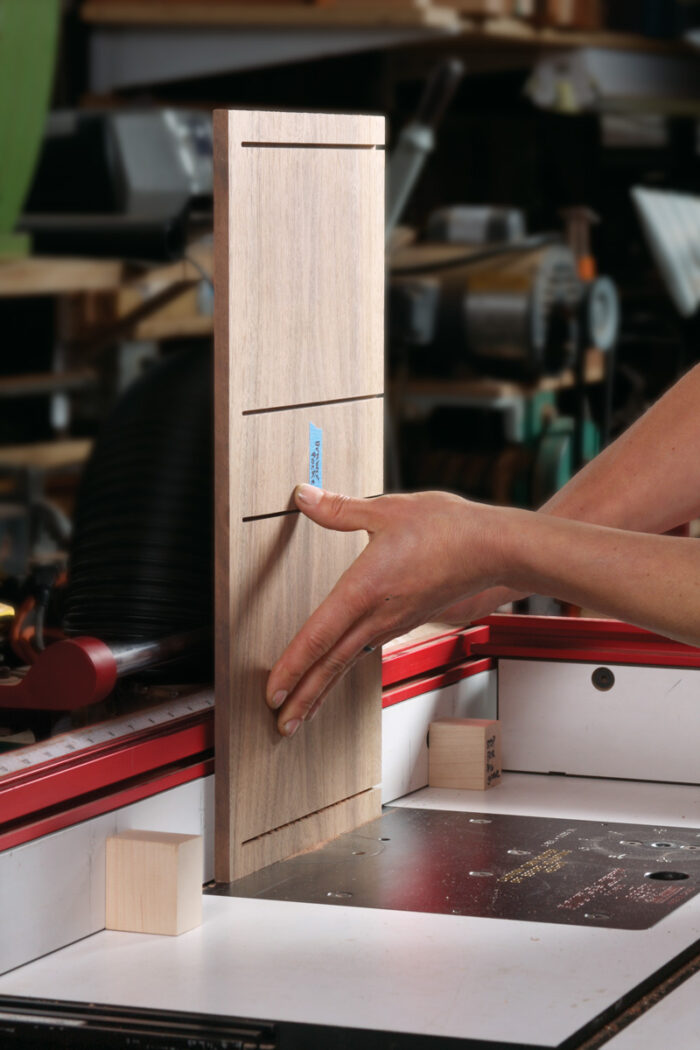
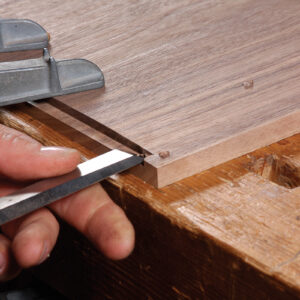
The bottoms of the gallery are just 1⁄4 in. thick, which is too thin for dowels, so I let them into the sides and uprights in rabbets stopped 1⁄4 in. from the front edge.The bottoms are notched so that everything is flush in the front, left wide, and later planed flush in the back. The rabbet is cut on the router table, using a rabbeting bit and a pair of stop blocks. I used a piece of scrap to set the bit height and depth of cut, then marked the fence for the location of the stop blocks. I laid the sides flat on the router table to make the cuts. For the two sides where the stopped cut is at the beginning of the cut, be sure to back up your part so that you don’t blow out the back edge as the bit exits the wood.afterward, square up the ends of the stopped cuts with a chisel. To establish the length of the bot-toms, dry-fit the top and uprights, bracing between the uprights with the MDF spacers you used during layout. Measure between the rabbets for the length of each bottom and cut them on the tablesaw. Then place the bottoms in the rabbets to lay out the front notches. I cut the notches with a handsaw and cleaned them up with a chisel. The bottoms will be glued and screwed into the sides.
Stopped dadoes for shelves and partitions
The compartment on each side has a fixed shelf that’s notched to fit into stopped dadoes. In the left compartment, the shelf is notched so that it’s flush with the side and upright. The shelf on the right stops 3⁄4 in. shy of the front of the case (it is not notched).
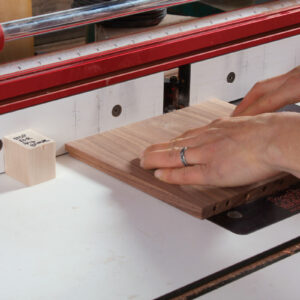
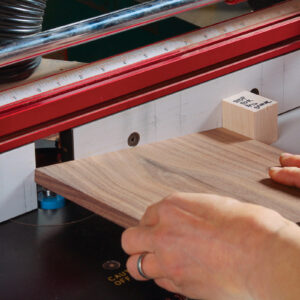
I used a 3⁄16-in. down-spiral bit in the router table to cut the dadoes in the sides and uprights. cutting stopped dadoes in opposing pieces requires you to start the cut in the middle of one workpiece and stop the cut in the middle of the other. To simplify these steps, I attached a stop block to the fence with double-sided tape to limit the travel in the proper direction for each cut.
I dropped into the cut by firmly holding the work-piece against the fence, tilted at an angle, and lowering it onto the bit. keep in mind where that spinning bit will exit the work and keep your hands away from it.
After cutting the dadoes, plane the shelf stock to fit into them. dry-fit the assembly, measure between the bottoms of the dadoes, and cut the shelves to length. Notch the left shelf and round over the leading edge of the right shelf using a handplane and a file to match the rounded groove. Rip the shelves to final width.
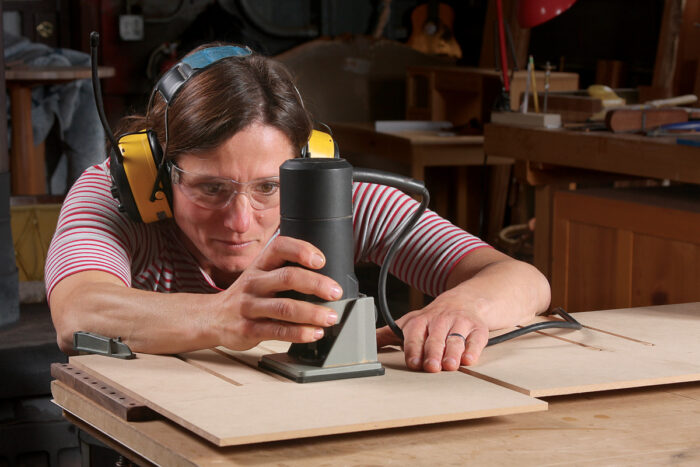
The envelope compartments call for routing a series of stopped dadoes in the underside of the top and a perfectly matching set on the top of the shelf. To locate the dadoes accurately, I used the MDF template shown in the photos on p. 64. of course you can modify the dimensions to suit your own storage needs or sense of symmetry. I cut them with a handheld trim router equipped with a 1⁄8-in. down-spiral bit and a 3⁄16-in. template guide.
 |
 |
A place for your drawers
The bottom of the middle drawer compartment is splined to the uprights. The stopped dadoes for the splines are cut on the router table, using a 1⁄8-in. straight bit. Make the splines of the same wood and orient the grain in the same direction as the piece you are joining, so it will shrink and swell in the same direction. The fit of each spline needs to be snug, but not too tight or it will bulge the opening. creep up on the thickness, and if you make one spline too loose, just make another.
There are actually three drawers; the middle one is hidden in plain sight. on either side of the drawers, end blocks are doweled into the uprights at glue-up. Taken together with the secret drawer front, they create the look of a front apron. The front of the secret middle drawer is tenoned rather than dovetailed, and extends past the sides by 3⁄8 in. one can get hold of the secret drawer front only by pulling out an adjacent drawer.
The drawer pockets are created by two sets of drawer guides—a pair of full-height dividers in the center, along with one shorter divider on the outside of both the left- and right-hand drawers. all four are held in place with splines, set into grooves cut with a routing template like the one I used for the envelope partitions.
The central drawer dividers create the pocket for the secret drawer. They are hidden behind the drawer front and must be set back to accommodate its thickness. These two guides are full height, and are splined into both the gallery and the bottom of the drawer compartment. The outer guides run along the left side of the left drawer and the right side of the right drawer. These guides sit behind the doweled end blocks, each in line with the block’s inner edge. To reduce friction in the drawers’ movement, I made these guides only 3⁄4 in. high.
Before glue-up, rabbet the back edges of the case parts at the router table to accept the back panels. This is also time to mortise for the door hinges with a trim router and drill holes for the glass-shelf supports inside the cabinet. Last, pre-finish the interior surfaces. It’s just too difficult to get into those small spaces later.
Glue-up starts in the middle
I started the glue-up in the center and worked my way out. First I glued the drawer guides into the bottom of the middle drawer compartment. I then splined this assembly to the inside of the two uprights. The drawer front end blocks were doweled at the same time.
When the assembly dries, glue the left-hand shelf into the dadoes of the upright and side, then glue and screw the bottom in place using 1⁄2-in. #2 brass screws. Then do the same for the right side.

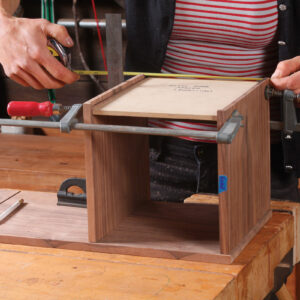
To glue up the top, set the whole gallery on a board on some sawhorses so that you can get clamp pressure where you need it. check for square in each section and then recheck. a slight adjustment of the clamp head can affect the outcome quite a bit. also, it’s a good idea to check for wind so that you don’t glue a twist into the case. If you do not have deep-throated clamps to get pressure in the middle of the gallery, make cauls with slightly tapered ends. The 1⁄8-in. vertical envelope partitions are glued in at this time as well. Slide them in from the back once the top is in place.
Once the glue has dried, the back panels can be fitted. I chose something splashy for my back panels. This way the interior behind the glass door is a little brighter and it looks fun if the piece is seen from behind. I used sycamore for the back panels as well as for the drawer bottoms to tie it all together.
Attach the top
Attaching the gallery to the desk is simply a matter of driving eight screws up through the bottom of the desktop and into the sides and uprights. I used #6 11⁄4-in. brass screws along with a #38 bit for the pilot hole and #17 drill bit for shank clearance. Make sure that you take the time to drill the proper hole and use a dab of wax on the end of the screw. This helps to reduce friction and prevents the screw from snapping.
From Fine Woodworking #239
For the full article, download the PDF below.
Fine Woodworking Recommended Products
Dubuque Clamp Works Bar Clamps - 4 pack

Jorgensen 6 inch Bar Clamp Set, 4 Pack

Stanley Powerlock 16-ft. tape measure




Comments
Looks like ads all over the place have been instituted by Taunton Press. Not a fan.
Log in or create an account to post a comment.
Sign up Log in