How to Cut and Fit Perfect Dovetail Pins
In the second part of this two-part article, Chris Becksvoort explains how to transfer the tail layout to the pins, cut the pins, and assemble the joint.
Synopsis: You learned to lay out, saw, and chop the tails in FWW #238. With that half of a through-dovetail joint complete, it’s on to the pins. Here you will learn how to transfer the tail layout to the pins, how to cut the pins, and how to assemble the joint. Widely acknowledged as a dovetail “master,” Christian Becksvoort has a lot of great knowledge to share—from ways to assure accurate scribing to methods for keeping the tail board flat and steady while you work. He also has tips for perfect paring and a stress-free glue-up. And if something goes wrong, he’ll show you how to fix gaps.
Read “Don’t Fear the Hand-Cut Dovetail (Part 1).”
In the first half of this two-part article, I described every step of the process I use to lay out, saw, and chop the tails in a through-dovetail joint. I always cut the tails first and use them as the template for the pins. In this part, I’ll show you my method for transferring the tails to the pins, as well as how I cut the pins and assemble the joint. Even if you use a different method to cut the tails—as long as you cut them first—you can apply all these techniques to your process.
Transfer the tails with precision
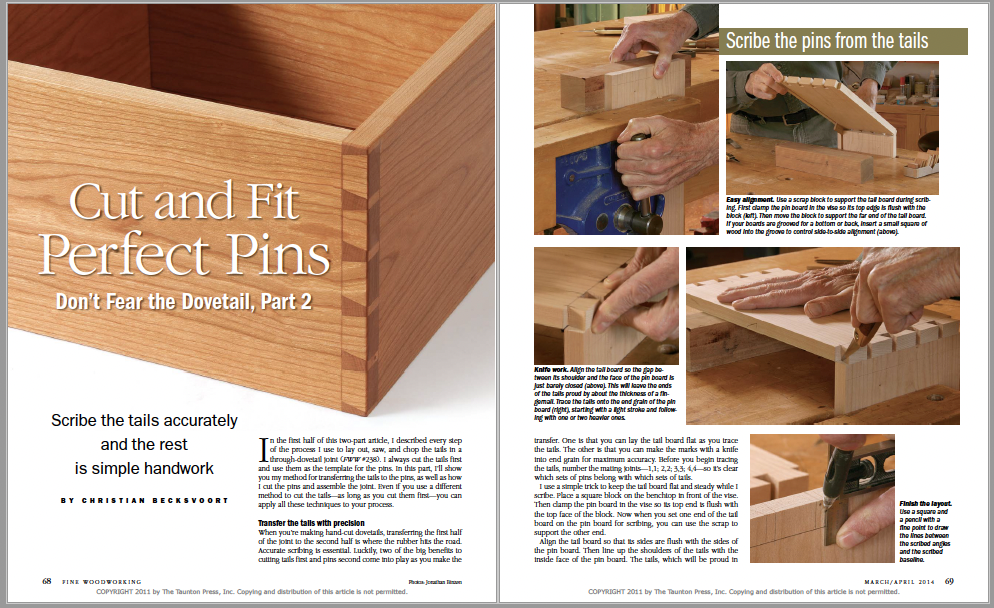
When you’re making hand-cut dovetails, transferring the first half of the joint to the second half is where the rubber hits the road. Accurate scribing is essential. Luckily, two of the big benefits to cutting tails first and pins second come into play as you make the transfer. One is that you can lay the tail board flat as you trace the tails. The other is that you can make the marks with a knife into end grain for maximum accuracy. Before you begin tracing the tails, number the mating joints—1,1; 2,2; 3,3; 4,4—so it’s clear which sets of pins belong with which sets of tails.
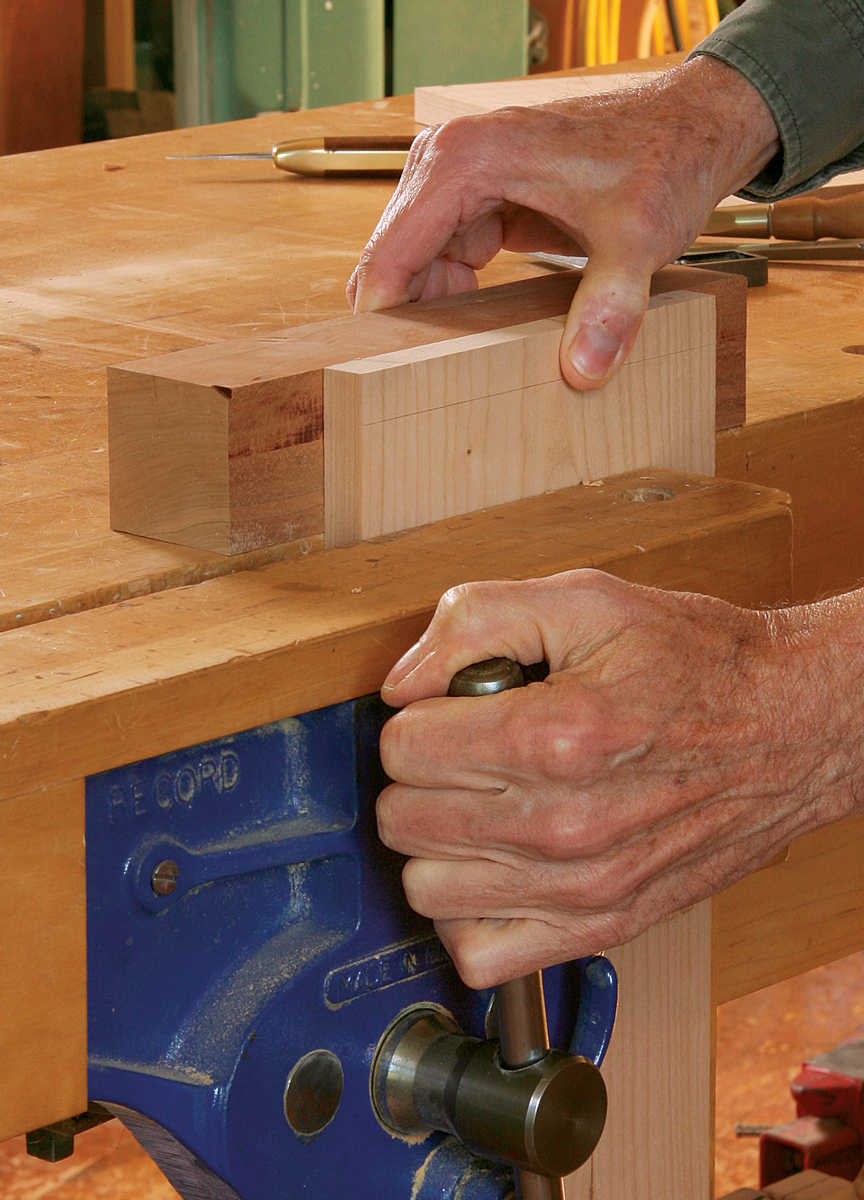
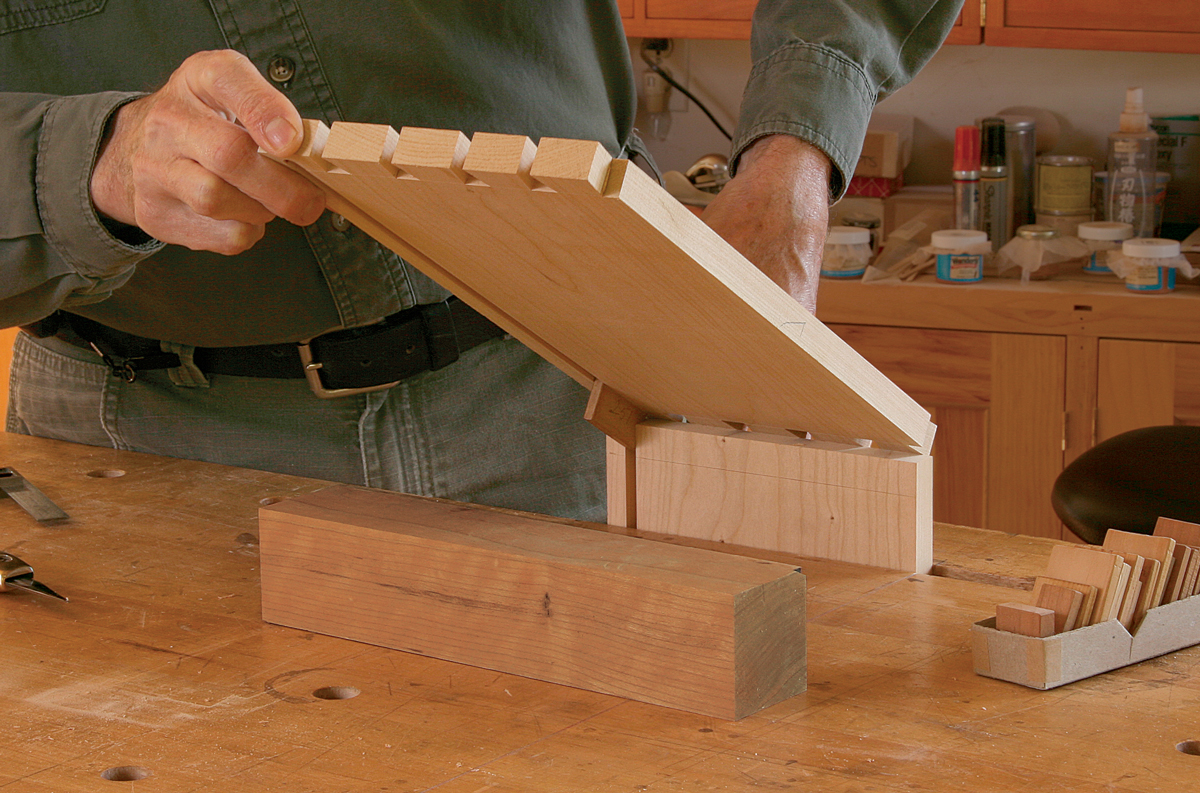
I use a simple trick to keep the tail board flat and steady while I scribe. Place a square block on the benchtop in front of the vise. Then clamp the pin board in the vise so its top end is flush with the top face of the block. Now when you set one end of the tail board on the pin board for scribing, you can use the scrap to support the other end.
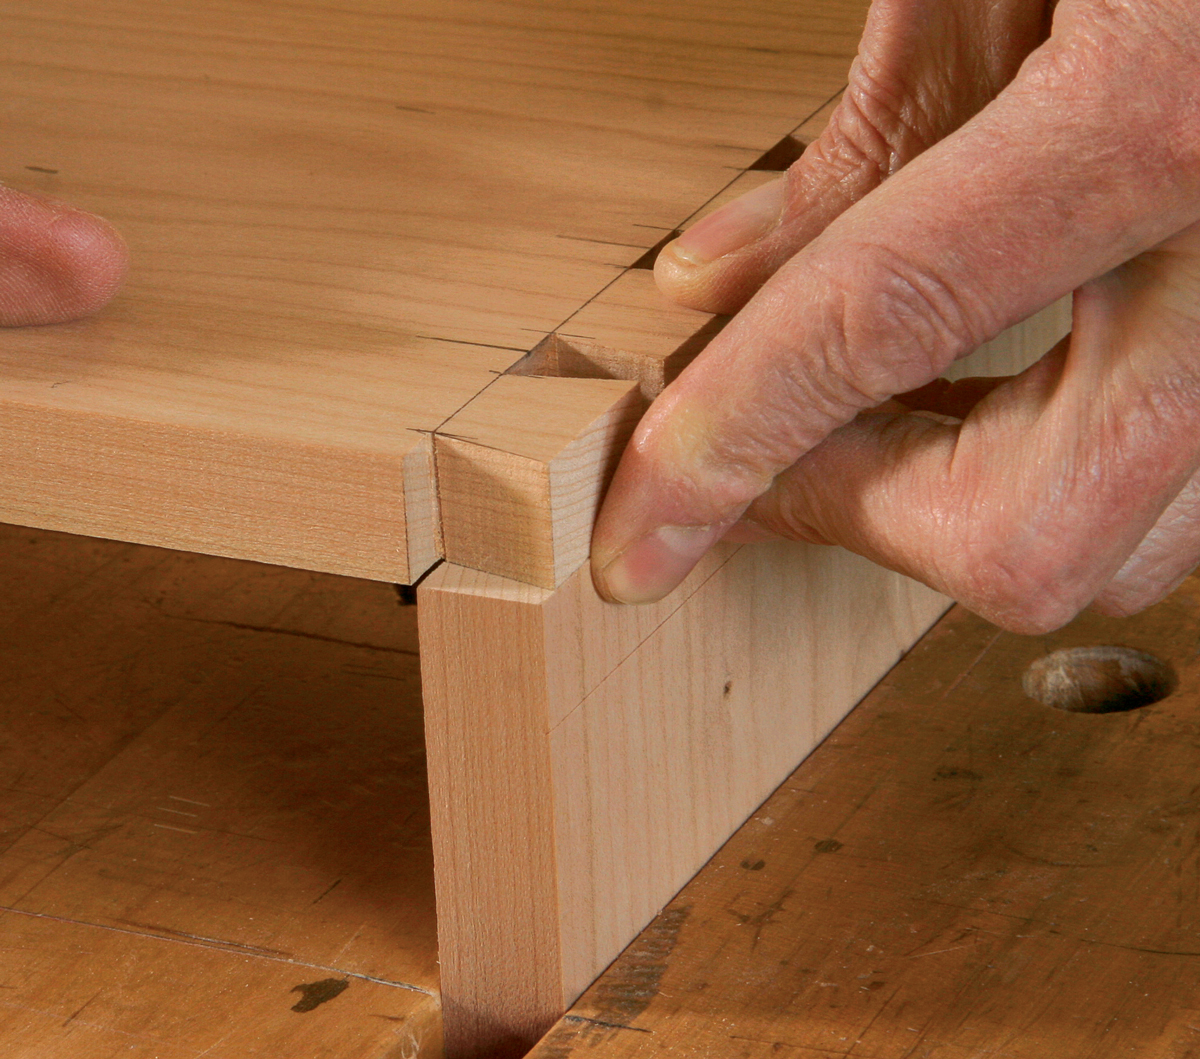
Align the tail board so that its sides are flush with the sides of the pin board. Then line up the shoulders of the tails with the inside face of the pin board. The tails, which will be proud in the finished joint, will protrude slightly past the outside face of the pin board.
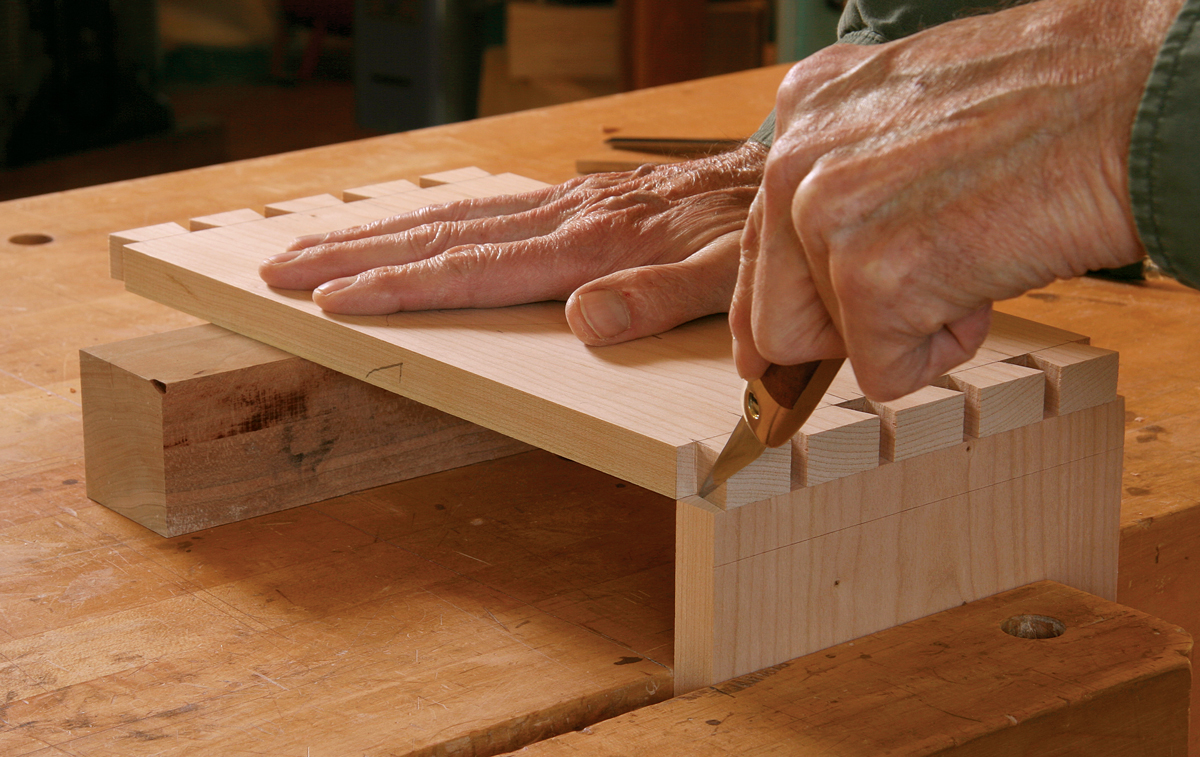
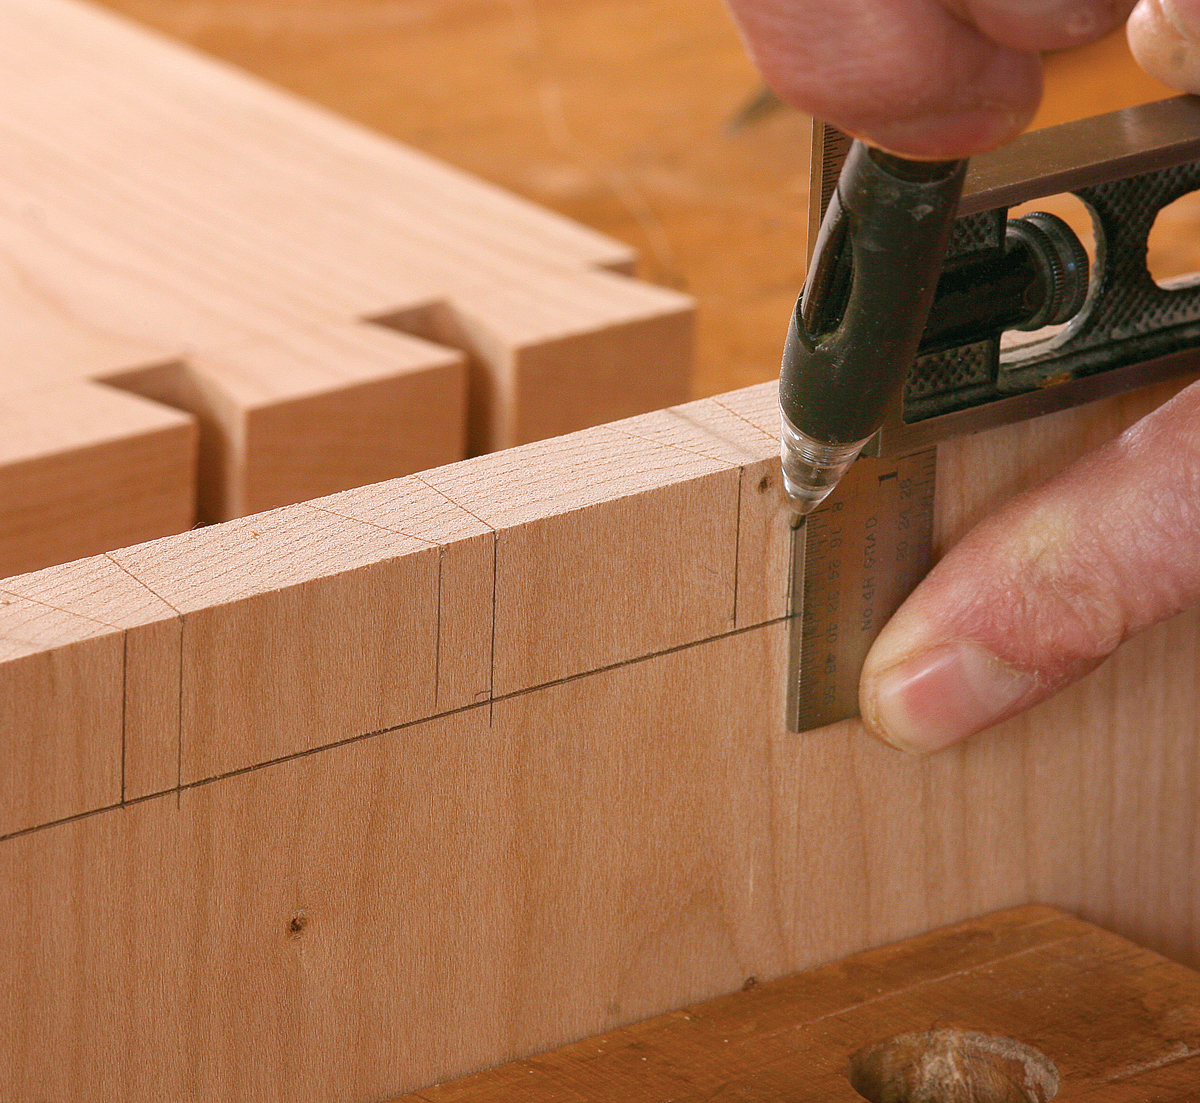
Holding the tail board down firmly with one hand, mark along both cheeks of all the tails. Use a sharp knife with a long bevel, and hold the bevel flat against the wood. For maximum accuracy, make a light cut first, followed by a heavier cut. Then use a square and a fine-point pencil to carry these knifed lines down the faces of the pin board to the baseline.
Remove the waste between pins
When you cut the pins, your sawkerfs should, ideally, be right on the layout lines. You could saw close to the lines and pare to them later, but this is a slow and inefficient process. Better to put the extra time into practicing cutting to a line beforehand.
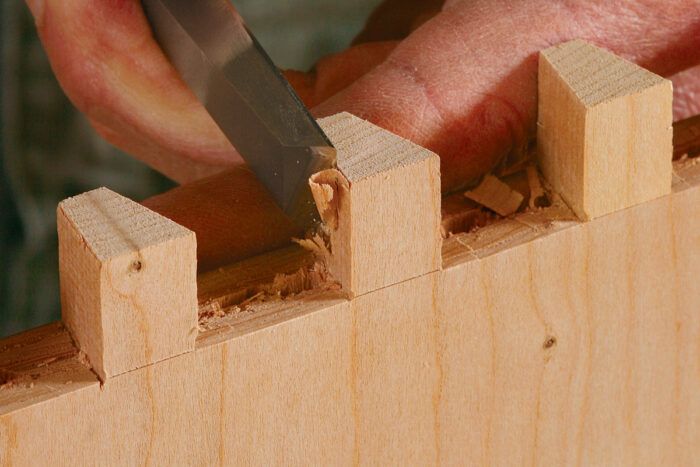
Once all the pins are sawn, you can move on to chopping out the waste. Clamp the pin boards flat on the bench, stacked like steps, and begin by establishing the shoulder. Use a wide chisel held vertically and with its point right in the scribed baseline. Make one light mallet blow at each setting of the chisel—you’ll likely have to set the chisel twice to span the baseline from pin to pin—and chop between all the pins. This light chop establishes the shoulder without driving the chisel beneath the baseline.
 From Fine Woodworking #239
For the full article, download the PDF below.
Fine Woodworking Recommended Products

Starrett 4" Double Square
Pfiel Chip Carving Knife

Marking knife: Hock Double-Bevel Violin Knife, 3/4 in.




Log in or create an account to post a comment.
Sign up Log in