How to turn pulls without a lathe
Create custom knobs using your drill press.
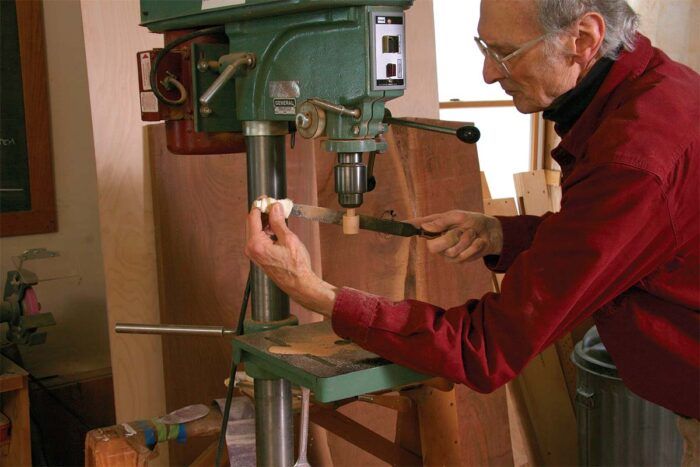
Synopsis: You can make authentic-looking Shaker knobs without a lathe. All it takes is a drill press, a tenon cutter, and a few rasps and files. The process is simple and surprisingly quick. Christian Becksvoort starts with square blanks, uses a tenon cutter to make the tenon, and then “turns” the knob with the tenon inserted in the drill-press chuck. Now you no longer have to settled for manufactured Shaker knobs, even if your shop is not equipped with a lathe.
When I started making furniture on my own, I had only a tablesaw, bandsaw, jointer, and drill press— no lathe. One of my earliest projects was a seven-drawer chest. What to do about knobs? I wanted authentic-looking Shaker mushroom knobs in graduated sizes to match the drawers. But commercial Shaker knobs were available only in small and large, and they were crude approximations of the real thing. By necessity, I soon discovered how to make goodlooking knobs without a lathe. All it takes is a drill press, a tenon cutter, and a few rasps and files.
The process is simple and surprisingly quick. Start by making square blanks 21 ⁄2 in. long and 1 ⁄8 in. to 1 ⁄4 in. thicker than the largest diameter of the knobs you’re making. The only critical dimension is the tenon, which must be precisely 1⁄2 in. dia. to fit a 1 ⁄2-in. hole snugly. I don’t recommend making knobs with tenons smaller than 1 ⁄2 in. on the drill press, because they could snap under the pressure of rasping and filing.
 Tenon first
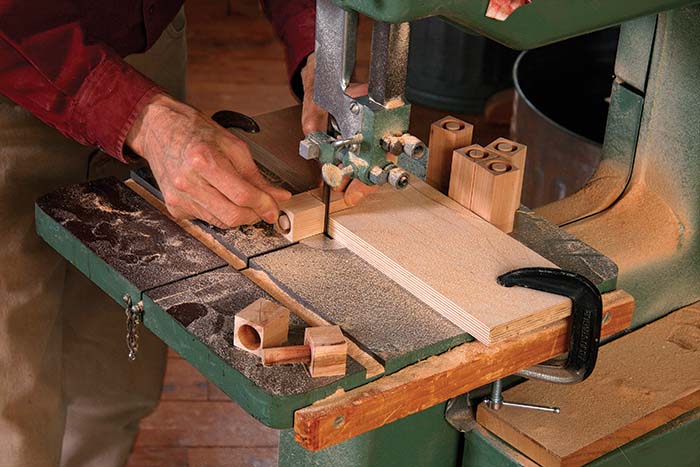
The fastest way to make a clean tenon is with a tenon cutter in the drill press (see “Sources,” p. 60). If you’re making a series of knobs, it’s worth building a jig to hold the blanks in place for tenoning. The jig is simply a flat plywood base with two upright fences creating a 90° corner. To position the jig precisely beneath the quill, draw diagonals on the end of a blank, put a brad-point bit into the chuck, and center the tip of the bit on the blank. Then clamp the jig to the drill-press table and replace the brad-point bit with a tenon cutter. Set the depth of cut to about 1-1⁄2 in. and drill. You’ll want an inch or so of tenon for the chuck to grip, and at least 1⁄4 in. exposed below the chuck—clearance for your tools while you’re shaping the knob.
To remove the collar of waste around the tenon, make four shallow cuts on the bandsaw. If you have a batch of blanks to do, make a quick jig by notching a piece of plywood and clamping it to the bandsaw table so it cuts at the right length and to the right depth. Once that’s done, you’re ready to begin “turning” the business end of the knobs. To make the process a bit easier, first chop off the four corners with a chisel, creating a rough octagon.
“Turn” the cylinder
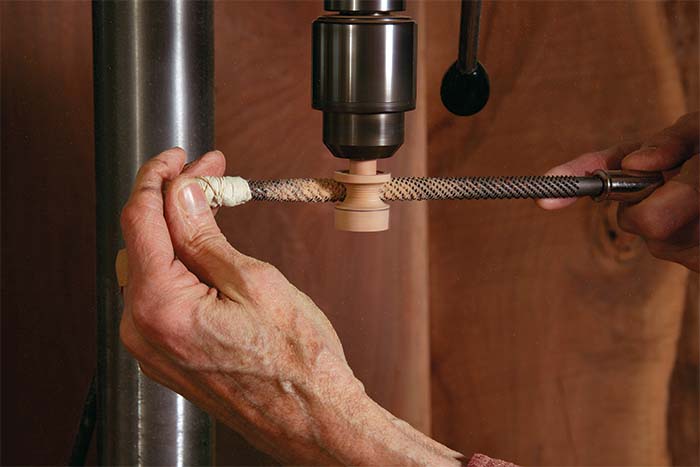 Now the fun starts. Insert the tenon into the drill-press chuck, leaving about 1⁄4 in. of the tenon exposed, and tighten. Set the drill press at its fastest speed (largest pulley on the motor shaft, smallest pulley on the drill shaft), and use a coarse, flat rasp to smooth the octagon into a cylinder. Too much pressure can break the tenon, so start with a light touch until you get the hang of it. Stop frequently to clear chips from between the teeth of the rasp. Leave the cylinder slightly larger than your desired final diameter to allow for shaping and sanding. To check the diameter, use a pair of calipers (or a shopmade gauge, or even a crescent wrench). With the cylinder finished and the drill press still running, use a pencil to mark the transition points in the knob’s profile.
Shape the mushroom
Next, using a coarse 3⁄8-in.-dia. round rasp, form the waist of the knob. Once you’ve reached the desired depth, switch to a 1⁄4-in.-dia. round rasp to shape the tighter radius where the waist meets the cap. Then use the flat rasp to reduce the diameter of the base. Next, with the 3⁄8-in.-dia. rasp, smooth the curve between the waist and the now-smaller base. Last, use a flat rasp to shape the cap.
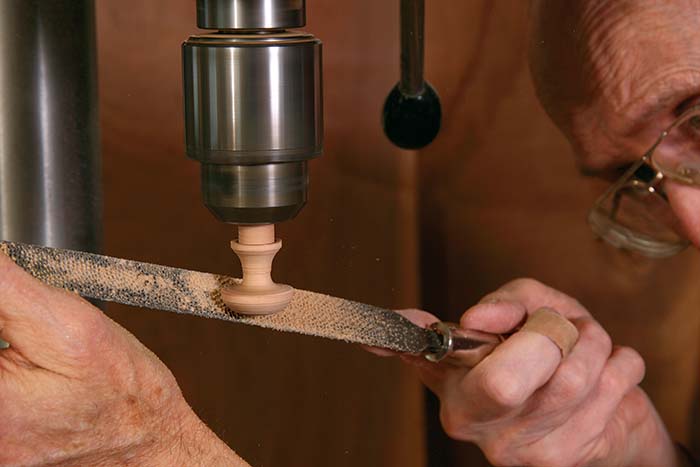 At this point the knob is in its final form and needs only minor smoothing. Do this with a set of flat and round files (or 80-grit sandpaper if you don’t have files). Go over the base, waist, and cap with files, then switch to 120-grit sandpaper. To sand the waist of the knob, I fold paper from my edge sander to present an appropriately curved face. Alternately, you can roll sandpaper around a dowel and use that. Continue sanding to at least 220- or 320-grit, doing all the work with the drill press running.
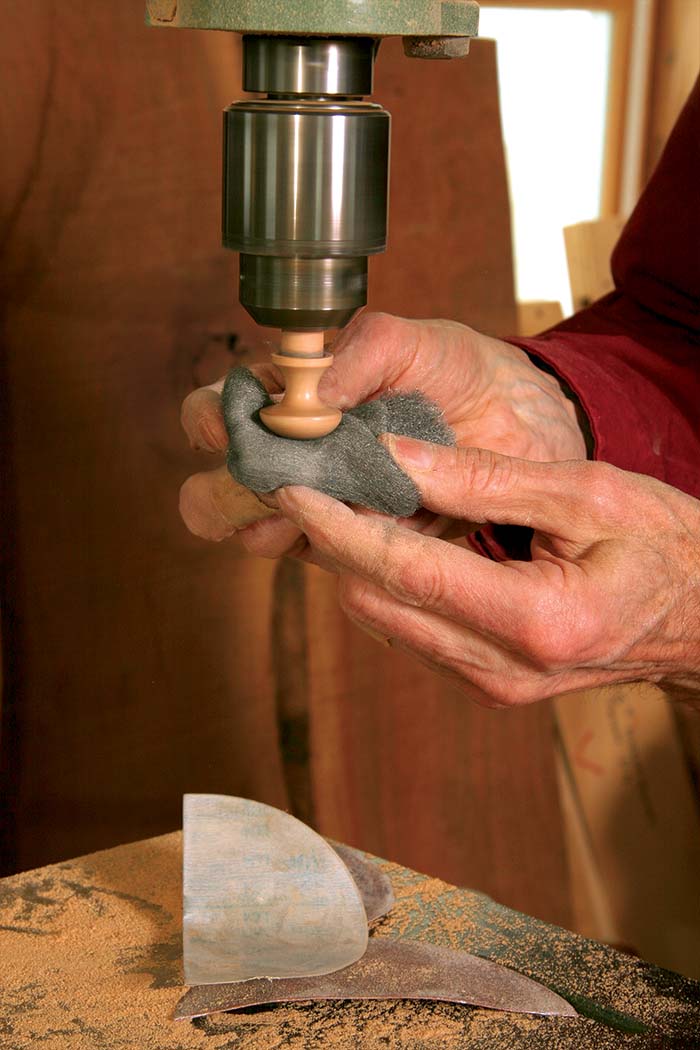
The surface of the shoulder between the base and the tenon is likely to be rough, so smooth it with a small flat or triangular file. The shoulder must be perfectly flat and have a crisp edge in order for the knob to sit tight against the drawer front or door stile. If it is difficult to achieve that with the file, you can always undercut the shoulder surface with a chisel after you’ve removed the knob from the chuck. Before you turn off the drill press, there’s one last step: Polish your custom pull with 0000 steel wool.
Watch a video of Becksvoort’s technique
For the full article, download the PDF below:
Fine Woodworking Recommended Products
CrushGrind Pepper Mill Mechanism




Comments
What a great technique for someone like me without a lathe! Thank you Christian for showing me another capability of my drill press.
Log in or create an account to post a comment.
Sign up Log in