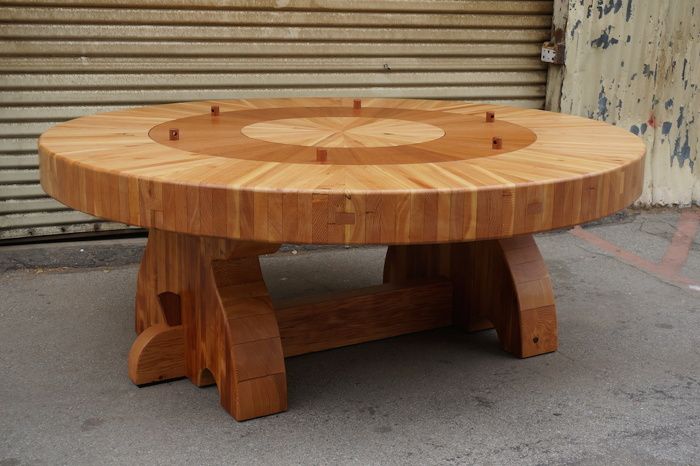
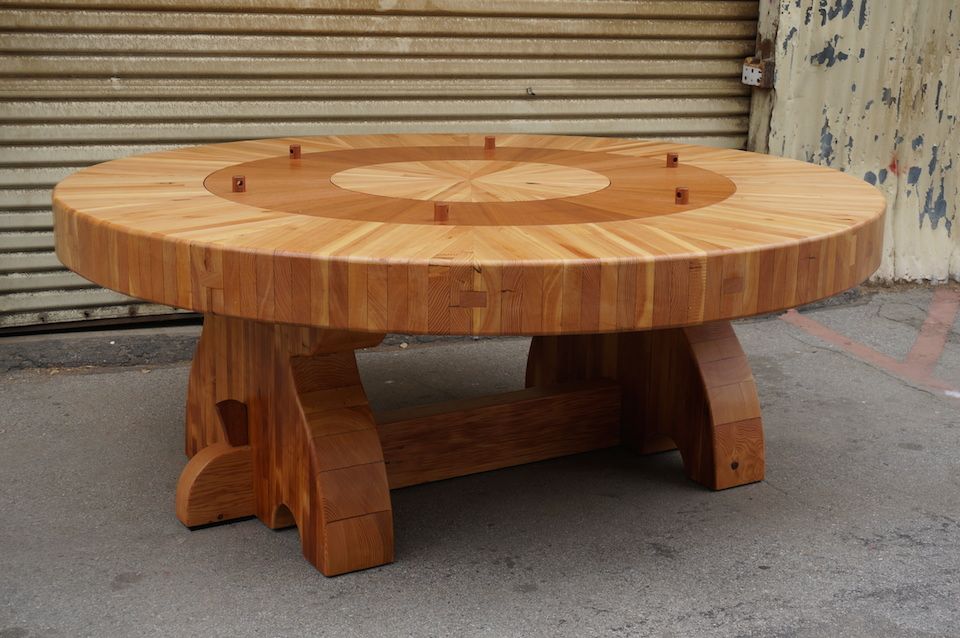
"Zeus's Wagon Wheel" was built at Offerman Woodshop from huge timbers torn out of a guitar factory. A Lazy Susan seemed like a necessity, and a worthwhile challenge.
 RH Lee manages Nick Offerman’s collective-style workshop in Los Angeles. Lee began working with wood at age 7, when she was enrolled in the Kids Carpentry program in her hometown of Berkeley, CA. Years later, she built theater sets at Brown University, then moved to San Francisco, where she built sets in small theaters and worked for 5 years at the Exploratorium museum, building interactive science exhibits and honing her skills in woodworking and furniture-building. Since moving to LA in 2008, Lee has been managing Offerman Woodshop, building custom furniture on commission, and continuing to build outdoor exhibits for the Exploratorium.
A Lazy Suzan for Zeus Himself
RH Lee
 |
 |
“Zeus’s Wagon Wheel” was the result of a year-long design conversation between two comedians, which I mediated through sketches and renderings, and finally, lots of sawdust.
The design constraints for this table were 1) we were to use the stack-laminated and 4×4 timbers that came out of the client’s gutted new home and 2) the table should accommodate the client, his wife and the 26 children he planned to beget. After various iterations, we settled on an 80″ diameter circular table, which should comfortably seat 10 around the periphery (with the other 16 piled up in the center or spread out under the trestle). To see how we built the table itself, check out my blogs on the Offerman Woodshop site. A Lazy Susan was our solution to the problem of passing the mustard across an 80″ divide.
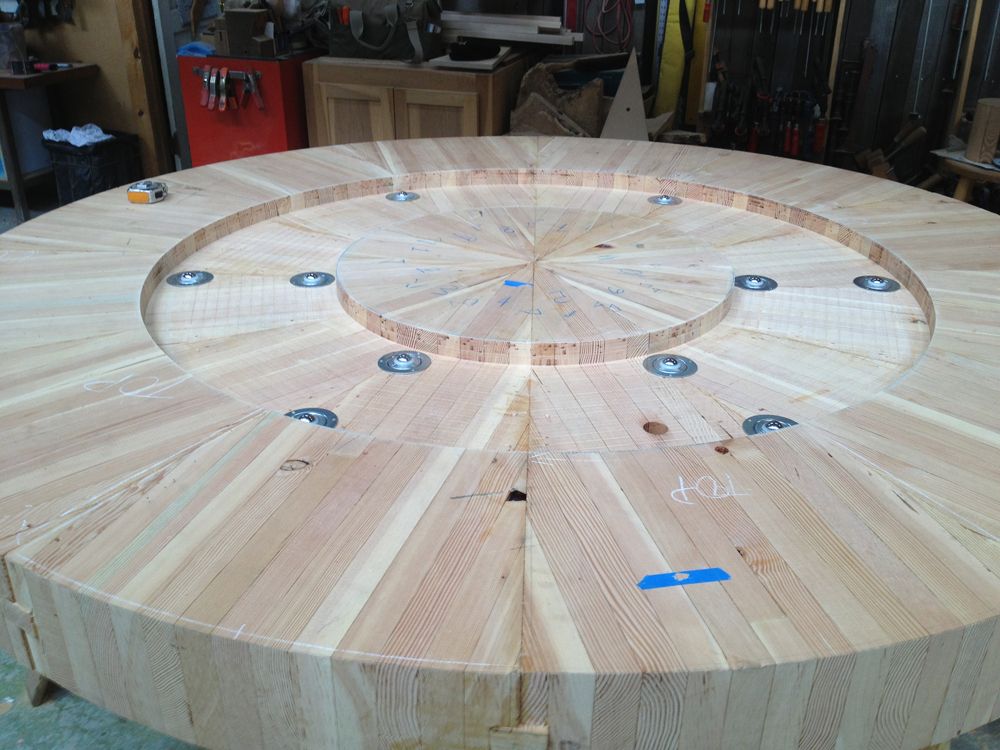
While the traditional (think Chinese restaurant) Lazy Susan-a solid circle that sits above the table surface-would have been much simpler to engineer, we chose to make ours a free spinning ring, flush to the table surface. We were not only aesthetically drawn to the the “racing-stripe” look the ring provided, but we were also driven by a perverse masochism-the desire to create and conquer a complex engineering feat.
A Smart Track
Luckily, my 10+ years of building interactive exhibits for the Exploratorium Museum in San Francisco gave me plenty of background in building kinetic objects/furniture. More importantly, all that collaborating with engineers, physicists, and interactive artists on exhibits provided me with some very smart friends. So naturally, I contacted my long time collaborator, mechanical engineer and exhibit developer Jesse Marsh, to help me design the mechanism that would allow this ring to spin gracefully and precisely for years to come.
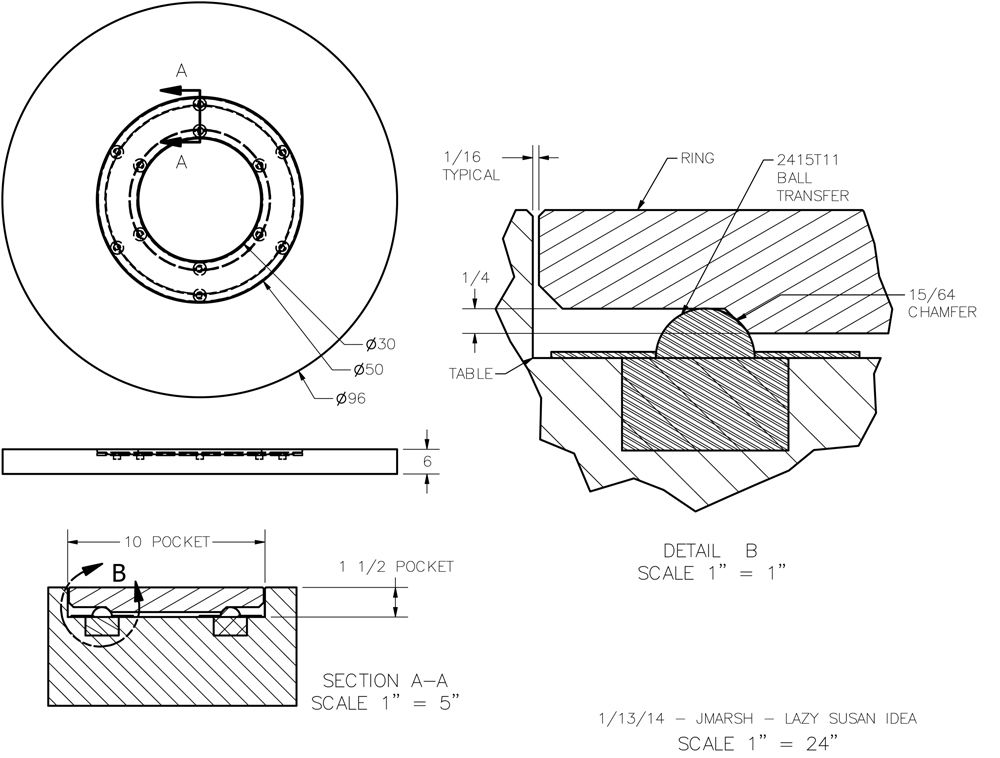
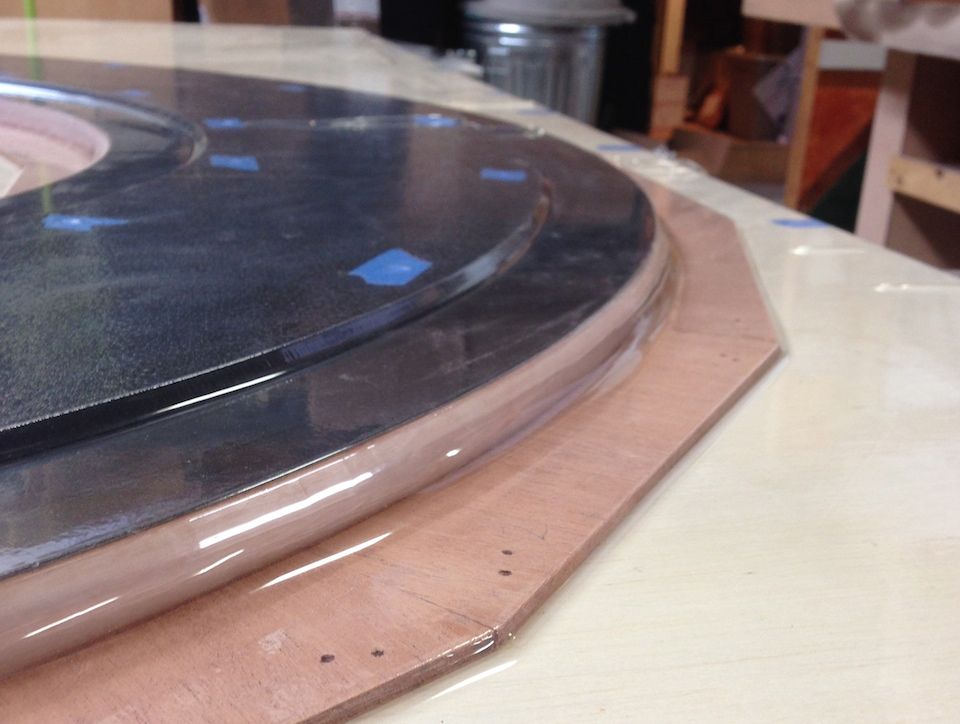
Jesse designed a system where steel ball transfers (huge ball-bearings) mounted inside a pocket in the table run lightly along a chamfered surface on the underside of our ring. The ball transfers are positioned to keep the ring aligned concentrically in the pocket and paired across the circle so they oppose each other, thus eliminating possible runout. That meant that the circular chamfered surface under the Lazy Susan had to be flawless.
Borrow a CNC
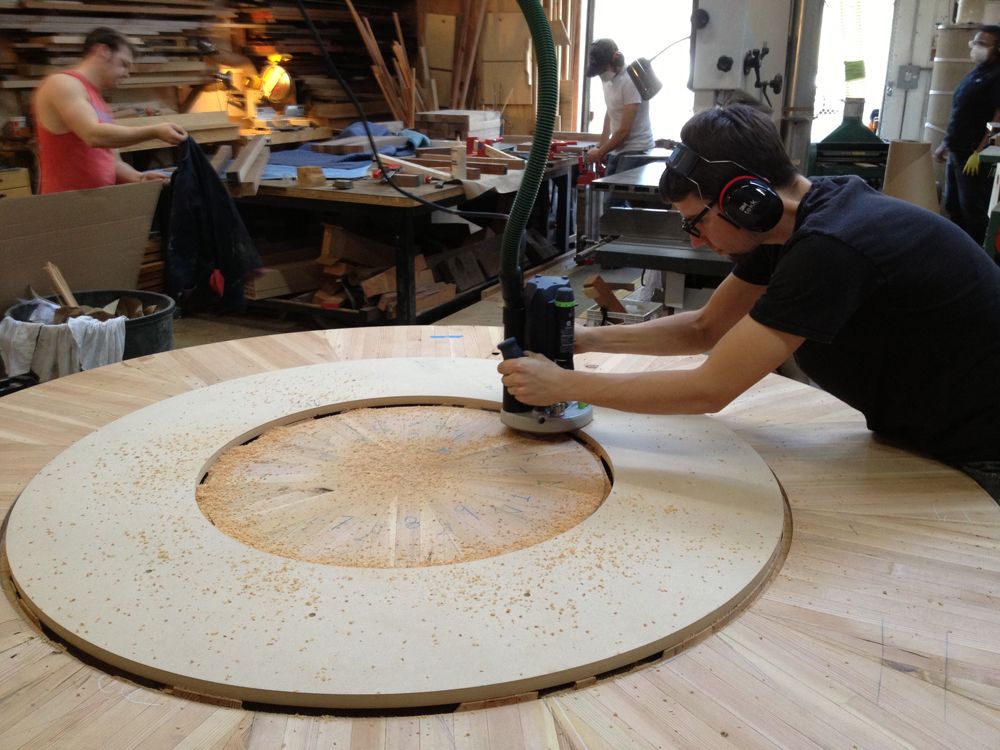
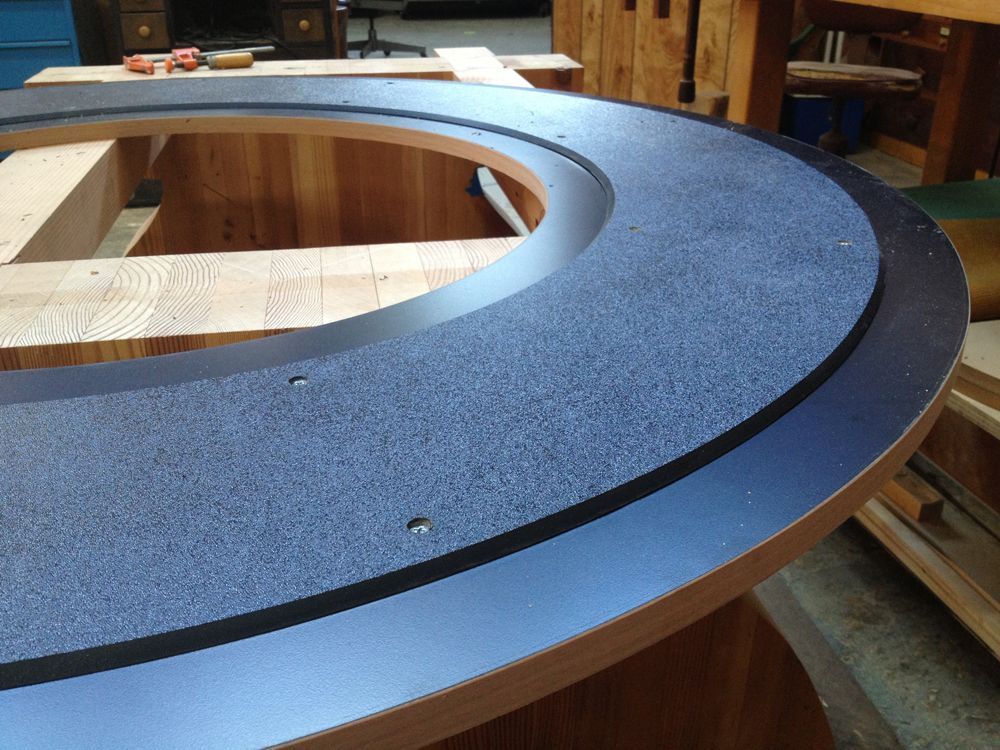
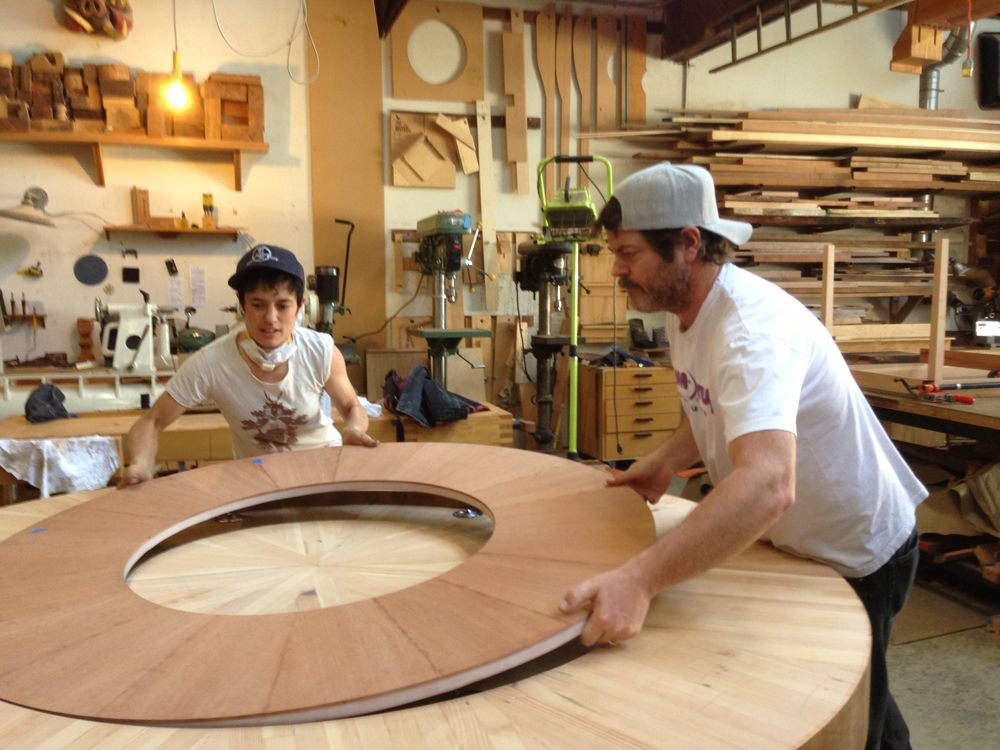
To ensure accurate circularity, of all of the parts actually, I had three sets of rings cut by an outside CNC shop. The first ring was the actual Lazy Susan, cut from 3/4″ MDF which we would then veneer. The next ring was a template for cutting the pocket in the table top-it was precisely undersized for use with a template guide and hand held router.The third ring was cut out of 1/4″ ABS plastic, inset 2″ from the ID and OD of the Susan, with a 45-degree chamfered edge.This ring, attached on center to the underside of Susan, is the track that runs on the ball transfers.
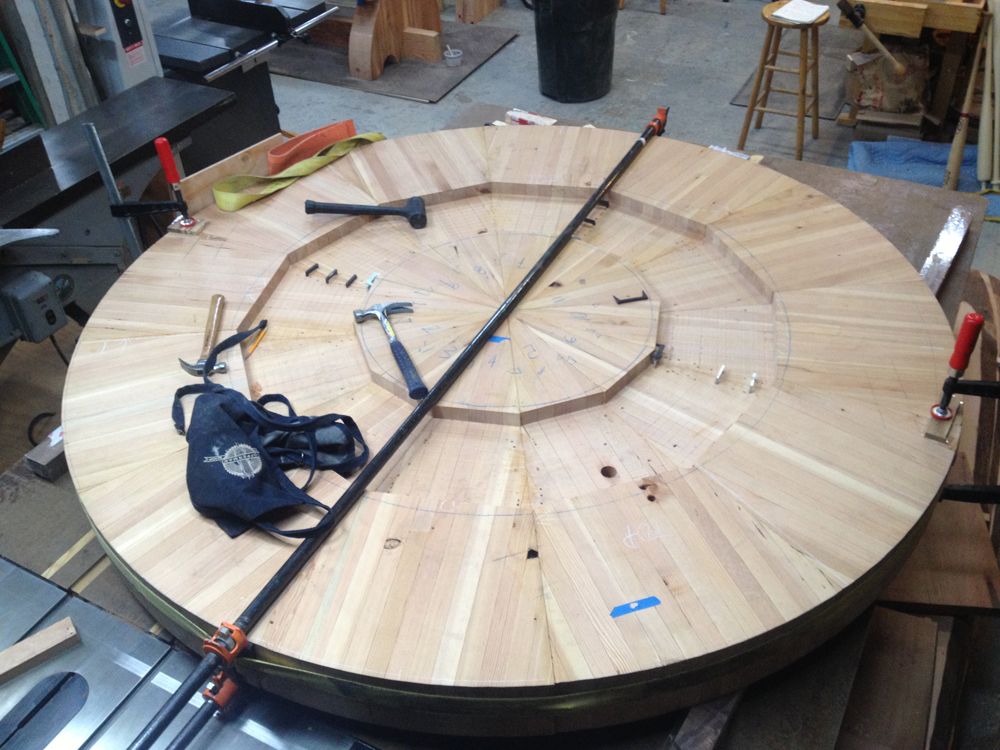
While the table top was still in pieces (before we glued the 12 wedges together to form a circle), we took advantage of their more manageable size to roughly dado out the majority of our trough at the 1-1/2″ depth. This saved us a lot of time when the table was assembled, and we only needed to clean up the two circumferences of the ring pocket using a router bushing, and our template.
Precision, Precision
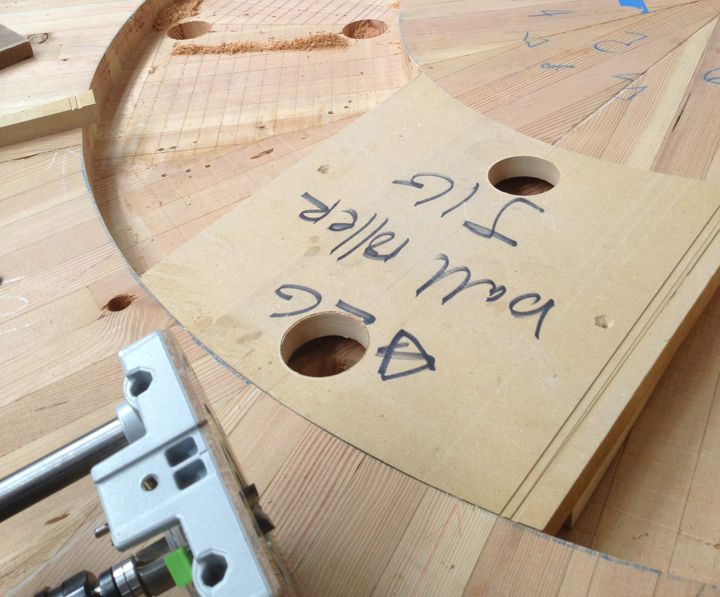
We also made a template for locating each of the ball transfers. To create it, I used our pocket template to rout a shallow pass in a scrap of plywood and then trimmed to the outer line of this pass to create a template that fit snugly into the ring pocket. I then used a router with a flush-trim bit to route the 12 pockets for the ball transfers.
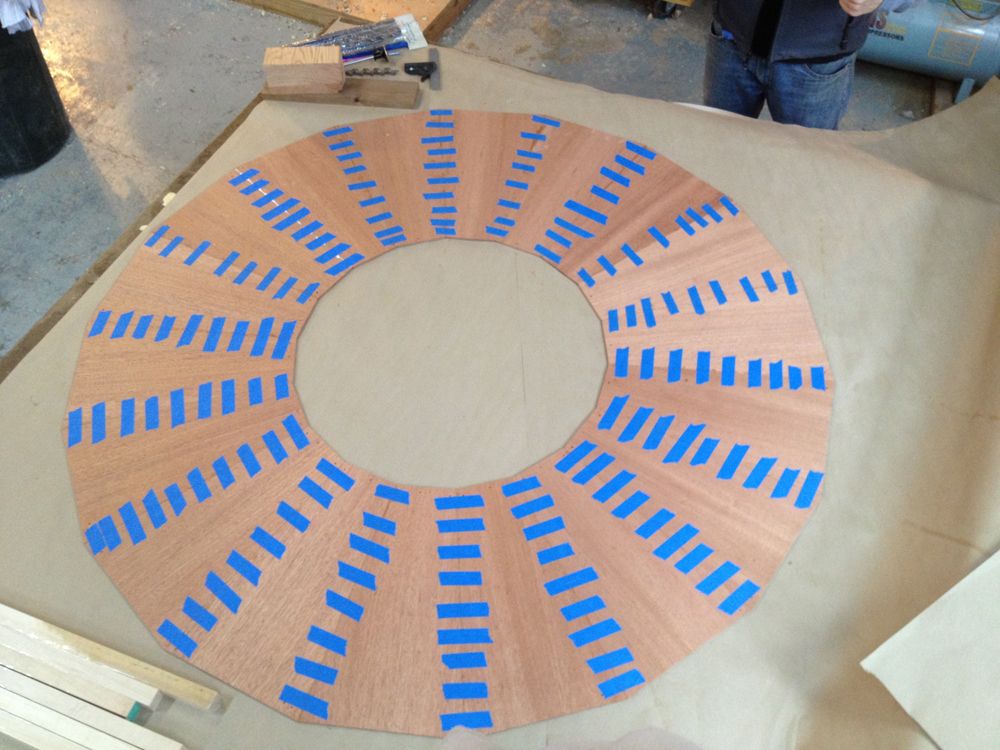
Initially, we laminated the underside of Susan with Formica, and then screwed on the ABS track. I chose to use plastic in both instances because of its superiority and longevity as a bearing surface. I then edge-banded the ring’s (invisible) edge with adhesive backed nylon tape to eliminate possible friction. We cut solid mahogany veneers for the ring’s surface and threw the whole thing in the vacuum bag overnight.
Live and Learn
It worked beautifully until LA got hit with our first rainstorm of the season. Then, as we should have guessed, the mahogany wanted to move while the Formica stayed put.We came in the next day to a fidgeting, restless and decidedly un-flush Susan. So, the Formica came off, and we replaced it with an opposing layer of mahogany veneer-we also brought the thickness of the veneers down from 1/4″ to 1/8″ to give them less moving power over the substrate. Just in case it still wanted to move, we drilled oversized holes through the bottom layer of mahogany so that the screws holding the ABS to the MDF would allow for slight movement. Bear in mind, we live in Southern California, and the table is going to stay there. In other parts of the country, a table like this might expand and contract too much, and upset the works.
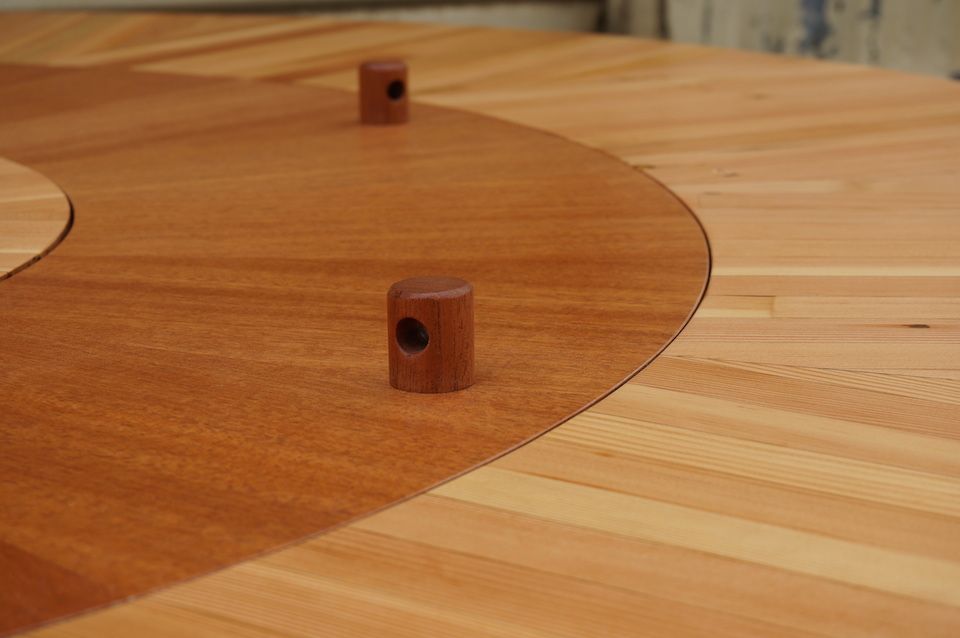
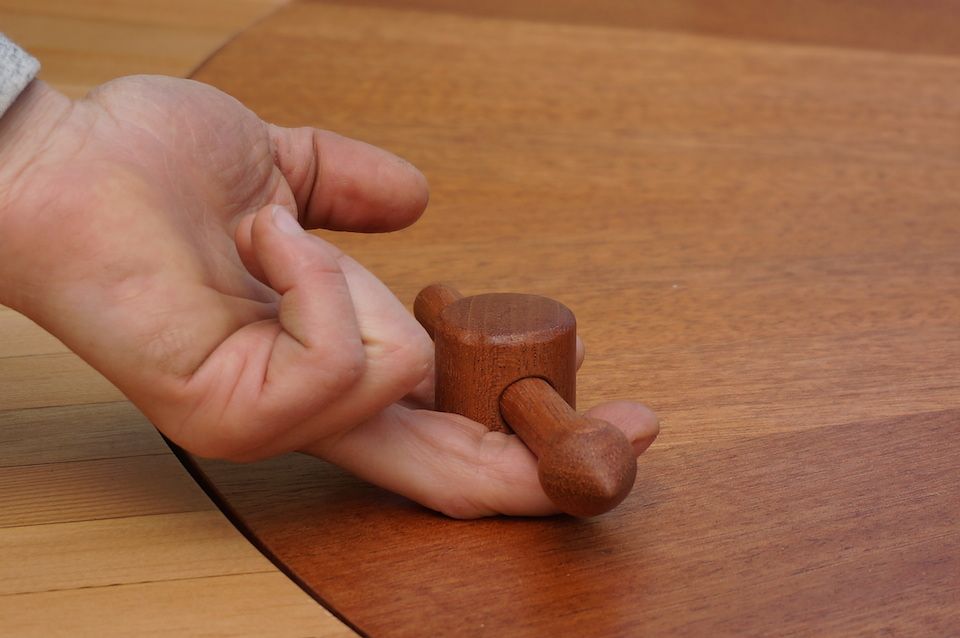
Because of the size and relative weight of Susan, we decided to put in handles-hand turned mahogany pegs-to allow for easy spinning. Because of the necessary clearance gap between Susan and the pocket edge, crumbs could eventually build up and inhibit travel. So we drilled horizontal thru-holes in our handles to receive a smaller peg (stored in the base), thus transforming the spinning handles into lifting handles for cleaning and maintenance.
Susan now spins flush, frictionless, and free in her new home in Venice, CA. She is both voluminous in size and sound, but that’s just part of her comedic charm.



Comments
Providing both an inner and an outer chamfer is not necessary. One is sufficient to keep the ring centered.
Over-sized furniture always tugs on my sense of reality and makes me feel small and weak. It also reminds me of when I visit a pre-school and see all those small chairs and tables. Then I feel like a monster.
I'm trying to imagine working on a piece that large. Does Mohammad go to the mountain or does the mountain go to him?
I'm guessing you had to use a forklift and a couple piano movers to transport that table.
After this, all the furniture you build will seem so-o-o small...
The fact that it works as well as you planned and looks great is a huge accomplishment.
Awesome, what a glorious beast of a table!
Great job. Mike
Log in or create an account to post a comment.
Sign up Log in