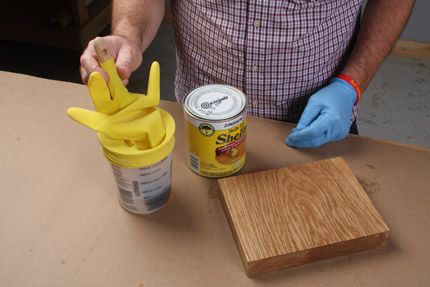
Between coats, just leave the brush sitting in some solvent. Snip the tip off one finger of a rubber glove, and use it to create a nice air seal around the brush handle and finish container, keeping the solvent from evaporating for a few days.
Finishing is a methodical process that takes place over a number of days. It takes multiple coats to do it right, you have to sand between most of them, and then apply wax at the end. Anything I can do to speed things up is a welcome addition!
As many of you know, you should use the best bruish you can afford. Treat it right and it will last for years. That means a good cleaning after every use. But you can skip a few of those cleaning sessions with the following tip, which lets you store the brush in a small amount of solvent. I usually give the brush a quick swish in the solvent and then just leave it there.
Snip the tip of one finger off a latex glove. That ends up hugging the brush handle, while the base of the glove stretches around the top of your the jar or cup. (When choosing which finger to snip off my glove, I considered how I felt about finishing in general.)
This way, no matter what finish you are using, you can just leave it in the solvent, with the rubber glove keeping it from evaporating. With shellac, you can leave the brush in the finish itself. The glove trick will buy you a few days of bursh storage if necessary.
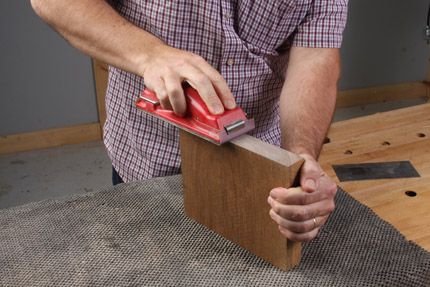
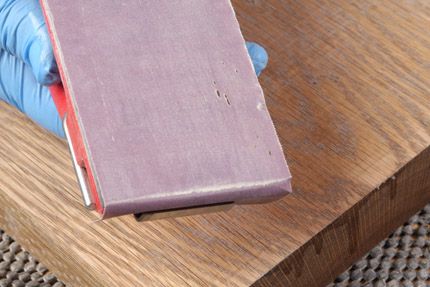
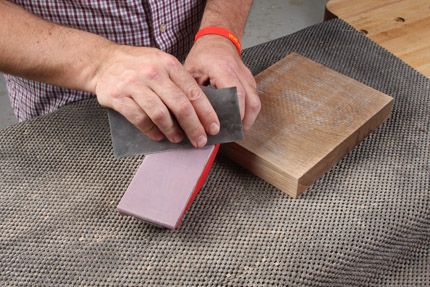
When you sand between coats, you’ll often find hard areas of finish built up on the paper. The pros call it “corning.” Rather than chuck that strip of pricy paper after just a minute or two of use, I scrape off the kernels with a dull card scraper. A light pass does it, the gunk is gone, and the sandpaper works beautifully again.
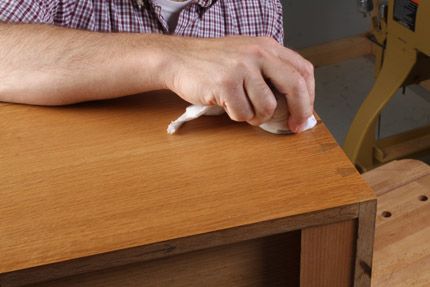
And here’s a great tip for the tail end of the process. Most finishes need finishing. That usually means a light rubdown with superfine steel wool, and then a coat of wax. If you just jam you wax rag into the goop, like some sort of Cro-Magnon, you’ll leave thick swirls of wax on the wood when you apply it. Those can be a prehistoric bear to buff off. The trick is to apply the lightest of coat of wax to the wood, let the solvent flash off for five minutes or so, and then buff it with a clean rag to a beautiful sheen. With a very light coat of wax, the buffing goes super fast. With too much wax, you could be rubbing for hours to get rid of it.
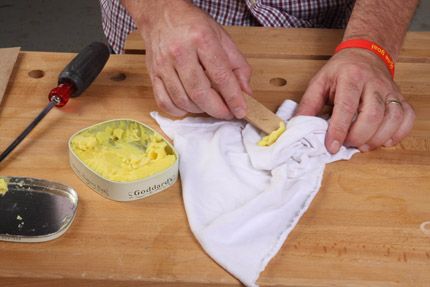
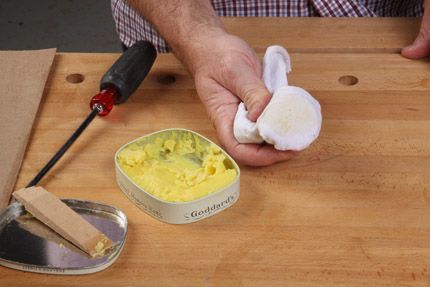
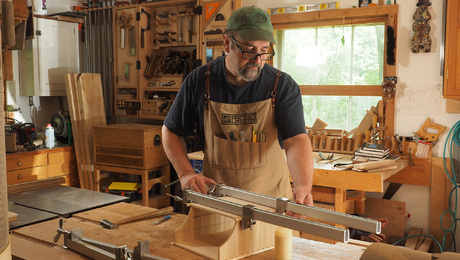
The way to apply that lightest of coats is to put the wax inside the rag, not outside. See the photos for more. That will also keep the wax out of the pores of grainy woods like oak, where it can be hard to remove.
I still hate finishing, but these tips make it more tolerable.




Comments
Hi,
Some advice please! I recently cleaned up an old coffee table (also a foot rest, play area an, hot cup stand & TV dining table) using a card scraper only to discover that the pine top was very dry and in poor condition. Liquid wax went on, two coats, which the wood soaked up like a sponge, this I reasoned would care for the wood for another thirty years. What a mistake!, no buffing wax would go on, no polyuethane varnish, apparently, will adhere to it. Denatured alcohol (methylated spirits for those in U.K.) and a card scraper have improved matters slightly. However, when it is finished it lhas to be tough hard wearing, heat resistant and child friendly
I ask for advice and suggestions on what to do next .
Normally everything is carefully planned, I deviated from that plan just once on the spur of the moment and paid for it.
Peter
Hmmm. From what I know helping my friend make bespoke kitchens from old pine (reclaimed pine here in the UK is very popular for some rustic kitchens) you don't use liquid wax on bare wood because it does soak in to open pores. I think you would have to take off the top 1mm to get back to clean wood. I have seen wax removed by placing something like brown paper on the surface and heating it up with an iron so that it soaks up the wax. That might work, but you run the risk of the wax also going deeper into the wood.
Peter,
Wax is going to cause you troubles. Finishes applied over it will not adhere.
As an example - Shellac contains wax in the natural form. When used for a seal/wash coat it needs to be de-waxed in order for varnish to be applied over it.
Unfortunately, your requirement of a durable finish means that a varnish of some type is needed. I think you are going to have to go the hard road of mineral spirits and elbow grease to remove the wax. ChiefEngineer brings up a good point, the paper bag trick will help to pull some of the wax out. You can also use more absorbent material like cotton (T shirt material). But I think you are going to have to remove a layer of wood.
With that said, wax can be a good finish - it has been used in the past. But you may need to refresh it from time to time.
Best of luck.
Dave
In the last picture above, where he is applying the wax is just wrong. Are the dovetails are on the wrong board or are the edges covered with wood tape? Also the guideline set with a knife needs to sanded out. That's one of the reasons I do not use a knife.
Hi ButchMacDonald,
Indeed you can see the scribe marks from the joinery. That's basically an aesthetic choice. many furniture makers actually leave these marks on their furniture. In my travels to the shops of many, many well known makers, I've found that it's a 50/50 thing. About half of folks leave the scribe lines intact, and about half don't.
As for your other comment: "are the dovetails on the wrong board?" -- This is the side of a dovetailed cabinet. I think you may have thought this was a drawer, perhaps?
Cheers,
-Ed
No. I did not think it was a drawer. I was comparing where the dovetails were in relation to how the the boards lapped on the front.
Looks like it could be a drawer to me. The piece behind the front could just be a glued on stop block butting into a stop in the cabinet. Way to be extra critical though.
@ButchMacDonald,
The cabinet is on its side, and you're looking at it from the back. The extra rail-looking thing is the French cleat upon which the cabinet hangs.
-Steve
right on and if you look closely,you can see the half pin at the back and I'm only guessing here but there's probably another one (unless there's an overhang)obscured by this gentleman's hand.............
Seems like whole lot of sass about another man's dovetails...
I like the glove tip though, never done it quite like that.
Tyler
Log in or create an account to post a comment.
Sign up Log in