How to Make a Finger Chuck
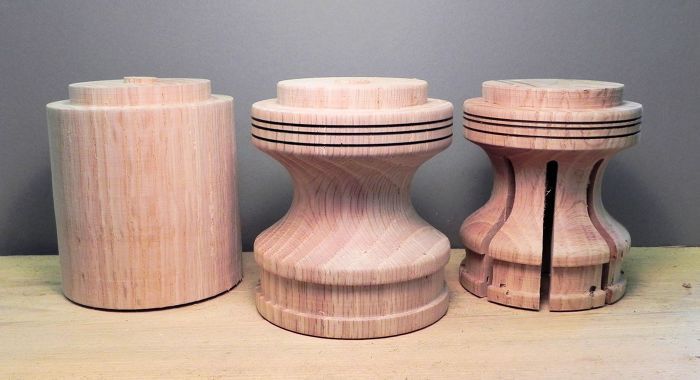
Photo 1. Start with scrap wood of an appropriate diameter.
Introduction
You can never have enough ways to mount a piece on the lathe. Jam chucking is a common and practical way to remount a piece to complete it or add an additional detail–typically used for boxes, scoops, end grain bowls, etc. However, reverse chucking a piece held from the outside is slightly more involved. The Finger Chuck provides a simple and quick method to accommodate this type of remounting so that you can put the finishing touches on the bottom of your piece or add that last detail you couldn’t during the initial mounting.
About the Chuck
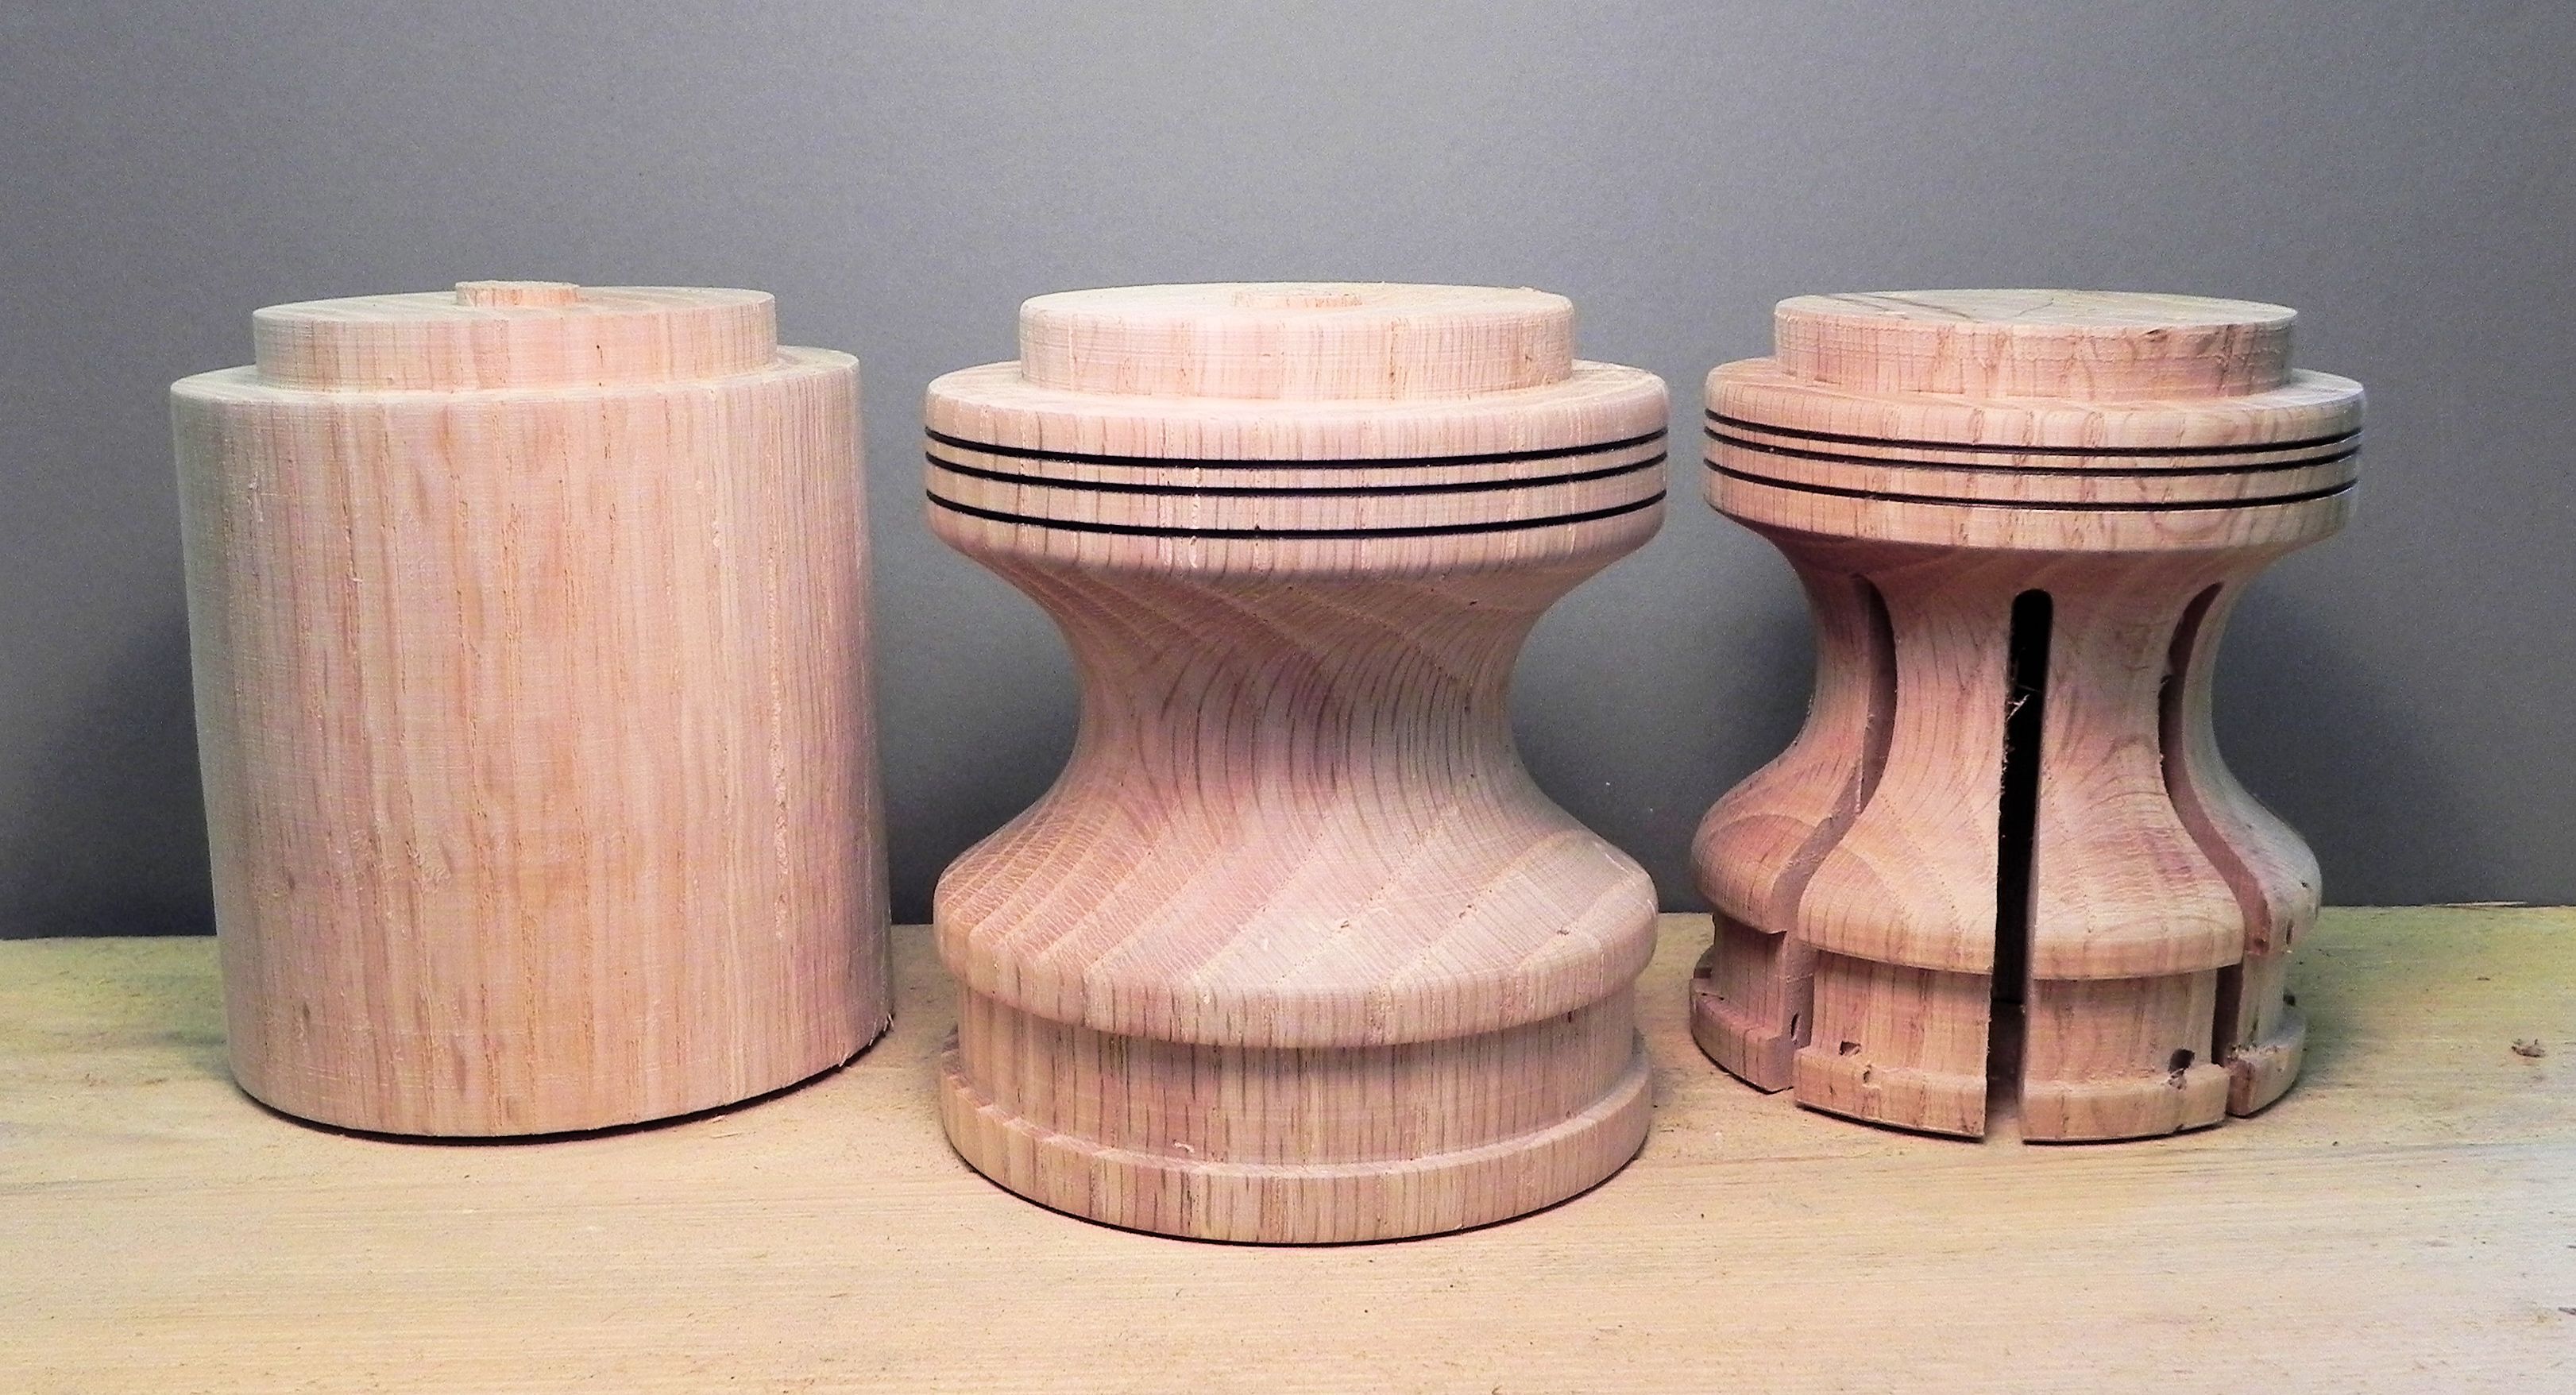
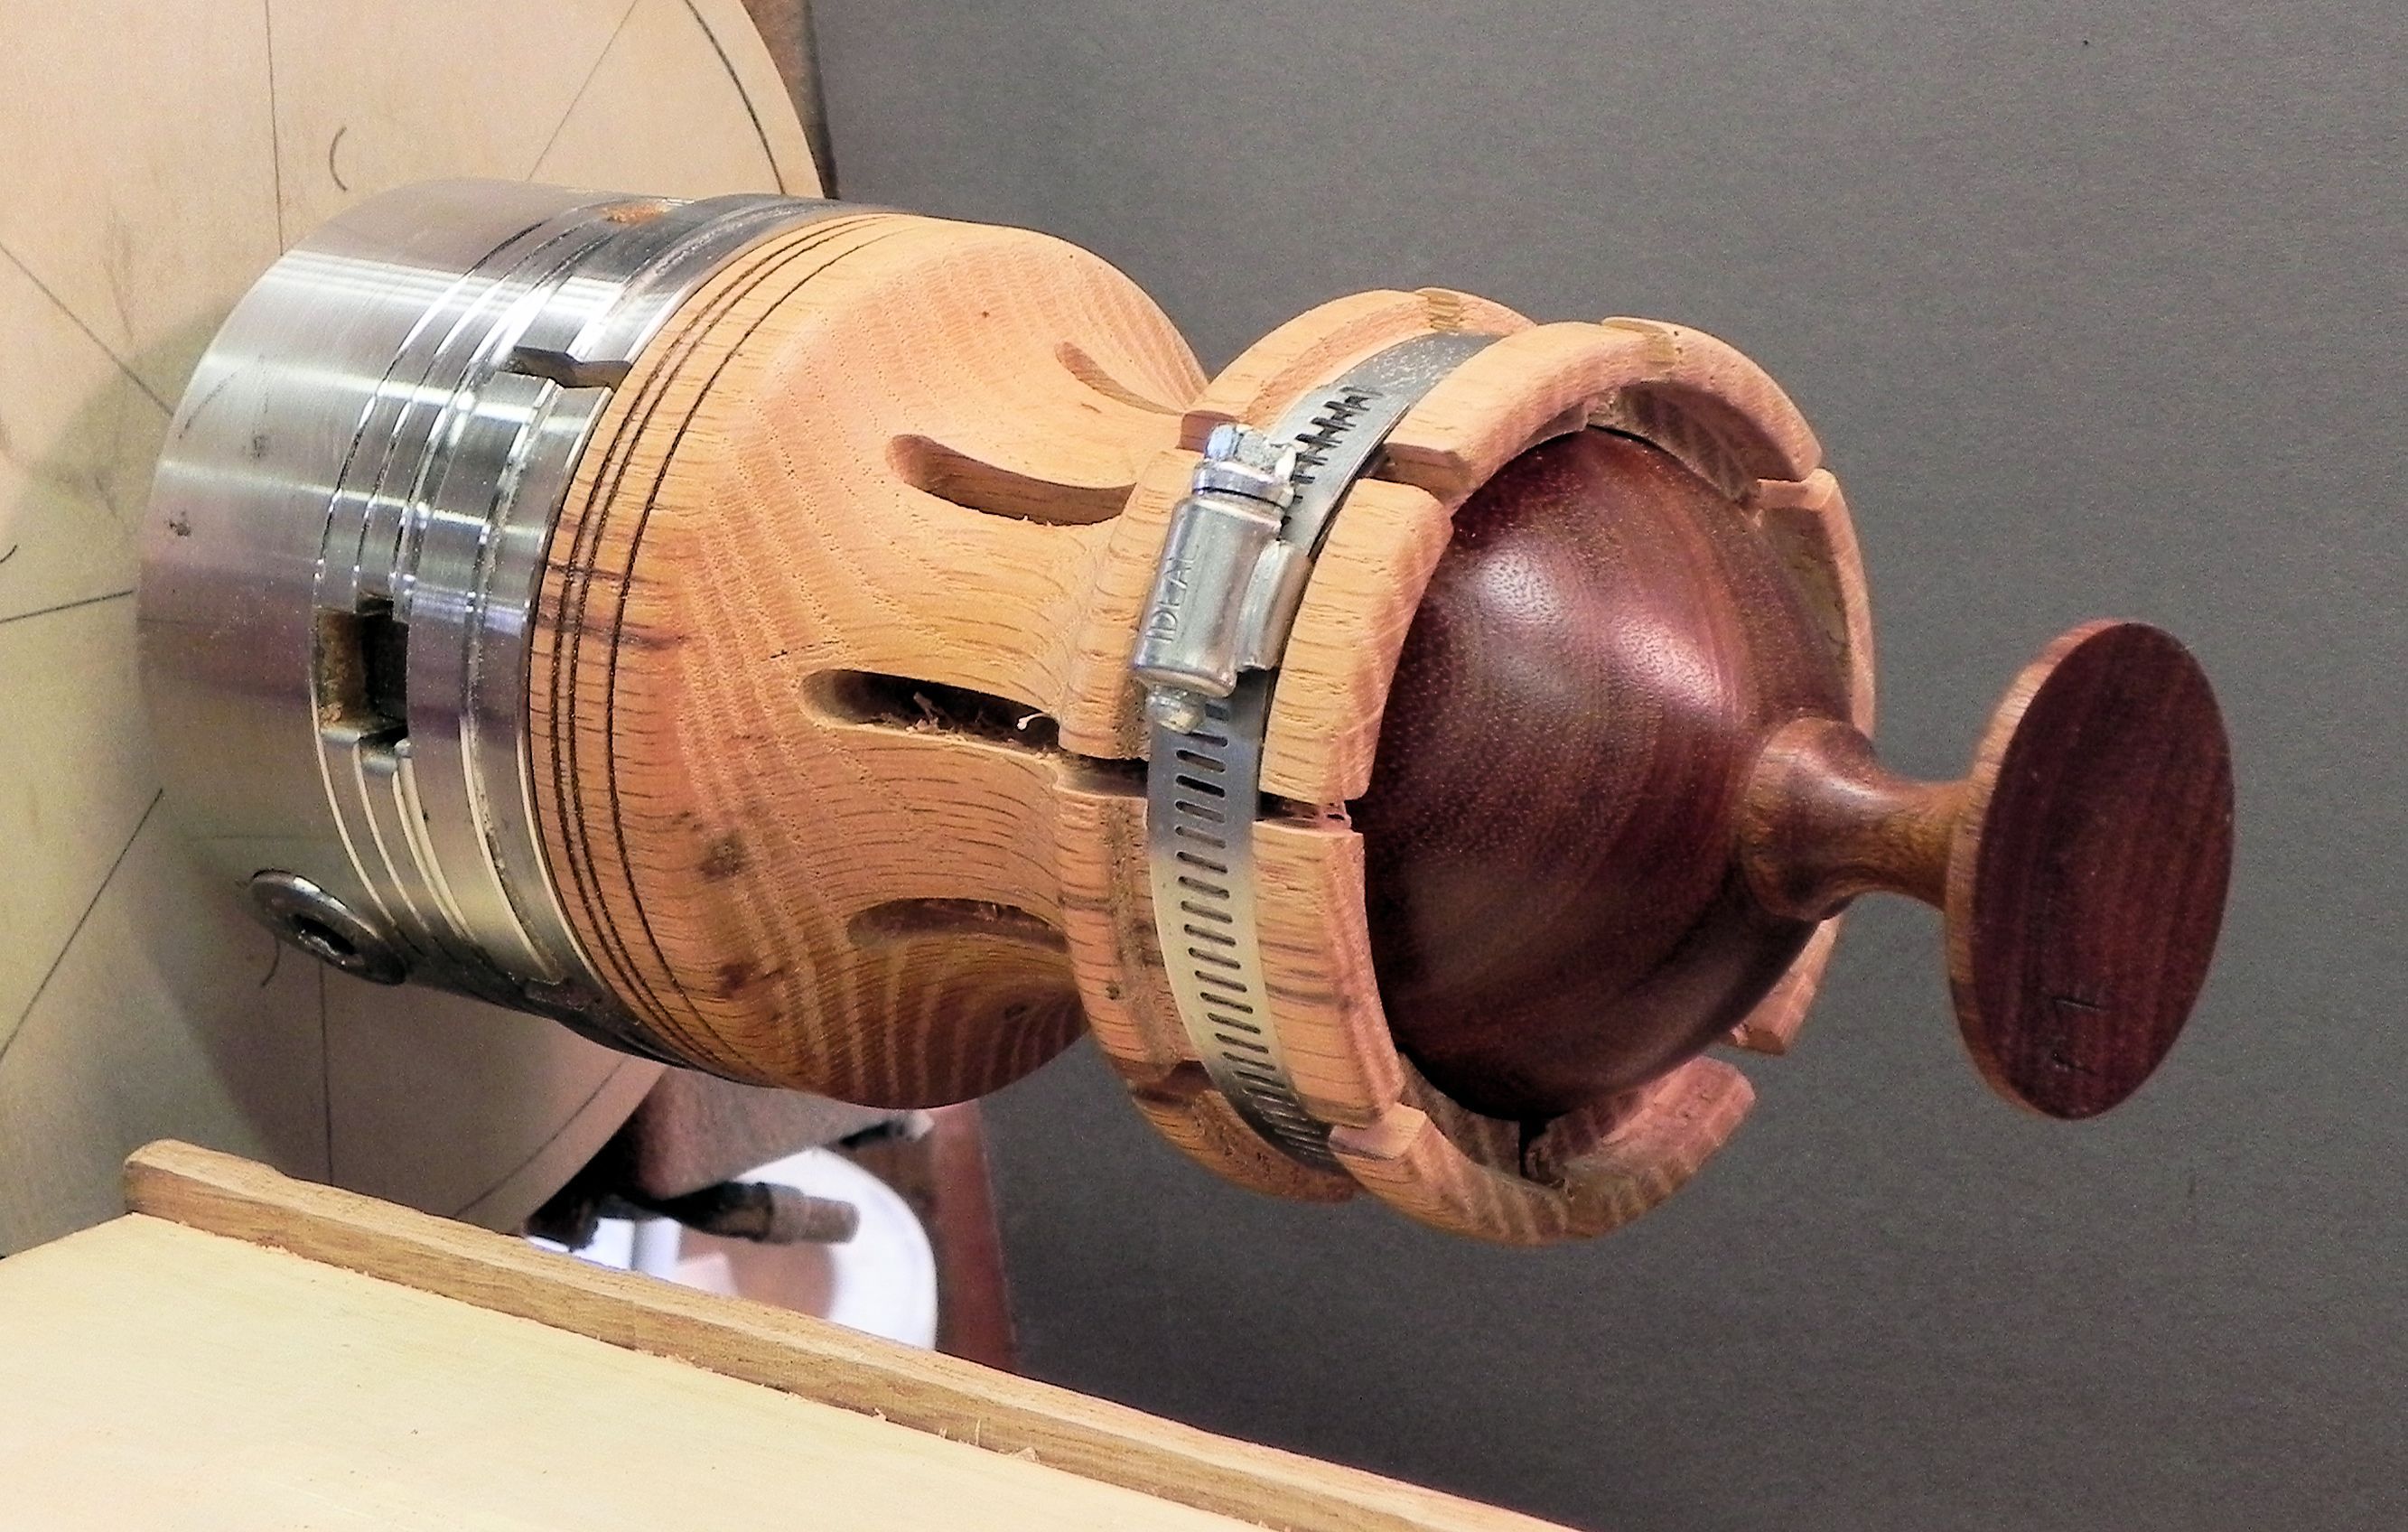
Making the chuck requires scrap wood (Photo 1), a hose clamp and a router with sliding base (Photo 2). The router base is easily constructed from scrap wood and very useful in a variety of situations. The chuck can be mounted on the lathe using a scroll chuck, face plate or by drilling and tapping to the appropriate spindle thread size. There are two primary features of this type of chuck: it can be turned to accommodate multiple diameters (like a step chuck) and it accommodates slight inaccuracies in diameter, often occurring in production turning, with the hose clamp/finger configuration.
The Tightening/Spring Mechanism
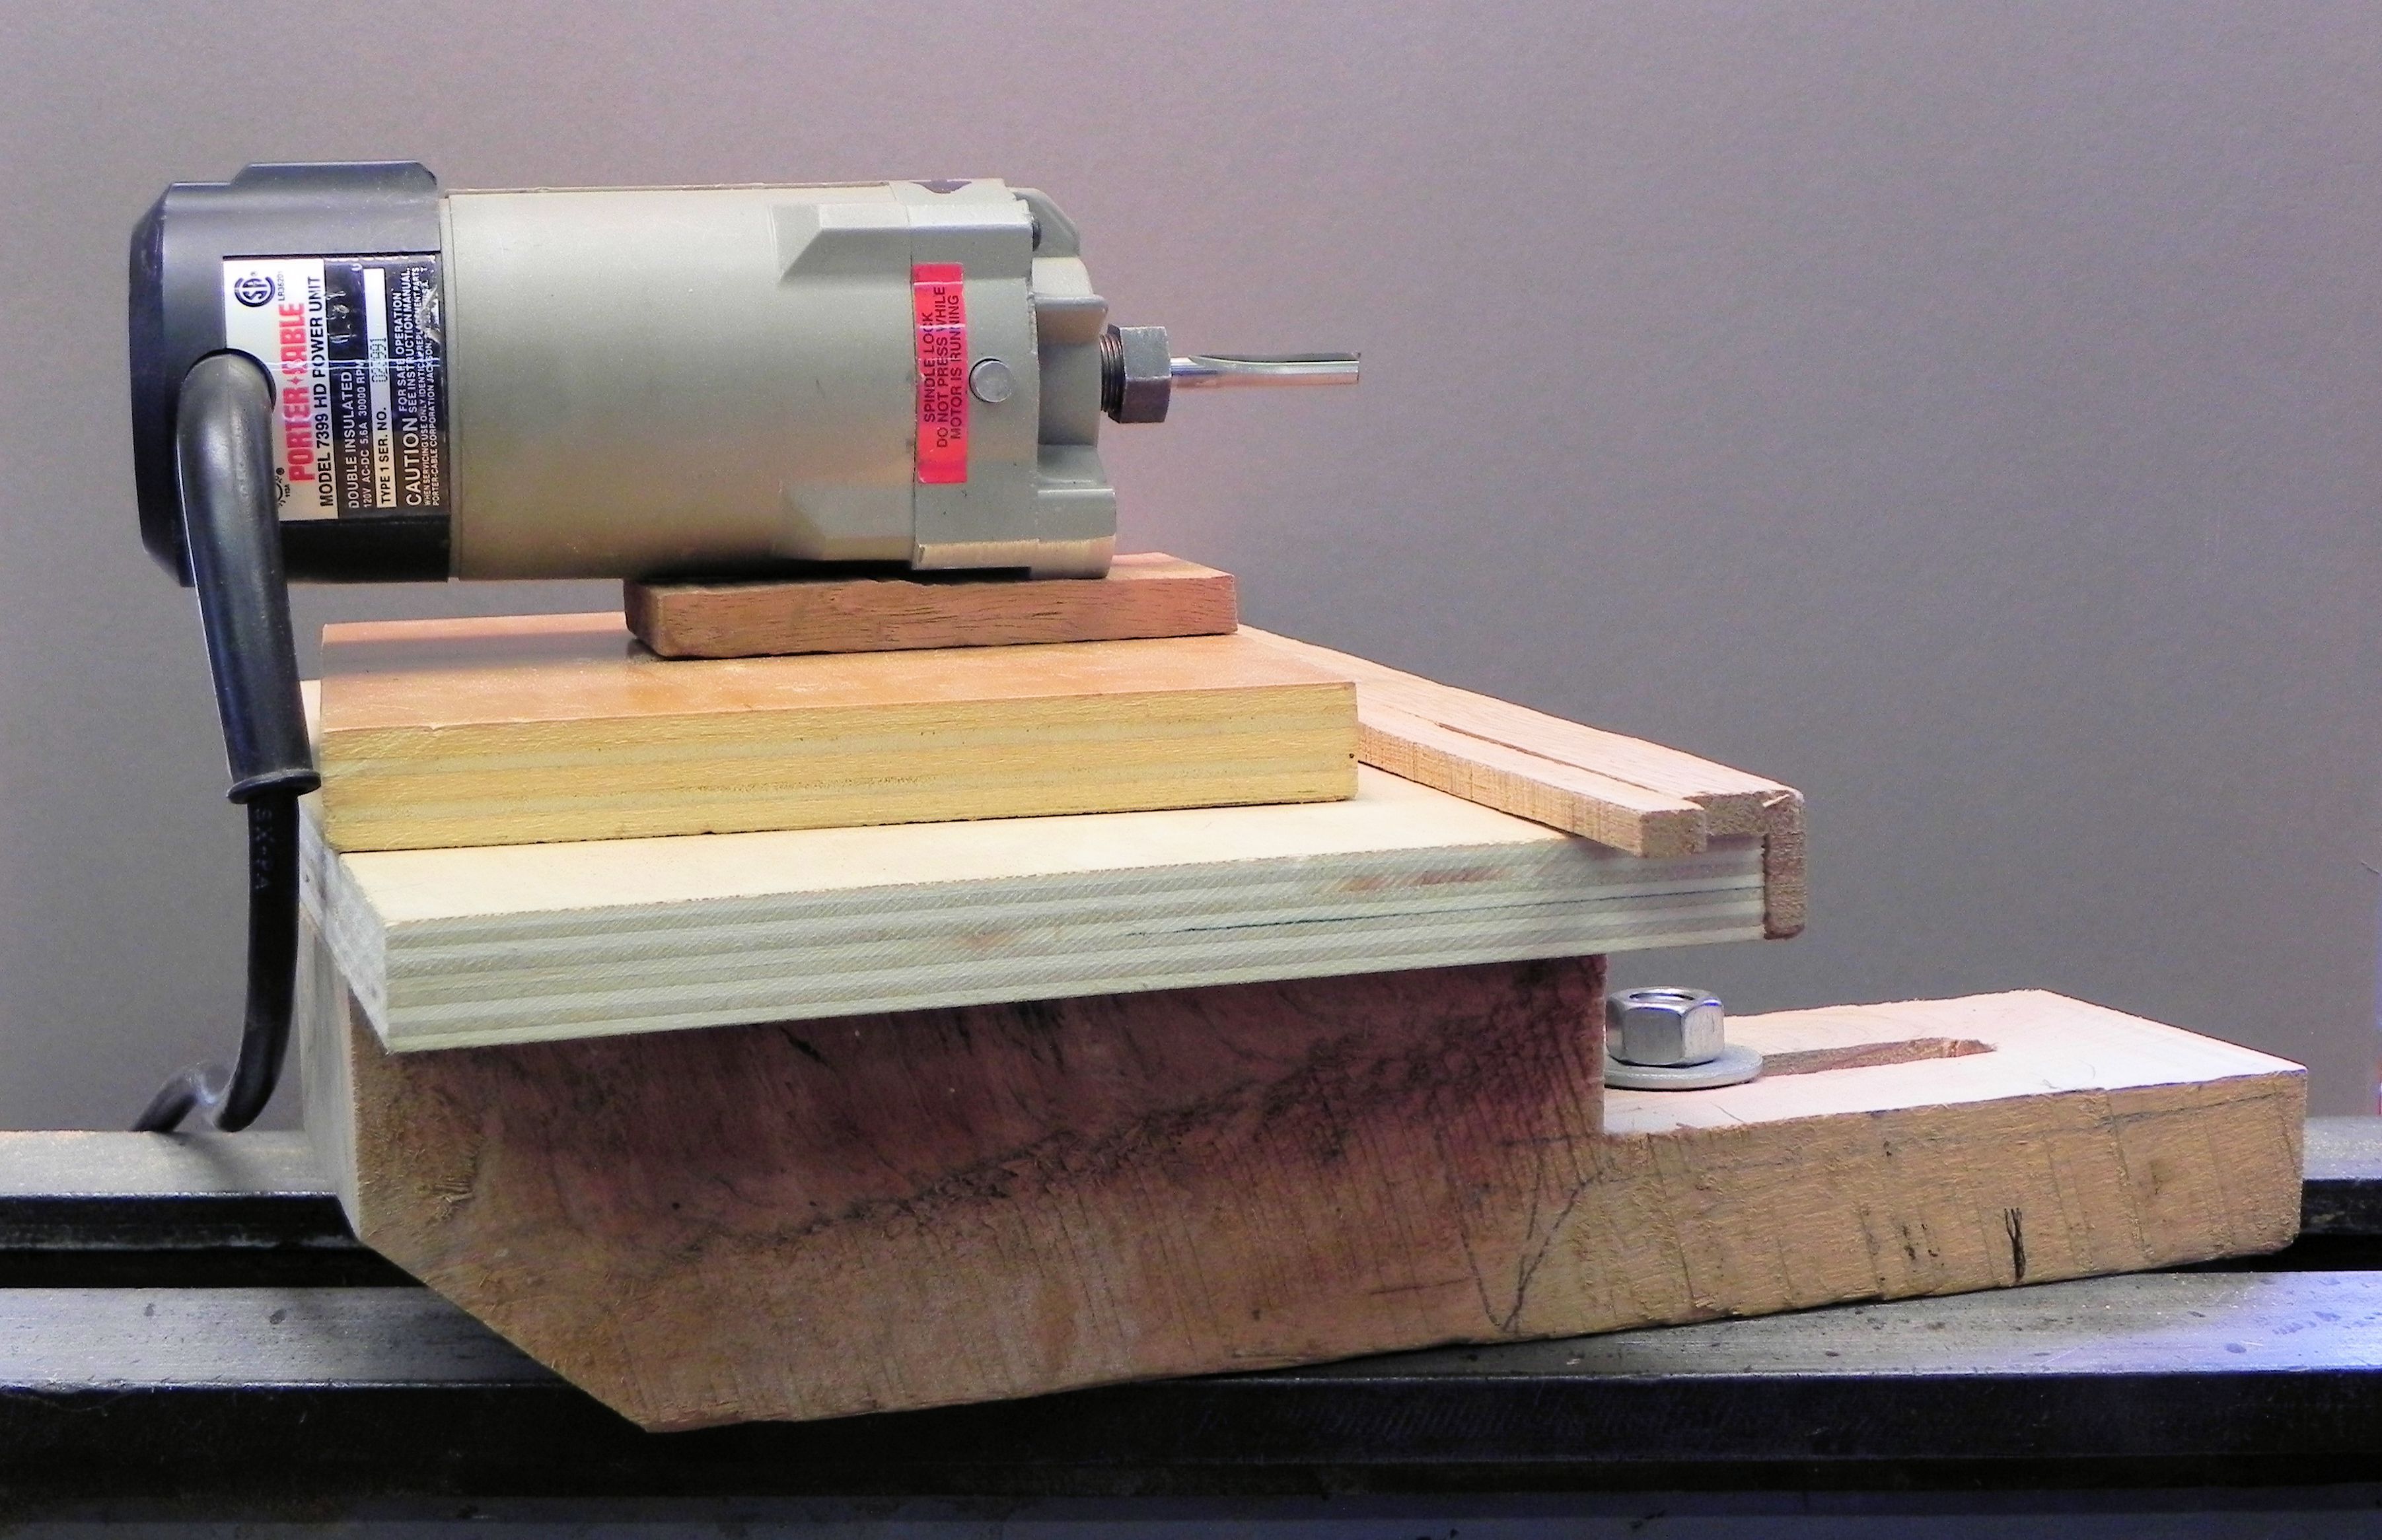
Start with a block of wood of appropriate diameter turned round between centers. Next, decide how to mount the finished chuck. Once mounted, drill a centered hole most of the length of the billet and turn a large cove in the middle of the billet leaving a reasonably strong, but springy wall thickness. Finally, using your sliding router configuration and lathe indexing system, cut eight evenly spaced ¼” kerfs back to the inside edge of the cove (Photo 3).
Chuck in Operation
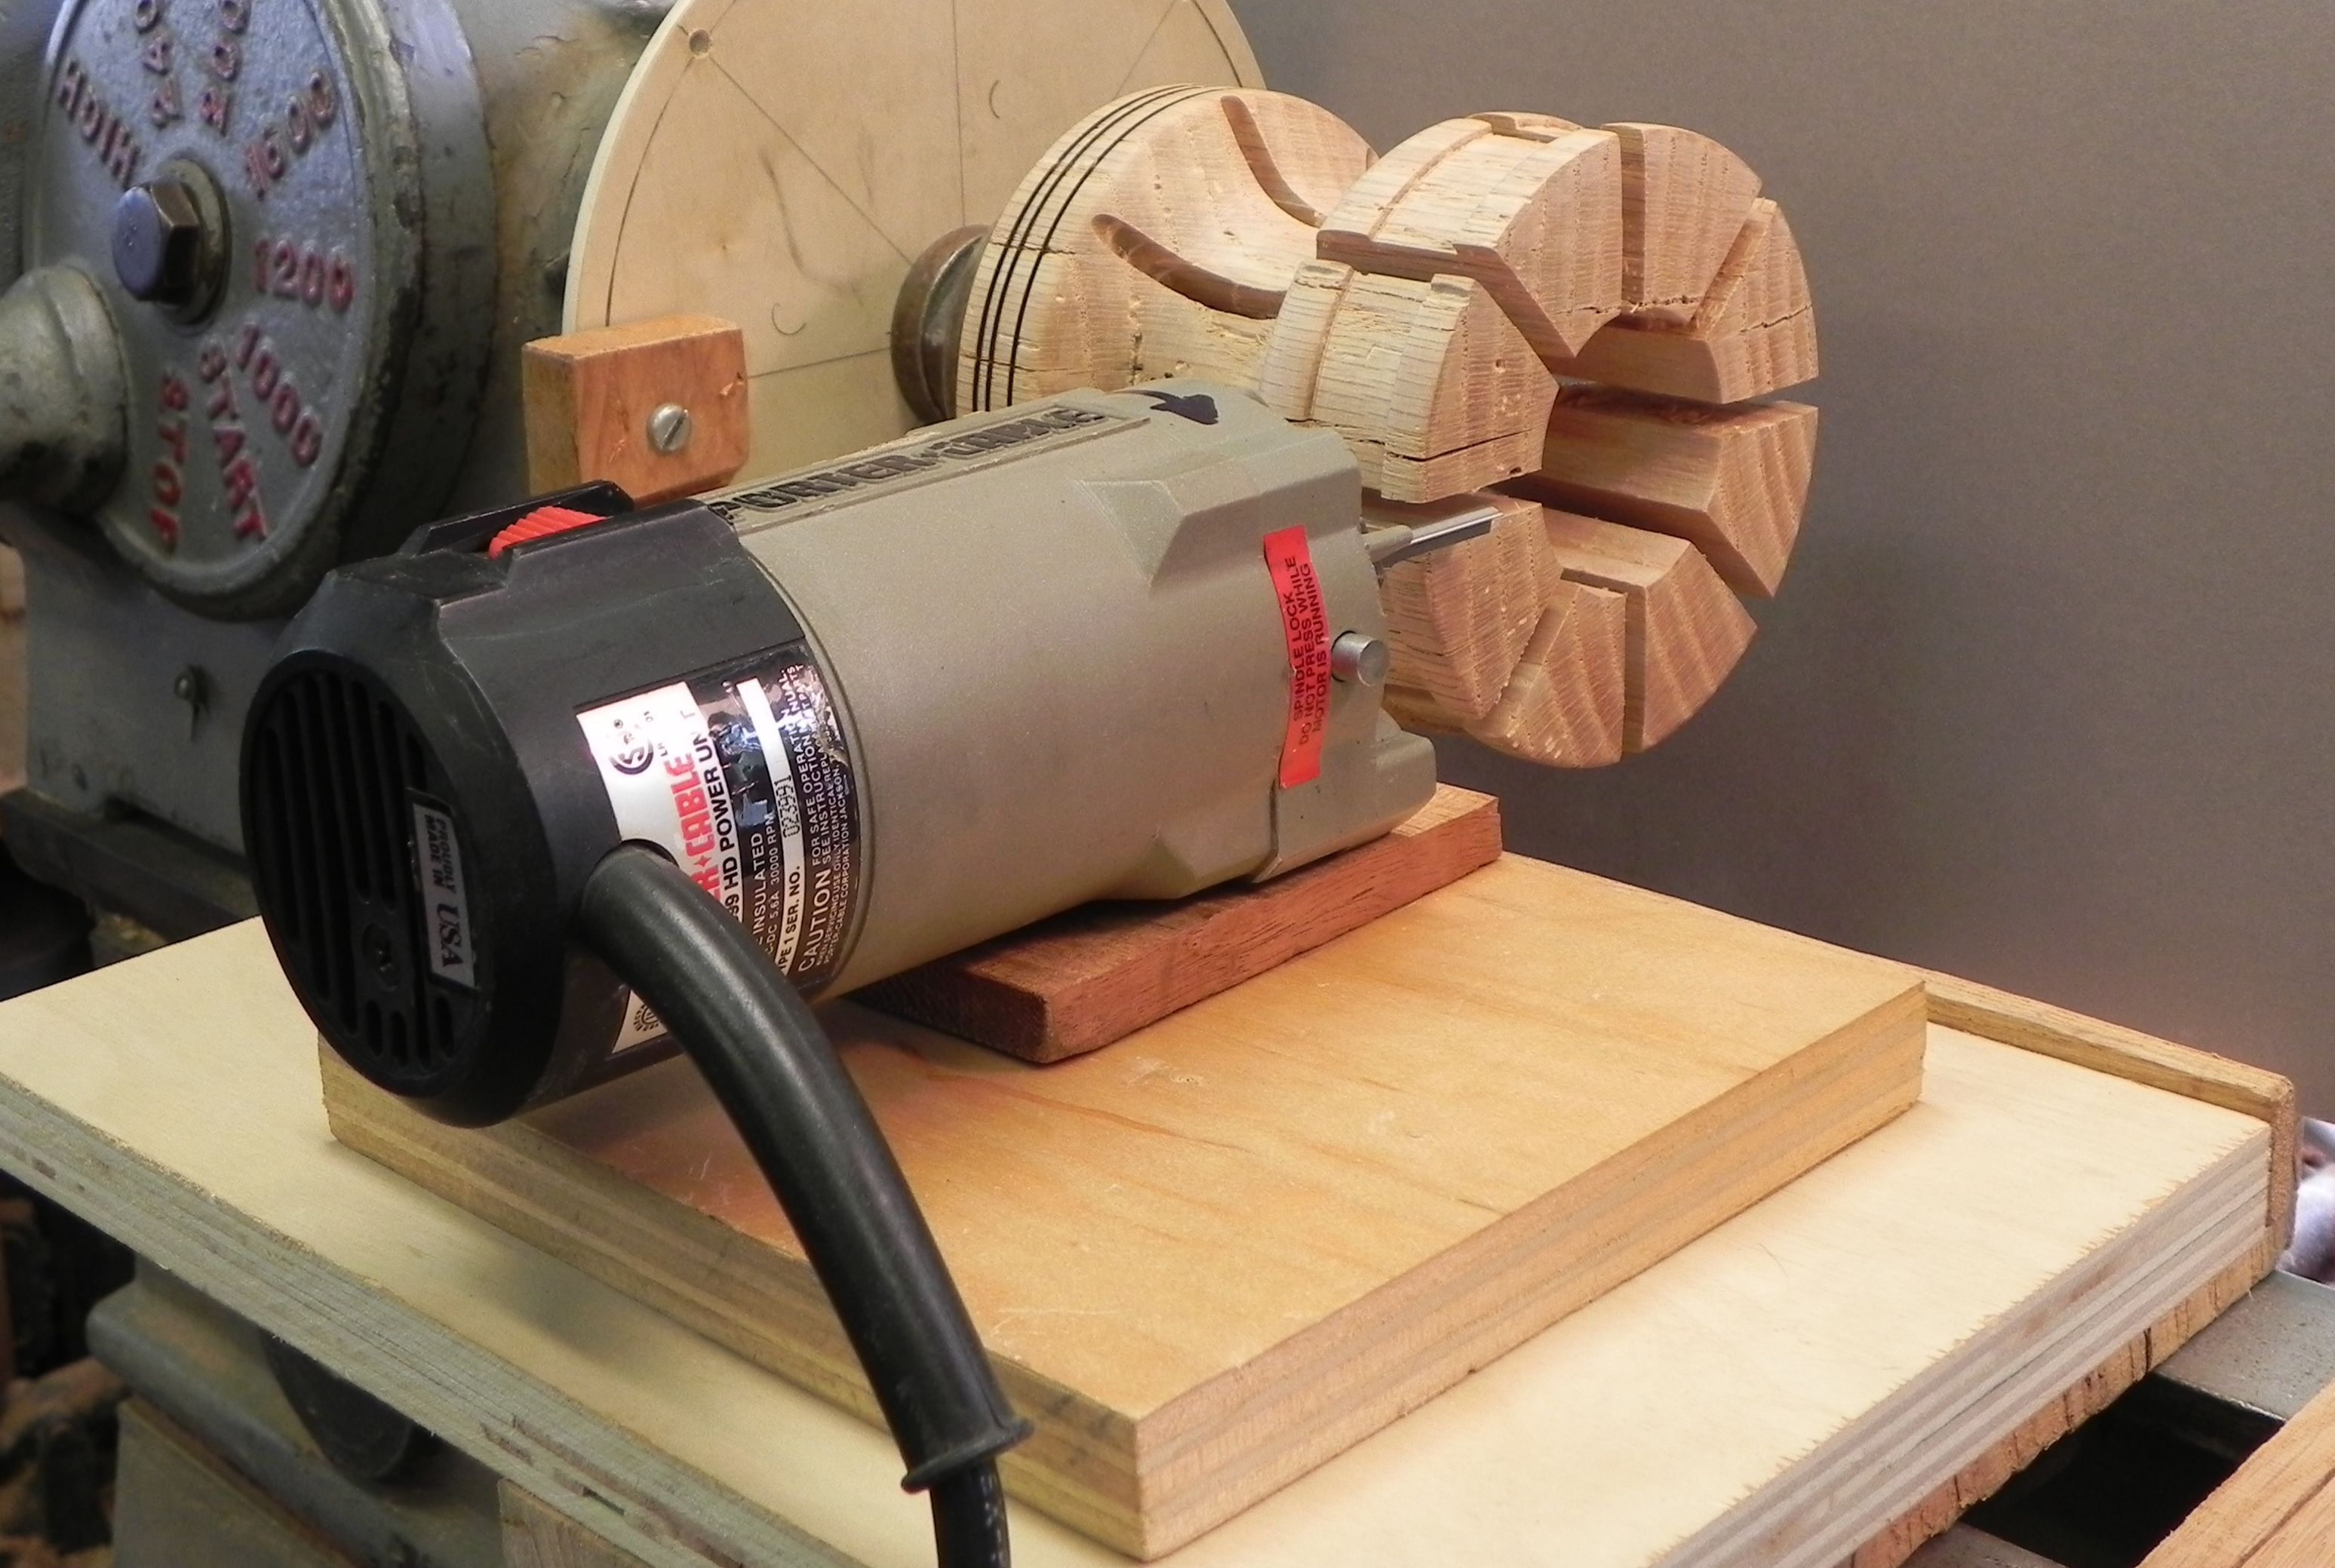
The chuck functions by applying equal pressure completely around the rim of the piece being held (Photo 4). It is important that the inside bottom edge of the chuck jaws is flat or slightly concave for the piece to sit squarely against so it will run true. The inside wall diameter of the jaws can be shaped appropriately for the piece. The key to an appropriate pressure are the long “fingers” with the reduced neck and the wide kerfs. These features leverage the grain flexibility and the strength of the wood to avoid breaking while providing a secure hold. When using the chuck, consideration should be given to wrapping the hose clamp with something to prevent injury–some ideas might be tape, an athletic wrist band, or turning the hose clamp slot such that the wood on either side sits slightly proud of the clamp adjusting screw.
Special thanks to Sue Barton Harris for the photography and Myron W. Curtis (a professional architectural woodturner from Virginia Beach, VA) for the project contribution.





Comments
Wrapping the clamp with something to soften the blow and reduce the damage??????? What did you do to balance that thing? Considering that the clamp knuckle is bulky and heavy, that has to be definitely a wobbler.... More info should have been given, as not all of us who enter here are experts. and some things presented here are not necessarily for the beginner to undertake..... Recommended max speed, etc.... Me, I like making my own tools, jigs and fixtures, but I would give plenty of consideration to buying a precision made compression chuck that would work both externally and internally
Hi usachief,
I recommend you build the chuck and test it yourself. I think you'll find many of your concerns alleviated. I think you'll quickly determine what a comfortable speed is for the chuck and the value of it for reverse chucking compared to dovetailed precision chuck jaws. Would love to see if you are able to adjust your comments after you have given the chuck a go. Who knows, it might not be of value to you in the final analysis and that is okay. However, I 'll bet others find it useful. Thanks for sharing!
Enjoy,
Matt
No photos.
Log in or create an account to post a comment.
Sign up Log in