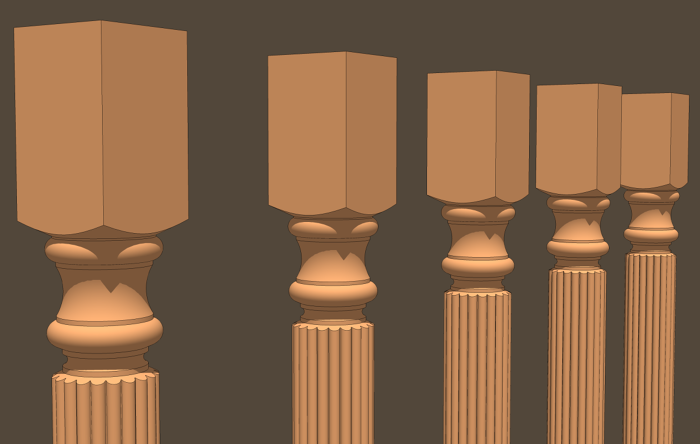
The transitions between round and square sections are a common feature on things such as table legs and columns. Drawing them correctly in SketchUp can be a bit of a challenge if you aren’t familiar with the process but with the right tools it turns out to be quite simple. While it might not be obvious at first, drawing round tenons cut on the ends of square spindles is exactly the same process. Here’s a video to show I deal with these things.
One of the main tools for this is Follow Me. In some other tutorials I’ve done using Follow Me I’ve made the point that you sometimes need to draw the path longer than the part you need to keep. This might be the case for drawing stopped chamfers, for example. I use the analogy of starting a router bit spinning before it contacts the work and not stopping it until after the cutter has moved away from the work at the other end of the cut.
This time, when drawing the profile of the turned section of a leg or column, I tend to think of that edge as being the final cut of the lathe tool. When turning the transition at the lathe, the tool is run off the work gradually. The key to drawing that transition is to draw the profile edge in the same way. Take a look.
–Dave


Comments
Dave . Your choice of subject (the pommel /turned transition) has come at a good time for me , I have been trying to work my way through the turned legs on a table which has a number of pommels on each leg . I have been using the illustrations of a a gate-leg dining from a book which Tim Killen made reference to in a previous posting , Lester Margo's book Construction of American Furniture Treasures , (excellent book by the way)
I have two questions
1) Do you know if there is a way in Sketchup to fix the line of rotation of the Orbit tool ,i.e to swivel the pommels around a centreline as it were ? I would find it valuable to be able to maintain the same view /scale while turning the pommels making it easier to remove the waste after using Intersect .
2) The pommels I am working on have rounded /chamfered for corners . If you were to put chamfers on the pommels in your video at which stage would that be done?
Jonas Mac
Hi Jonas,
1) There isn't a way to lock the center of the Orbit tool but you could switch the camera to Parallel Projection and then use the standard front, right, rear and left views as needed.
2) I gather the square sections of the legs, the real pommels, have the chamfers on them? The easiest way to handle them would be to draw the square section with the corners mitered so it is basically an octagon. Then use Push/Pull as I did. It is possible to take off the corners to create the chamfers after you've made the transition from turned to square but it would be more work than just drawing the chamfers in place before hand.
-Dave
Dave
Thanks for the response .
Enjoy the long weekend!.
Jonas Mac
Excellent video. I tried the previous printed tutorial on pommels, but was not successful. Thanks.
mishad, thank you. I'm happy to know it was helpful.
Jonas, I had a thought about a possible improvement to the process of cleaning up the ends of the reeded section. Instead of moving the reeded section into place in the column, I could have copied the cone surfaces over from the column to the reeded section. The reeded section could be made substantially longer as I did with the square sections. The intersections would be made and the waste deleted. The top and bottom waste portions of the reeds could be selected with a right to left selection box and deleted in one swell foop. The resulting reeded section could then be moved into place in the column.
I don't know why I didn't think of that before.
Have a great weekend, all.
-Dave
Dave,
The video link for pommels is not active on the FWW website. How do I get it please?
Unfortunately I don't seem to have the option to edit this post so here's the link to the video: https://youtu.be/M5UhxUWSfK8
Log in or create an account to post a comment.
Sign up Log in