How To Build Frame-and-Panel Doors by Hand
Strengthen cabinet doors with haunched through-tenons
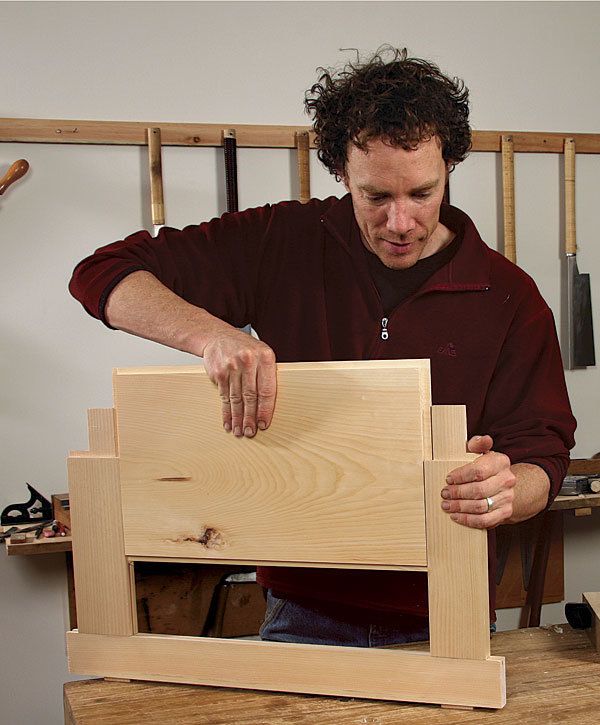
Synopsis: The doors on Andrew Hunter’s country hutch are rock solid. The rails and stiles are joined with haunched through-tenons, which are suited to hand-tool woodworking in a variety of ways: Through-mortises are easier to chop by hand than stopped mortises, and offer the option of adding wedges to the tenons for greater strength. The haunch adds glue surface and increases resistance to twisting, and it also makes the job of cutting grooves for the panels simpler.
I designed the doors for my hutch (p. 64) to be both rock solid and well suited to hand-tool woodworking. I joined the rails and stiles with haunched through-tenons, which deliver maximum strength and a batch of other benefits. When working by hand, through-mortises are easier to chop accurately than stopped mortises, because you cut them from both sides of the workpiece toward the middle. They also offer the option of adding wedges to the tenons for even greater holding power. the haunch itself not only adds glue surface and increases resistance to twisting, but it also makes the job of cutting grooves for the panels simpler. With ordinary tenons, you need to stop the panel grooves in the stiles so the empty groove isn’t visible at the top and bottom of the door after assembly. But the haunch fills that space, so you can use through grooves—which can be cut with a plow plane, a simple process— rather than stopped ones, which are more difficult to cut.
Mortises and grooves first
For these doors, I cut the stile joinery in three stages: First, I cut the through-mortises; next, I plowed the grooves for the panel (in both rails and stiles); then I cut the haunched section of the mortises. If your mortises are the same width as your panel groove, you can skip this third step—the haunch will fit right into the groove. Because I wanted my mortises wider than the groove, I widened the end of the groove for the haunch. I left the stiles an inch or two long until after assembly, to avoid splitting the wood during joinery and glue-up. I laid out all the joinery in pencil, but I also scribed around the through-mortises with a knife.
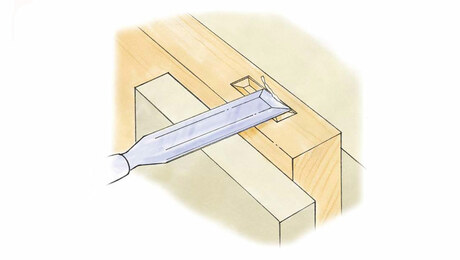
To start the through-mortises, cut a series of closely spaced holes with a brace and bit, drilling from both sides toward the middle. For these 5⁄16-in.-wide mortises, I used a 1⁄4-in. auger bit. With the drilling complete, use a narrow chisel to chop the ends of the mortise and remove the waste between the auger holes. Clean up the sides of the mortise with a wider chisel—1 in. or so. then, with a plow plane, cut the 1⁄4-in.-wide through-groove for the panel, making sure to locate it entirely within the width of the mortise. Once the grooves are cut, widen them at each end to accept the haunches. To cut the haunched tenon, first rip the narrow cheeks and make crosscuts to remove the waste. Then rip the wide cheeks and crosscut their shoulders. Shave the tenons to an exact fit in the mortises with a chisel or rabbet plane.
For the full article, download the PDF below:
Fine Woodworking Recommended Products

Festool DF 500 Q-Set Domino Joiner

Veritas Precision Square

Leigh D4R Pro


Log in or create an account to post a comment.
Sign up Log in