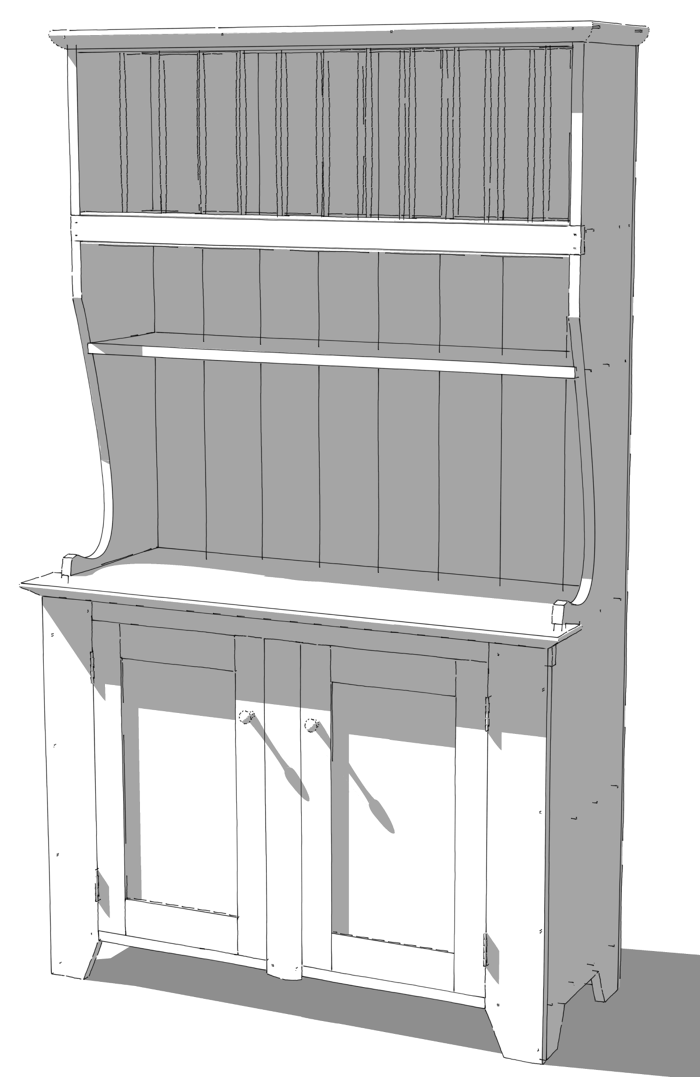
Once you’ve got the SketchUp model for your project detailed, you might be ready to head off to the shop. But maybe you’d like to know how much wood you’ll need and how large the various parts are. You can figure it out manually with pencil and paper or manually enter the dimensions into a cut list program but there’s a better way. Let SketchUp give you that information automatically using the CutList plugin by Steve R. Here’s a quick look at the interface.
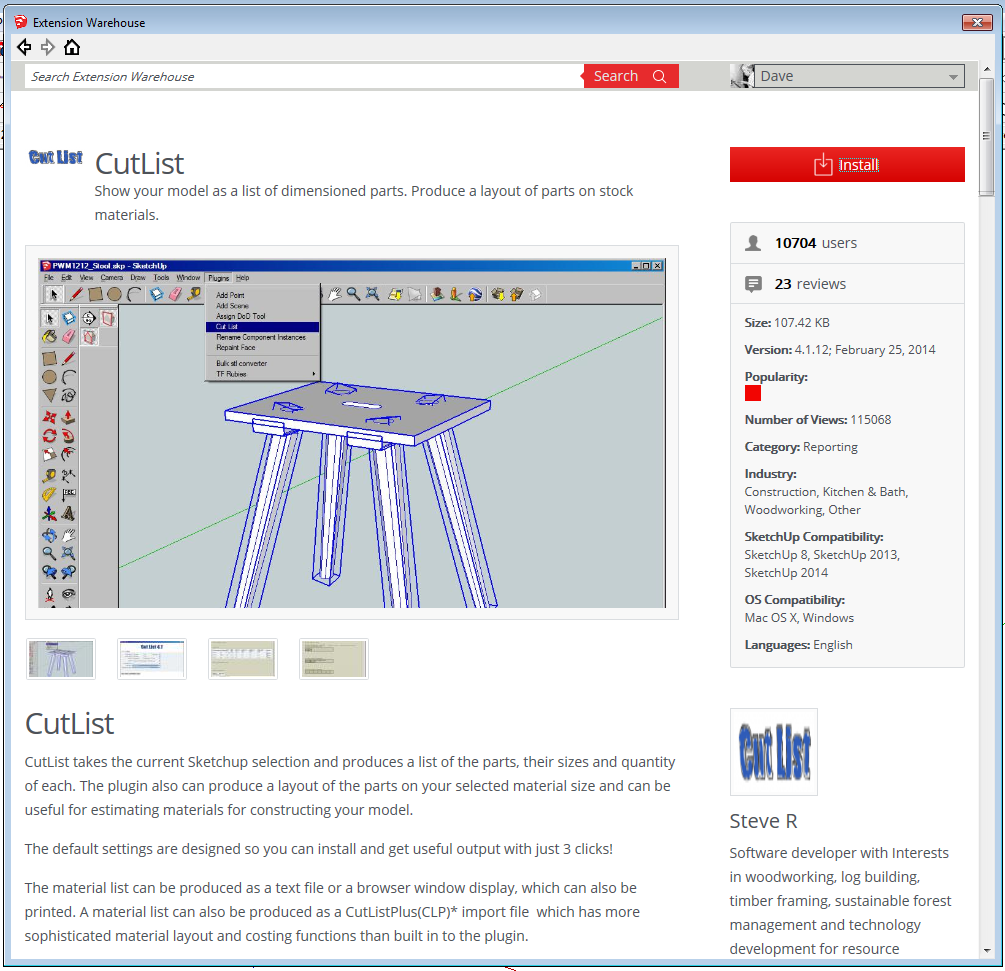
First, whether you’ve already got the plugin or not, go to the Extension Warehouse (EW) and get the most recent version. The best way to do this is to access the Extension Warehouse under the Window menu. If you’re using an older version of sketchUp that doesn’t provide access to the EW, download the plugin from the link, above. It’ll download with the extension .rbz. If you are using SketchUp 8, Maintenance Release 1 or later, you can then go to Preferences>Extensions, click on Install Extension… Navigate to where you saved the downloaded file, select it, click Open, Yes and OK. Close the Preferences window and to make sure the plugin is fully loaded, quit SketchUp and restart it. If you are getting it directly through the EW in SketchUp, just click Install and answer the questions in the popup boxes.
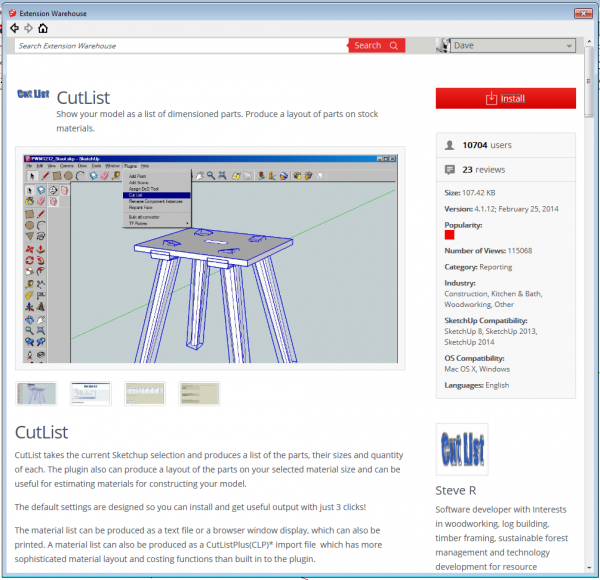
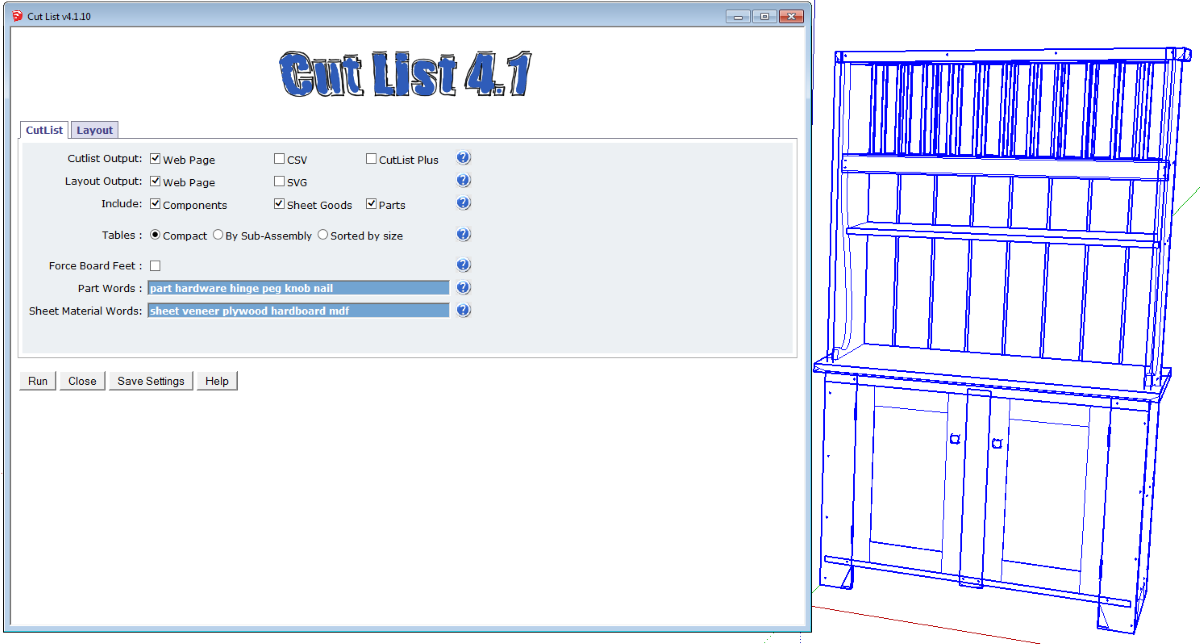
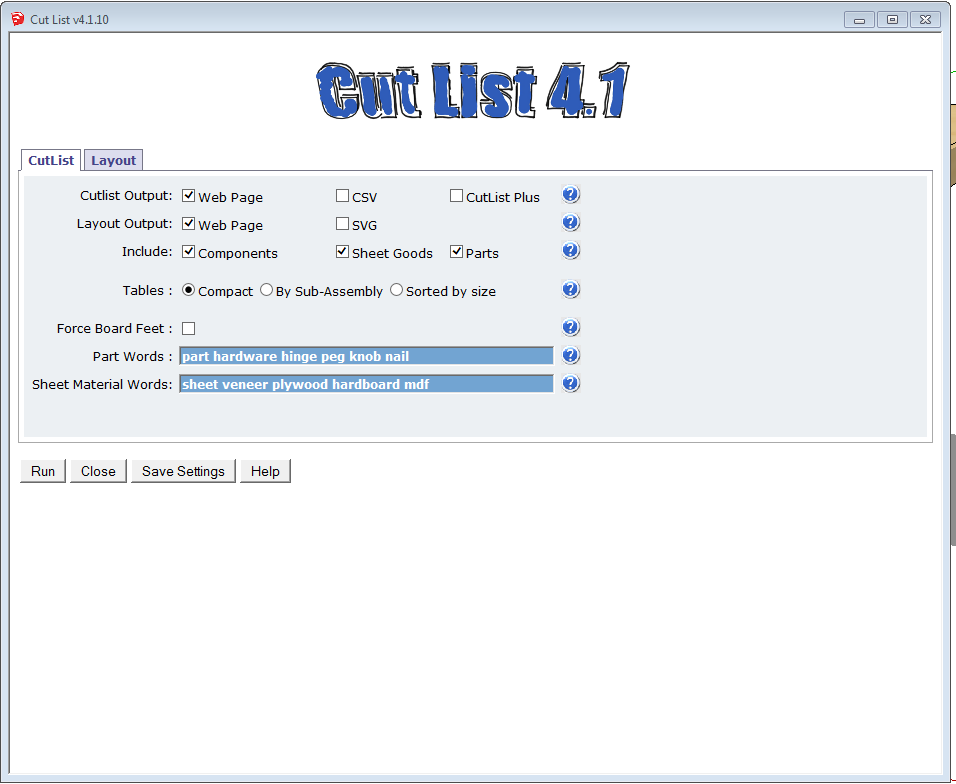
When you open the CutList interface you’ll see something like the following.
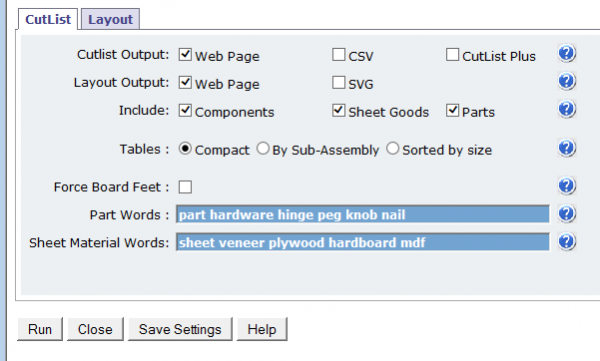
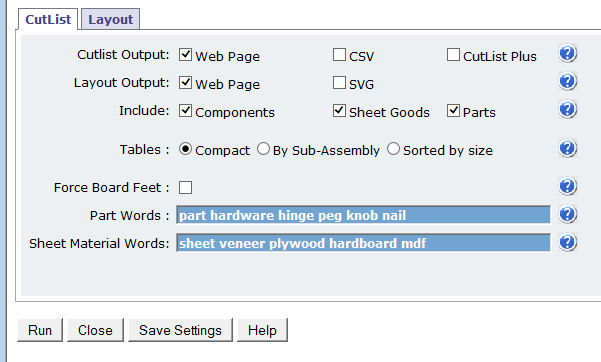
These are some general settings for the cut list and layout outputs.
Web Page is an HTML display.
CSV With this ticked a comma separated values file is saved in the same directory as the SketchUp model. I use this option all the time for plans I create. The plugin actually gives much more information than I need to show and I always want to rearrange the content of the list. I do most of the editing in Excel and finish up in Word to get the cut list looking the way I want it.
CutList Plus if this is ticked a file is generated in the format expected by that program. SVG creates scalable vector graphic files for the layout images. For those of you using Macs, if you want the layout images, you’ll need to tick this box.
The next set of tick boxes are used to determine what categories will show in your cut list.
Components Typically this would be for all the parts made out of solid wood. Any component definition names that don’t include either Sheet Material words or Part words will get listed here. Only components listed here will be included in board foot calculations.
Sheet Goods Plywood, veneer, MDF, etc. Component definition names containing a word from the Sheet Material words list, will be included here.
Parts Hinges, knobs screws, etc. If your component definitions include a word from the Part words list, they’ll show up here.
Under Tables, you can choose to make either a compact cut list or divide it by sub-assemblies as well as sorting the list by the size of the parts.
Force Board Feet Ticking this box will result in volumes being displayed as Board Feet even if you have metric dimensions. Otherwise, with metric units the volumes will be given as cubic meters.
Part and Sheet Material Words These are words that determine where in the cut list the components get shown. You can add words as desired by typing them into the appropriate lines. Then make sure you use these words in the component definition names.
After you’ve made the desired selections here, click on Save Settings so they stick.
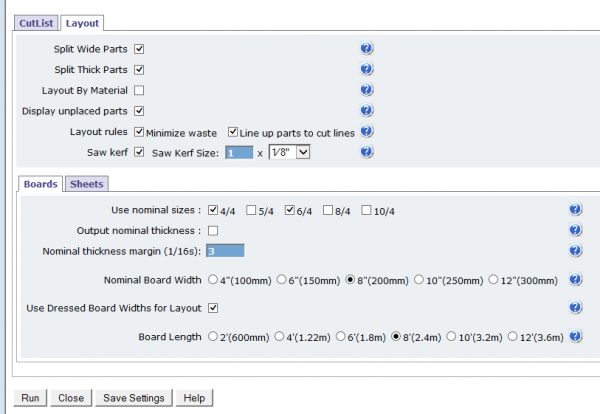
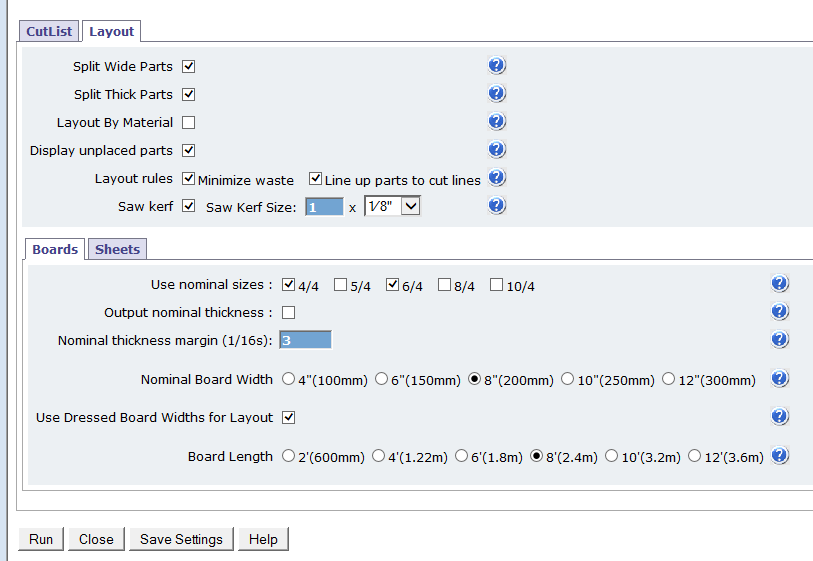
Clicking on the LayOut tab gives you a bunch of settings used for directing the way the layout images look. If, when you open this page there’s no value in the blue Kerf Size box, type in 1 and click Save Settings.
The bottom section allows you to set the nominal settings for boards.
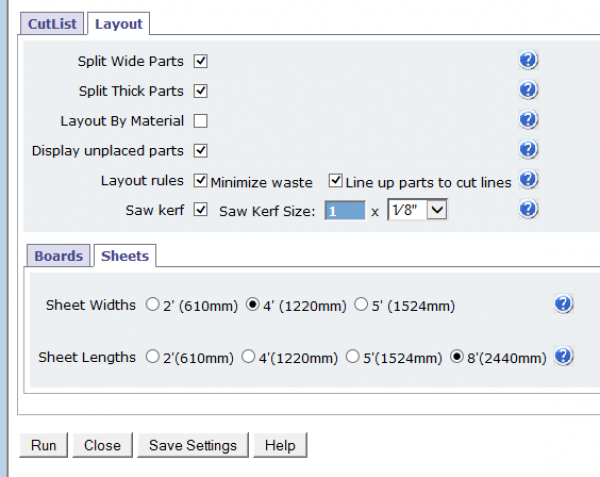
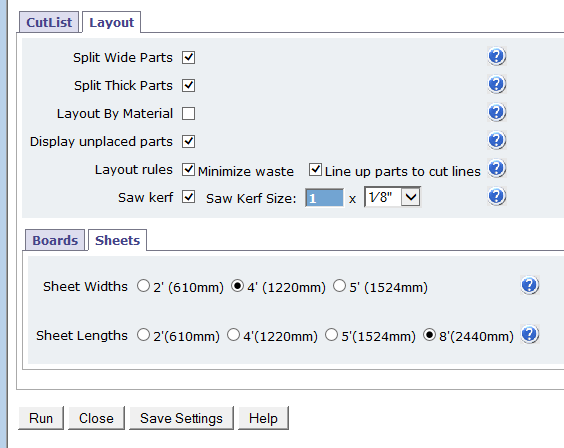
And under the Sheets tab you can set the size of the sheet materials you have access to.
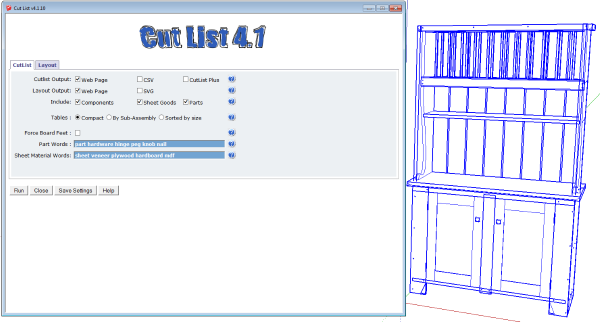
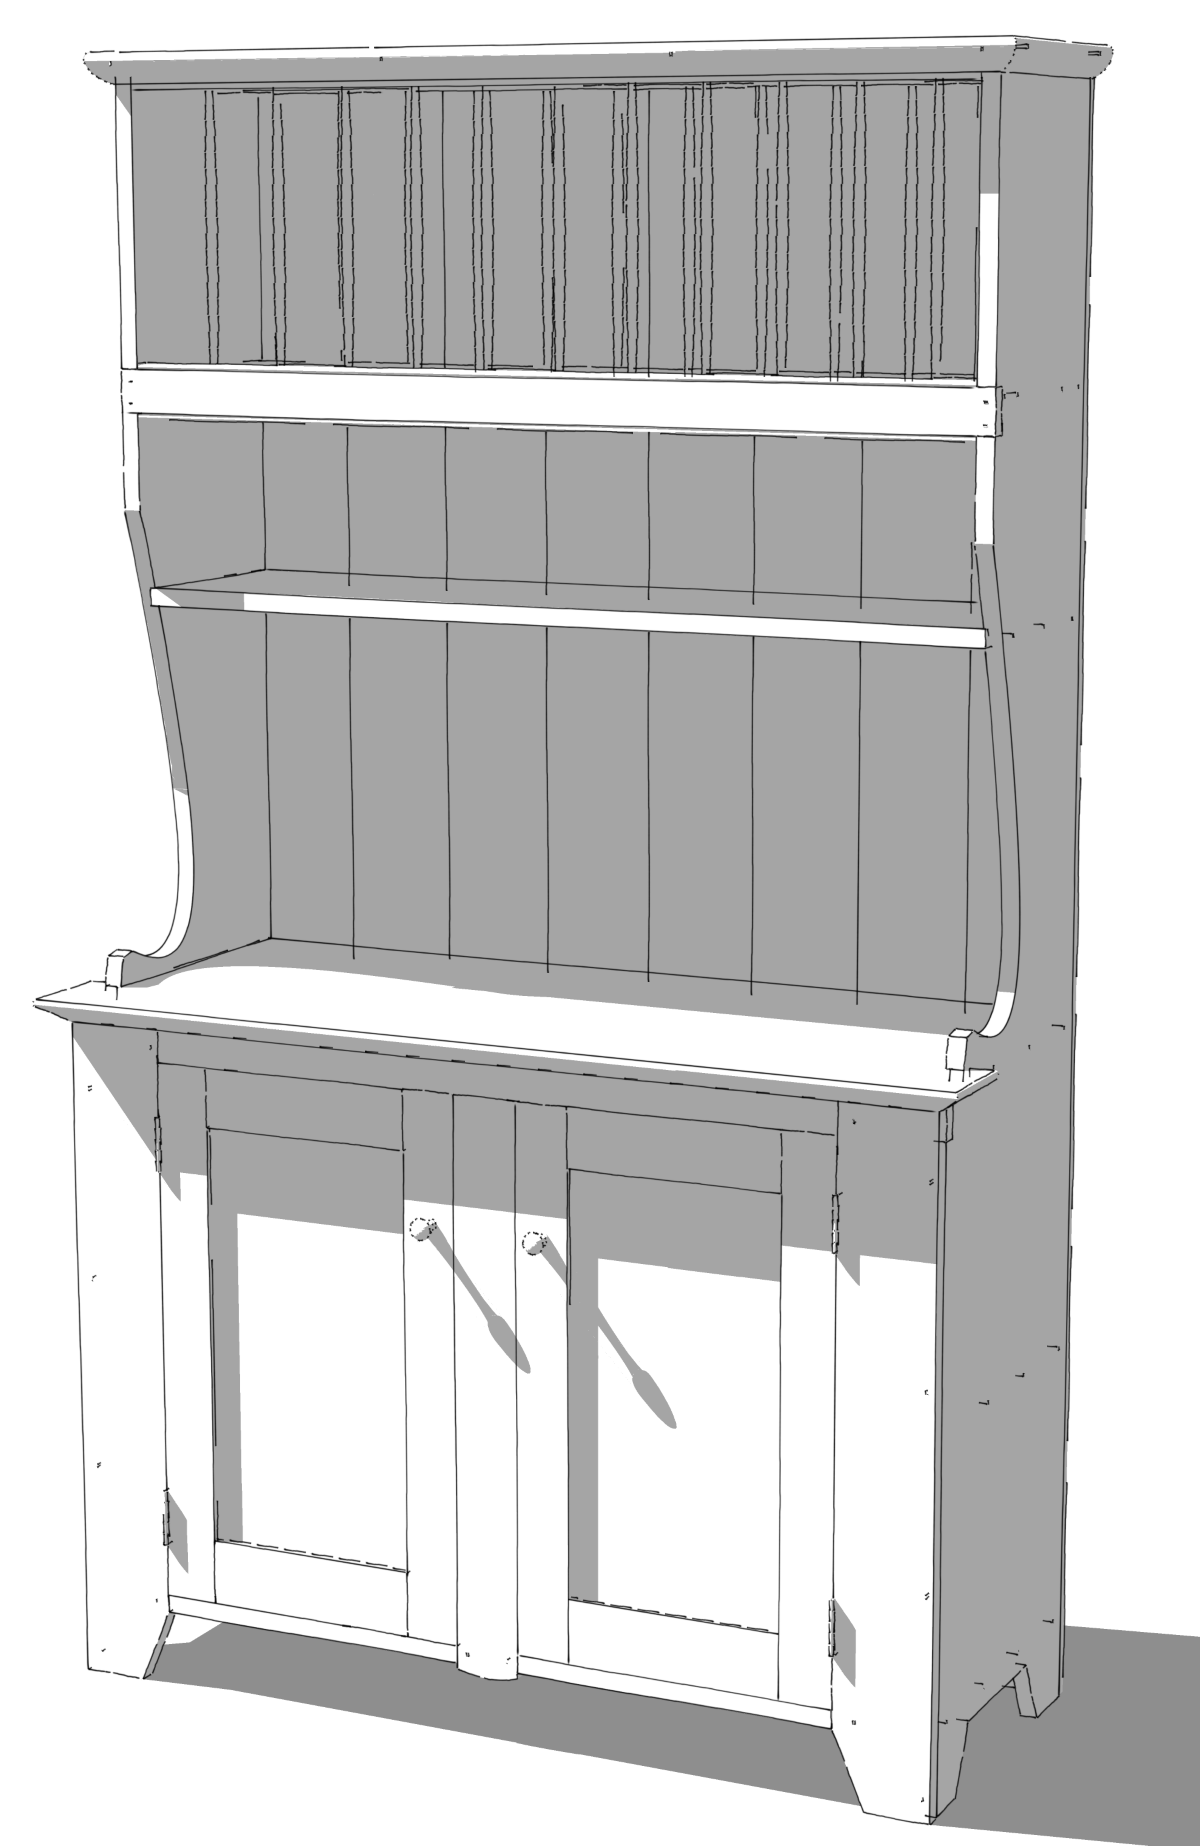
When you’re ready to run the cutlist, open the interface from the Plugins folder. Then click on Run. I’m using the SketchUp model I made for Andrew Hunter’s Country Pine Hutch and because there are other copies of the parts for various views in the model space, I’ve selected what I want to include in the cut list. If you select nothing before hitting Run, the plugin will ask if you want all of the components to be included. If I did that I’d get bloated numbers for quantities and board foot calculations.
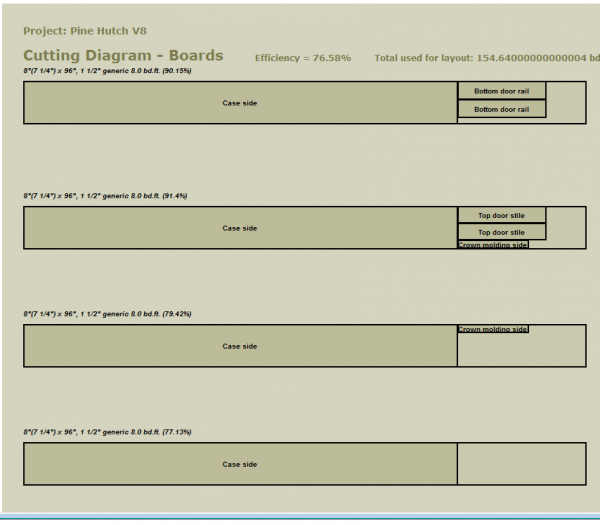
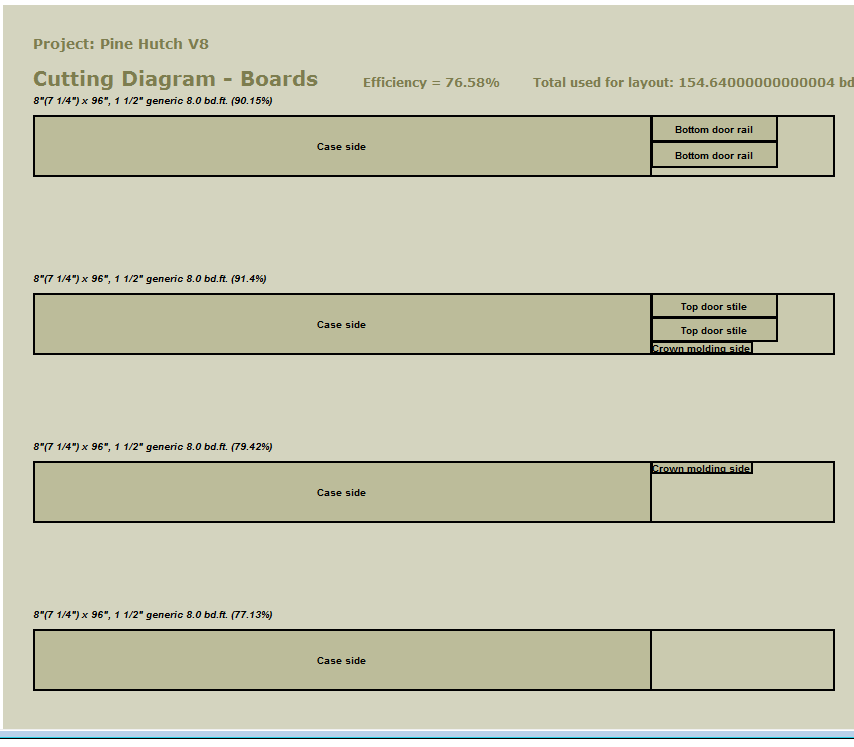
This is part of the layout web page display. As you can see, the case sides get divided into pieces based on the width I set for the boards.
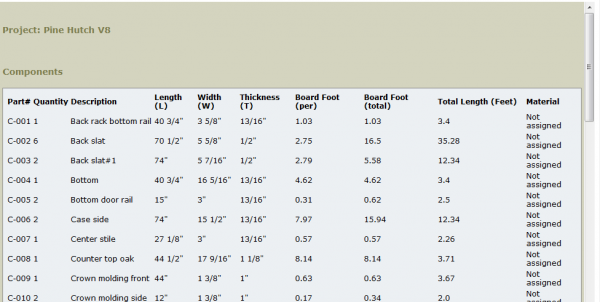
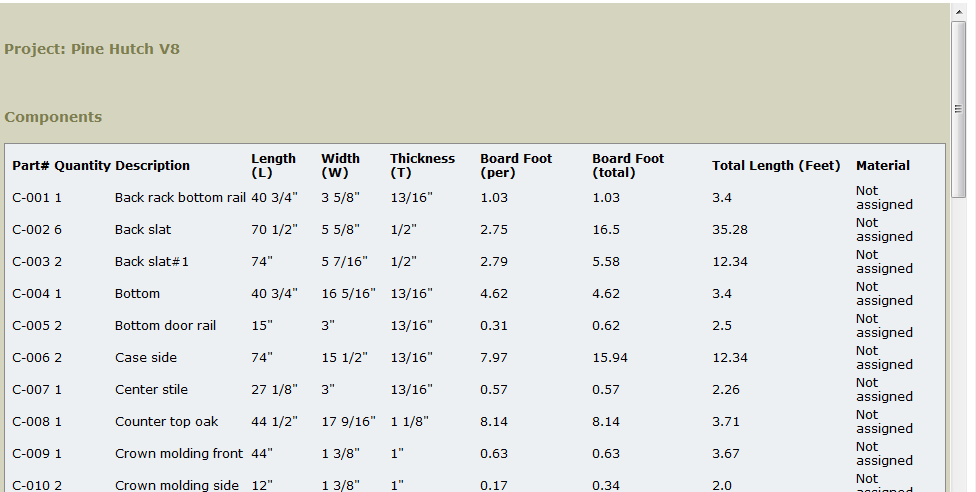
This is part of the cut list web page. Since I haven’t applied an materials to the parts in this model, The Material column shows “Not assigned”. If you do use materials in your model, they’ll get listed in that column and the cutlist will divide the board foot calculations by materials.
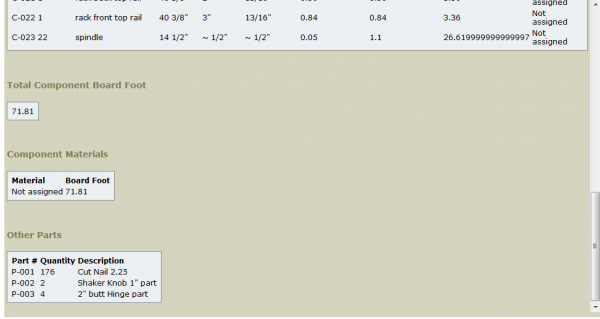
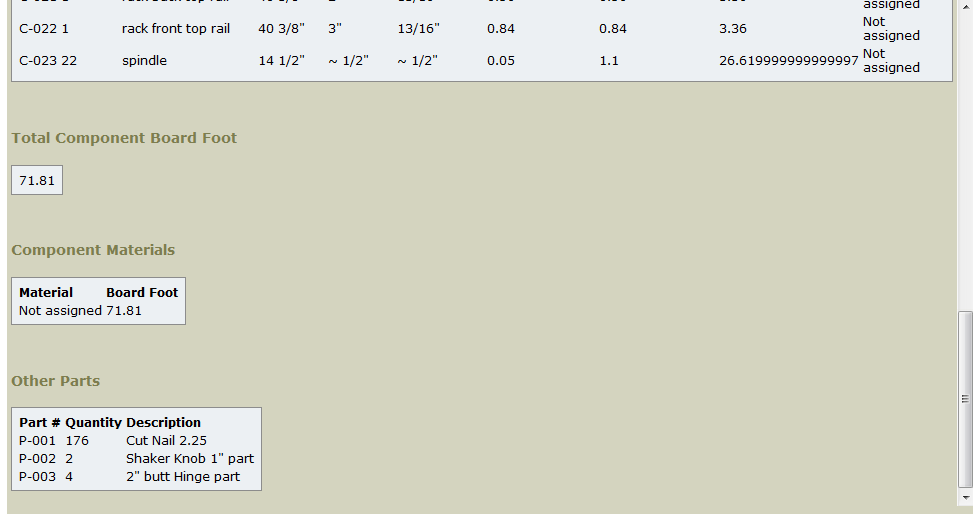
Here’s the bottom of the cut list web page. There are no sheet materials in the model so no sheet goods section is displayed.
Getting a cutlist is very fast and easy but remember, this is a computer we’re dealing with and GIGO (Garbage In, Gabarge Out) applies. The cut list’s accuracy is dependent on how well you’ve drawn your model. Here are some things to keep in mind.
–Give your components useful names so you can identify them for what they are in the list. Some folks like to use groups instead of components because they aren’t bothered by a window asking for a name. The plugin will work with groups but imagine how useful the cut list above would be if all the parts were called ‘Group’. If you use groups, you’ll need to go back and edit the names of the parts.
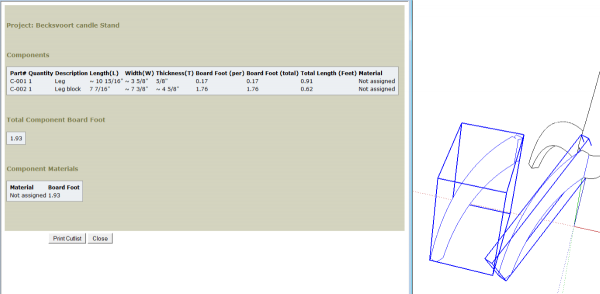
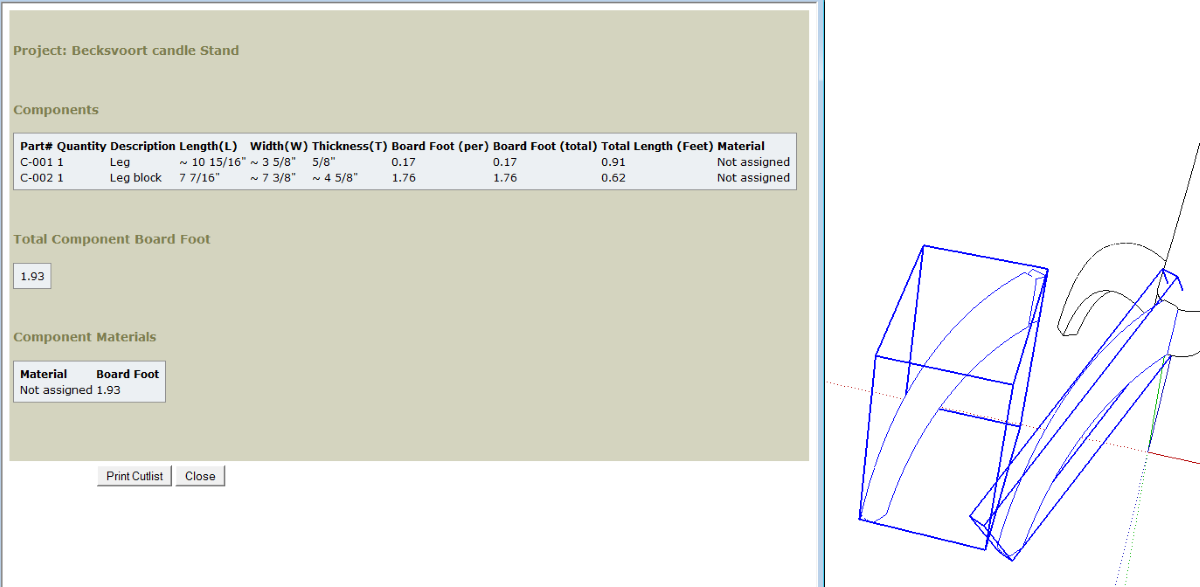
–Dimensions given in the cut list are based on the size of the bounding boxes of the components in the model. If you have components that are positioned at angles, take a few moments to properly align the bounding box to fit the part correctly. In the example below, I made a copy of one of the legs of Christian Becksvoort’s Candle Stand. I exploded that copy and made it as a new component I called Leg block. Compare the dimensions given in the resulting cut list. Note that you don’t get an option to change the axes for groups. It is possible to correct the bounding box orientation on groups but it is a lot of work so I won’t go into it now.
–If you plan to make a CSV file or a file for CutList Plus, don’t use commas in the component names. The commas will skew the contents of the columns in the resulting file.
In addition to creating the cut list for the model I’m working on, I also use this plugin as a way to make sure all of the parts are the correct size. It’s a quick way to make a quality check before going on. I’ll run only the web page cut list and do a quick look down the Length, Width and Thickness columns. Although I never intentionally draw any part with a dimension in 64ths of an inch, I work with Precision set to 1/64″. When I look at the dimensions in the cut list, I’m looking for dimensions with 64ths and/or ~. Both of those things give me clues that parts might need attention. It doesn’t always mean there’s an issue but it might. For example the spindles in the cut list for the Country Pine Hutch show ~1/2″. That doesn’t surprise me because those are shaped by hand with a spokeshave or draw knife and aren’t perfectly round. On the other hand, if the case sides showed as 15-33/64″ wide, that would raise a red flag for me and I would go back to the model to find out what’s going.
Since the size of the bounding boxes are used to get the dimensions, make sure you don’t have stray lines, extended lines, dimensions or text included or those things will cause incorrect numbers. Look to see how the bounding box fits the geometry that you know is the part. If it doesn’t fit as tightly as it can, correct it before making your cut list.
In a nutshell, do clean and accurate modeling and the cut list will be clean and accurate.
Now go give it a try.
–Dave



Comments
Dave
How do you resize something the is coming out as ~1/8 vs 1/8.
I did some scaling on drawers and a bunch of dimensions went this way. I try to type in dimensions every time but still get the ~ on some dimensions. Your reader need to know that if the dimension error is in thickness, Cutlist uses a separate piece of wood.
Tom
Tom, although it seems logical, you shouldn't use the Scale tool to resize parts. As you've found, you can wind up with incorrect dimensions. Instead, use the Move tool. For example, suppose you have a dovetailed drawer and you want to make the drawer wider by 6 inches. Open the drawer front component for editing and use the Select tool to drag a left to right selection box around the right end of the front. Make sure you are selecting all of the geometry that makes up the dovetail joints on the right end. Then get the Move tool and move the selection 6 inches to the right. Repeat the process for the drawer back and bottom components. Move the entire right drawer side over to the right 6 inches, also and you're finished. This process may seem like a lot of work but once you do it a time or two you'll find it goes quickly and you'll find the payoff in the accuracy of your cut list, too.
By the way, scaling the drawer front would also result in a distortion of the dovetail joints. Consider a rail with tenons on the ends, too. If you scale it along its length you also scale the length of the tenons. Again, using the Move tool eliminates the issue.
You can see that process with the Move tool here: https://www.finewoodworking.com/item/107847/working-efficiently-in-sketchup
As to the thickness and a separate piece of wood, you're right. If the component thickness is different from other parts, CutList will separate it to a different board than the other parts. If that thickness ends up being more than you can get out of a single board based on the settings you've made, it'll show that component requiring more than one piece in the same way the case sides in my example screen shots got split because the sides are wider than the available boards.
-Dave
Not using dovetails in my drawings. Anyway other than completely redrawing, is there a way to change from ~ to accurate? The only way that I found that works is to delete the line that is bad and redrawing it. With each board having 4 corners it is a tedious job. I have 15 different size drawers with face, sides, bottom and back. Although all are not wrong it is very frustrating.
This is the first time using the scale tool in this manner, Too bad it didn't work. A lot better than using move tool. Oh well.
Ah, but as you've found out, the Scale tool isn't better than the Move tool if it results in incorrect dimensions. And using the Scale tool has resulted in more work for you.
When I get models from others that require fixing for these sorts of precision issues, I look at possibly using Push/Pull and/or the Move tool. I would set a guideline off a good reference edge and use that as a snap to line. If there's a lot of parts to fix, though, it may be just easier to redraw them with the proper sizes.
If you want to send me the model, I can take a look and give you better details about how to fix it.
-Dave
Dave r/t SchetchUp Cut List,
I downloaded it from the Extension Warehouse, but since the file has an extension of .rbz I can't open it.
Can you tell me what Windows program you use to associate it with & to open it?
As I outlined in the second paragraph above, to install plugins/extensions with the .rbz file extension, go to Preferences>Extensions and click on Install Extension... Navigate to where you've saved the .rbz file, select it and click Open, Yes, OK and whatever other affirmative responses are needed.
Preferences are found under the Window menu on PC and under the SketchUp menu on Mac.
If you haven't got the Install Extension button you're using a version older than SU8M1 and should upgrade. If you're still having problems, drop me an e-mail by clicking on my name, above, and we'll get you fixed up.
Dave is right. Using the Move tool is the way to go for resizing. Do this 3-4 times and it quickly becomes your preferred method.
For fixing ~ dimensions, I often go outside of a component and draw a temporary line at the correct location(where Dave draws a Guide line). I edit the component and Move the end to that line(snapping it in place). Exit the component, and then delete my temporary line.
As for the cut list, I have never seen a use for the cut list add-on. Mainly because I can count on one hand when I've ever built something from standard size lumber. I guess if you live in a perfect world where HD is behind your shop and you have absolutely no scraps left in your shop, then it might be useful. :P
You can try to reduce the appearance of the ~ by increasing the precision in the preferences.
You're right, Carsten. I always use 64ths for Precision which generally minimizes the appearances of the ~.
Log in or create an account to post a comment.
Sign up Log in