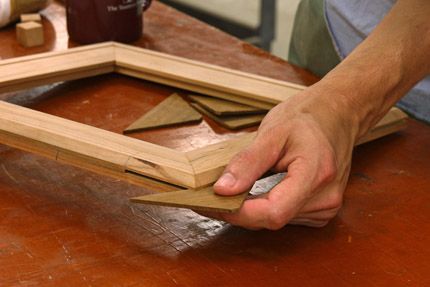
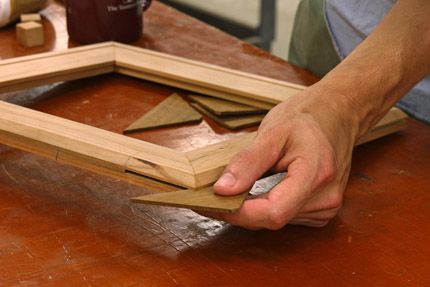
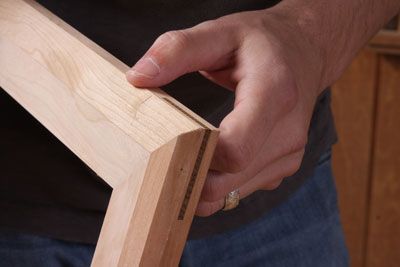
Some dark-grained wood from the scrap bin made nice splines. I machined them for a good fit and cut them into oversized triangles. Then I put on some glue, pushed them all the way in, and let them dry- no clamps needed!
Miter joints are probably the most common joint used to make picture frames, and they are popular for cabinet doors too, but they aren’t that easy to get traditional clamps on. I’ve seen a lot of ways to clamp miter joints- the corners usually tend to slide around with traditional clamps because the pressure isn’t delivered squarely across the joint, so it’s a pain to get them all lined up.
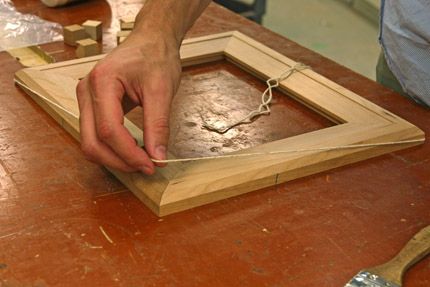
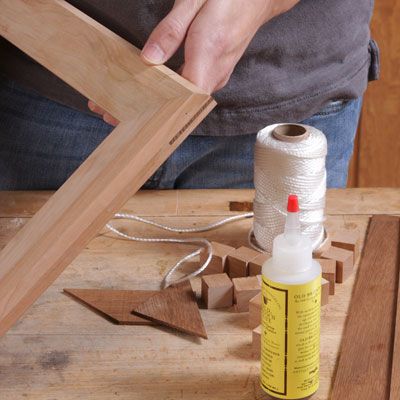
This method that I learned from Lance Patterson is my go-to for miter joints- it just works great and doesn’t require any fancy gear- all you need is some heavy weight string and a bunch of square wooden blocks- I used some mason’s twine (cotton string holds a knot better, but it’s what I had…) and made a bunch of 3/4-in. square blocks from some scraps of frame material.
This “string and block” method also naturally holds the corners together in the proper alignment, which makes your work a lot easier once you put the glue on and the clock starts ticking…
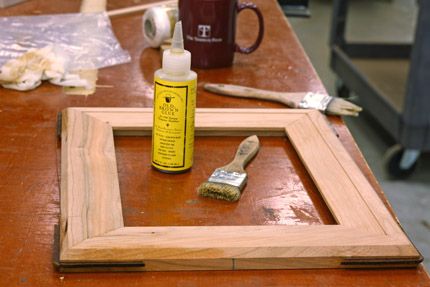
Using this technique is pretty straightforward. I cut the miters and smoothed the machine marks on the inner surfaces of the frame with a card scraper and sandpaper, leaving the smoothing on the outer edges for after the glue up. Next I got out my string and cut a piece that would wrap all the way around the frame, with about a foot extra to make it easy to tie a knot.
Tie the string in a loop that’s just a little smaller than the frame- I use a square knot- it needs to hold without slipping, but keep that in mind you may have to undo it a few times to get the right fit. The string should stretch tight when you put it on the frame.
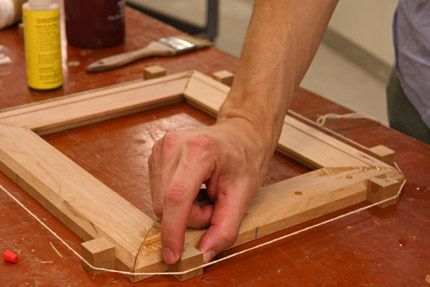
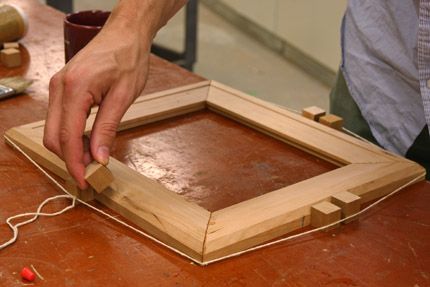
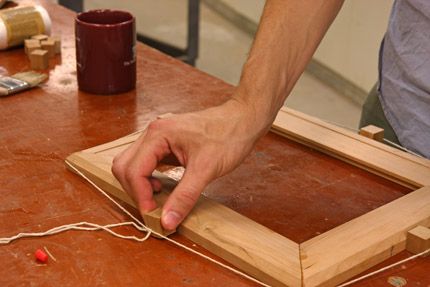
Next I glued each corner and put the string on, and checked to make sure each corner was even and flat, then started working my way around popping the blocks under the string on each side one at a time, then added a second block to each side the second time around.
Once all the blocks were in, I slid them towards the corners, which increases the clamping pressure on the whole frame, and also directs the pressure directly across the miter joints, to pull them closed tightly. Then it was time for dinner, so I set the whole thing aside so the glue could dry overnight.
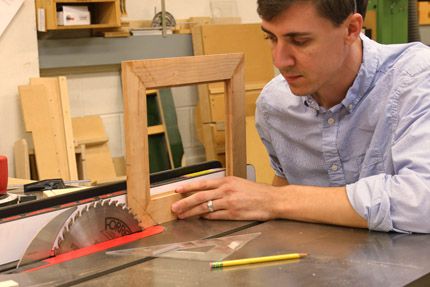
The next day I added the splines. I took the string and blocks off of the frame and started setting up to cut the mortise for the splines with a stopped-cut on the tablesaw. After using a square to lay out a spline on the frame, I raised the blade until it would cut a near- 45 degree mortise into my frame. I marked where the cut would start on the throat plate of the saw, and cut to my marks on the frames.
Since the tablesaw blade made a mortise about 1/8-in. wide, I milled the splines to fit them, using a nice dark-colored wood from the scrap bin to contrast with the cherry frame, and glued them in. After that, the corners just needed a quick trim of the splines and some sanding to clean them up. The most time-consuming part of the job was letting glue dry- I think I spent about $5 on string, and now I have a new custom-made picture frame for the baby’s room.




Comments
Good job
A very cool method I am eager to try. One small point (trivial really, since your method obviously works): a square knot is in fact a slip knot. They don't tell you that in scouts, but it's true.
Interesting. The picture that caught my eye the most showed you checking blade depth for the splines. If I am following correctly: you are not using a sled. You are just pushing each corner into the blade and then pulling it back. Is that rigth? If so, the "inner back wall" of the spline will be curved at the radius of the blade. Is that correct? If so, I really like that approach. Neat.
Also, here is a great knot for the loop of string. (found these links on the web, no clue about the sites, but the images are good)
First, put a bowline on one end of the string.
http://www.thomasalspaugh.org/pub/crg/knots.html.
Then put this on the other end and use the bowline as the substitute for the fixed "eye" shown at this link.
http://betterthangranite.blogspot.com/2009/10/truckers-hitch.html
These are great and easy to "draw up snug".
I really think a sled would make the process of cutting the spline slot a whole lot safer. Having driven wood into my thigh with kickback, you're just begging for a disaster with this setup. If you must use it, at least use a tall auxiliary fence that prevents tipping.
For seventy $ you can buy a miter vise. Using hide glue you can knock out splined miters all afternoon.
Thank you for sharing Ben, I work on frames all the time and am always short on corner clamps, this will be of tremendous help in my shop.
Just used a variation of this technique on a larger picture frame. Instead of string I used a lashing strap I use to hold my surfboard on the roof-rack. I pulled it taunt and let the block do the rest. Worked great!
Log in or create an account to post a comment.
Sign up Log in