Sturdy Stool for Home or Shop
Comfortable and quick to build, this cherry stool with leather seat fits a workbench or a kitchen island.

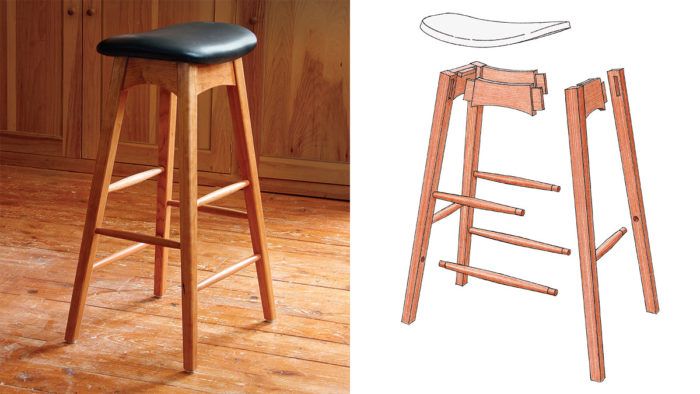
Synopsis: This cherry stool by Christian Becksvoort has all the elements of simplicity and comfort: square tapered legs, round rungs, arched rails, and a curved, upholstered seat. The legs are tapered on their inside faces and the corners eased with a router for a more rounded look. The seat rails are attached to the legs with angled mortise-and-tenon joints. Becksvoort turns the rungs on the lathe, but you could shape them by hand instead. The curved seat is a lamination of five sheets of 1/8-in. plywood.
I built this cherry stool with a leather seat to use in the kitchen, but to my wife’s dismay I kept carrying it out to the shop—it turns out to be perfect as a bench stool when I’m chopping dovetails. I’ve also taken it with me when I do shows, where I need a seat that’s comfortable all day long. It fits the bill for all three uses, and it doesn’t take long to build.
I started by making a full-scale drawing, something I rarely do. I can visualize most rectilinear furniture in my head, but for chairs, which have few flat surfaces or right angles, a full-scale drawing is a necessity. Forty minutes with a piece of cardboard, and I had all the primary elements down: square tapered legs, round rungs, arched rails and, for comfort, a curved, upholstered seat.

I gave the stool an overall height of 29-1/2 in., which works well with our high kitchen counter and my tall workbench. As a rule of thumb, a seat should be 11 in. to 12 in. lower than its mating table or counter. So a stool for a 36-in. counter should be about 24 in. tall. To make the stool as comfortable as possible, I decided on an upholstered seat, but I sent it out to be upholstered. If you like, give it a try—it’s not a complicated job.
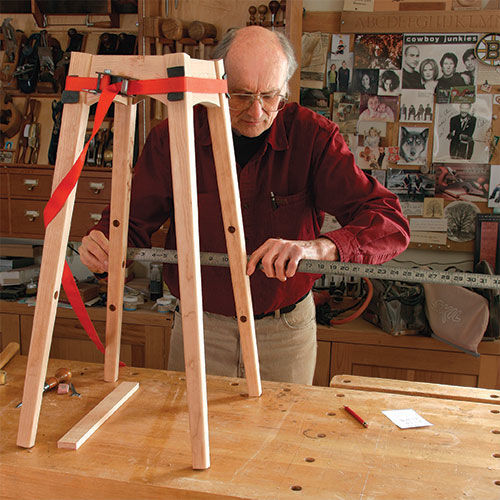
I made the legs with straight-grained stock and tapered their inside faces. I used a shopmade tapering jig on the tablesaw, but cutting to a line on the bandsaw would also work. Once the legs are tapered, mark them on top so it’s easy to keep track of which is which and how they are oriented. To give the stool a softer, less angular look, ease all four corners of the legs at this stage with a 1⁄4-in. roundover bit on the router table.
Then it’s on to mortising for the seat-rail tenons. I did this with my horizontal mortiser, but any other mortising method would be fine. Whichever technique you use, be sure to register off the outside—untapered—face of the leg, so that the face of the seat rail will be parallel to it. I cut the round mortises for the rungs at the drill press, using a 5⁄8-in. brad-point bit. I tilted the table to match the leg-to-rung angle and drilled about 7⁄8 in. deep.
For the full article, download the PDF below.


Comments
My next project -badly need a shop stool and a few counter stools in the kitchen as well.
Does the leg taper begin at the top or below the aprons?
The taper starts below the mortise and provide enough area for a flat surface below the mortise for the rail to sit on. Make a tapering jig and start the cut on the table saw from the bottom of the leg and daylighting the cut below the mortise leaving enough for the rail to sit on a flat surface.
Guess I don't quite understand this. If the taper begins below the mortise then the splay angle of the leg inside surfaces will be a bit
larger than the angles cut in the rails (by about 3/4 degree). This
will require the mortises for the rungs to be drilled at this increased angle, not at the tenon shoulder angle of the rails. Taking the taper all the way to the top of the legs still leaves a flat surface for the rails to sit on, so I don't see a problem there. What am I missing?
Well this looks like a nice project. However, bending plywood is used to form the seat. This is a highly specialized product that is hard to find. It would be nice to have a source included with the article.
You don't need to use bending plywood. I have made several of these and have used Luan ply which works fine. Just use 4 or 5 1/8 inch layers and pull them down to the bending form with clamps and cauls that go across the form to distribute the pressure. It works just fine. Make a template of the seat bend to transfer to the legs and apron. It is a lot easier to handle than trying to hold the seat against the legs and apron. Also move the top of the leg mortise to 3/4 inch to give a little more room to cut the curve in the legs and apron without messing with the top of the mortise. It gives you a little more wiggle room to cut the curve.
If you build this stool it is pretty easy yes. The upholstery takes some thought as the instructions in the article do not match the final shape provided in the pictures of the finished stool. There is no way to wrap two layers of foam around the entire seat and get the shape pictured. The foam needs to be sculpted a bit to get a good result. They took the easy way out when presenting the drawing for the stool seat. Wrap the foam only around the front and back of the seat. Cut the foam off even with both outside edges of the seat and trim the foam to a slight slope to meet the edge of the seat. Use some Dacron batting on the top of the foam only and then cover pulling the cover tight first along the center of the seat. Once you get the method down it goes quickly and is easy. The explanation and graphic in the article will not provide good results.
Log in or create an account to post a comment.
Sign up Log in