A reader stated interest in making a SketchUp model of a very comfortable family rocker. (The original rocker was made in the early 1900’s by the Northwest Chair Co in Tacoma, WA.) The reader assembled a SketchUp file, but ran into difficulty with all the component angles and how to fit them into a 3D space.
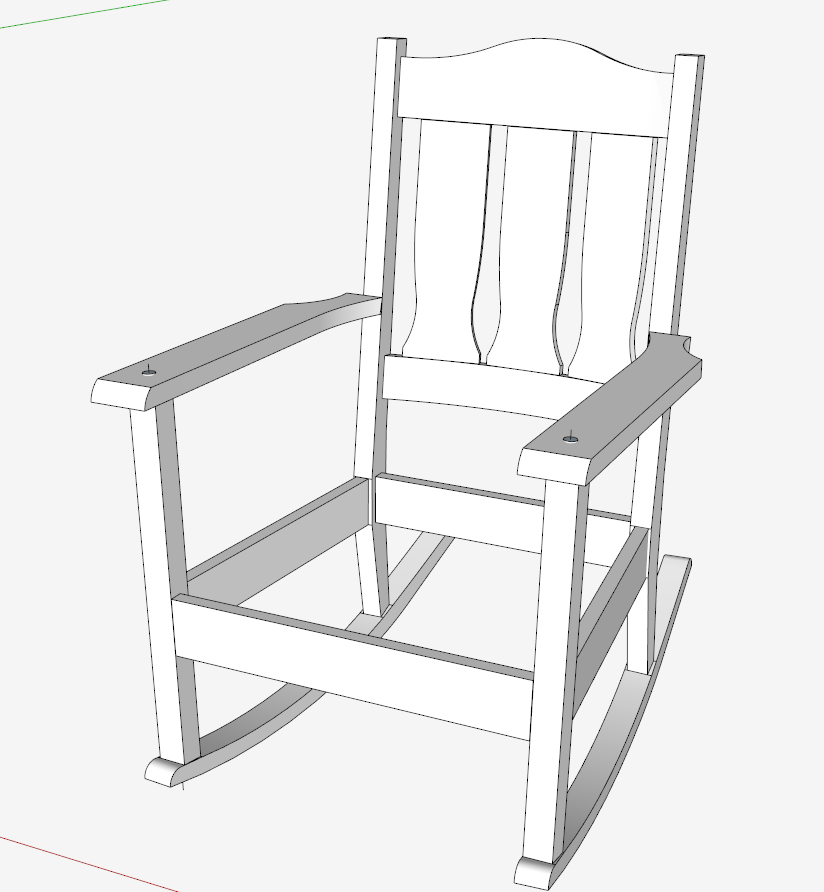
Here is a picture of the Chair Assembly:
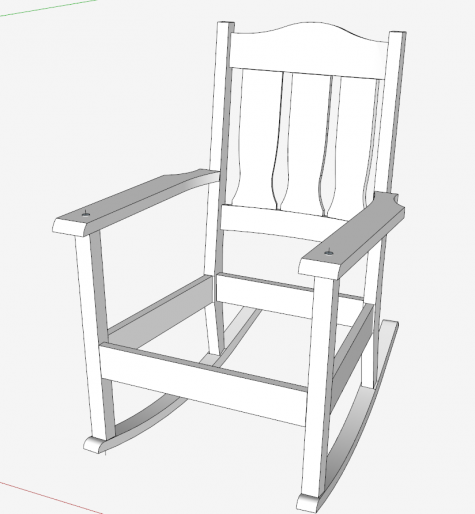
This is not an easy project for a beginning SketchUp user, so I would like to show ways of breaking this down into a do-able job.
It is very helpful if there are good photos of the furniture piece, ones that are taken perpendicular to the major structural faces of the object. In projects like this it would be good to have photos including:
1. A side view picture perpendicular to outer side face of the Side Rail and Rocker
2. A front view perpendicular to the front face of the Front Legs
3. A picture perpendicular to the front face of the middle Back Slat
4. A top view perpendicular to the top face of the Arms.
Nevertheless, I was able to use pictures of rough sketches that the reader provided.
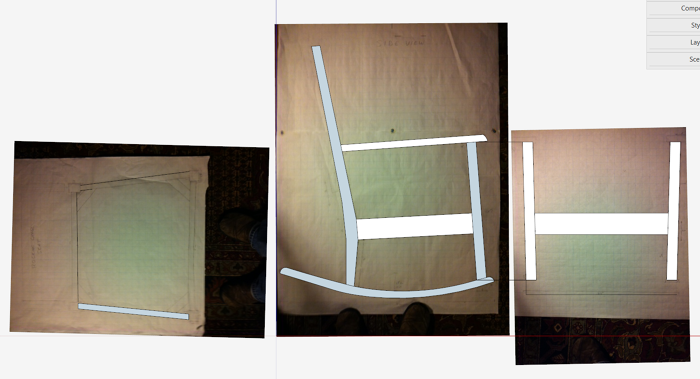
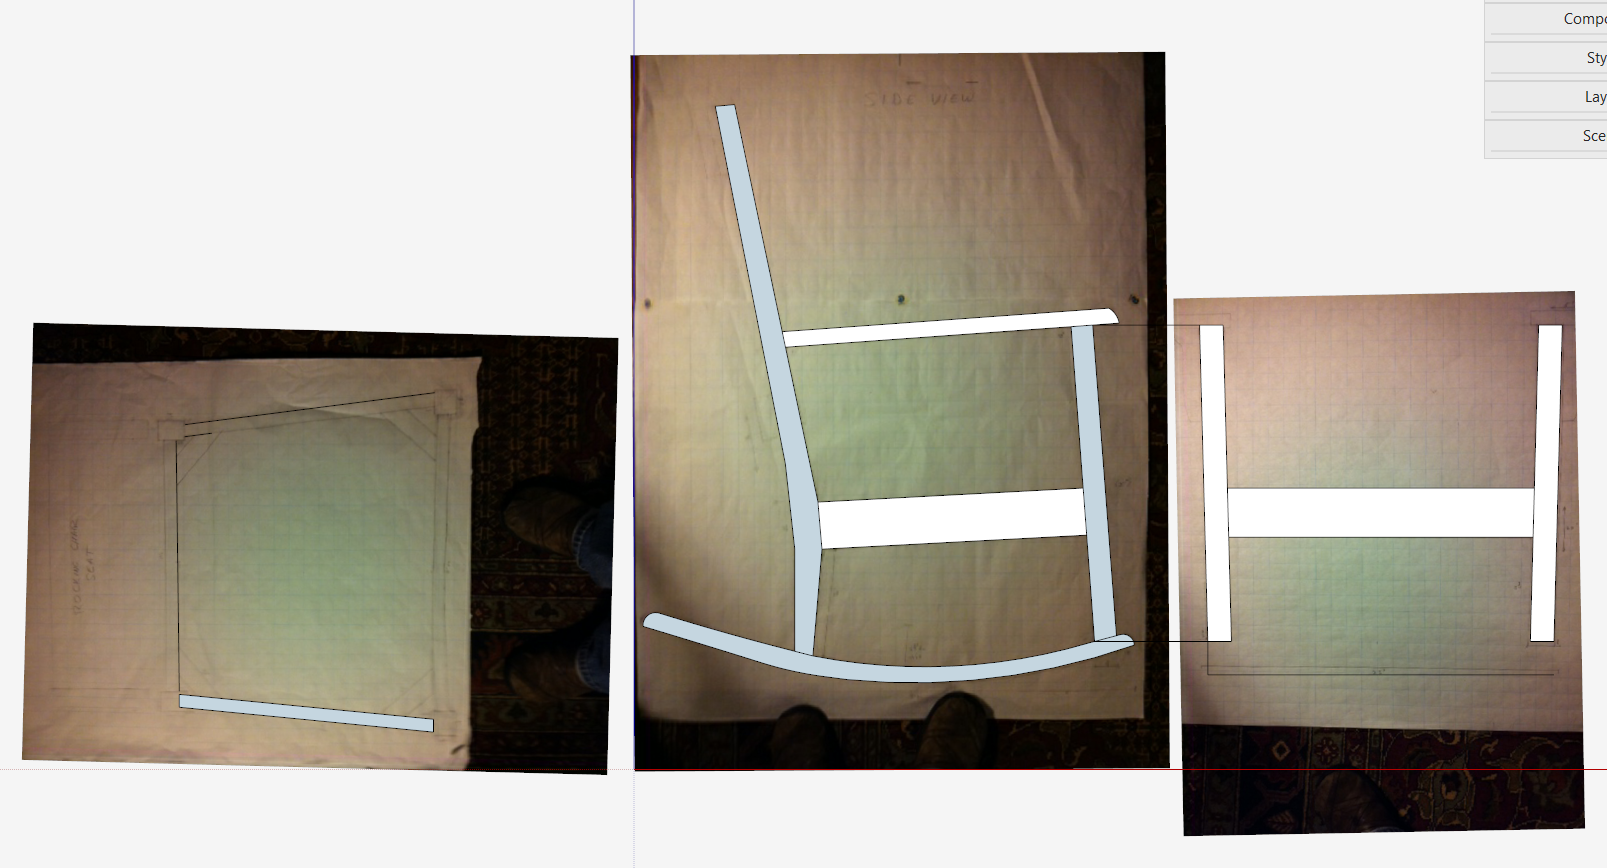
After importing the rough sketches, I straightened them to align with the Axes, and scaled to full size.
Here are the photos, however you may not be able to see much as they were very faded.
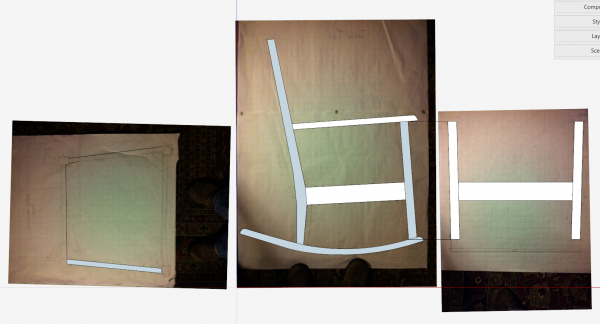
I began to outline the shapes of all the major components, legs, rails, arms, and back slats. You can see the outline of these shapes over the top of the background photos.
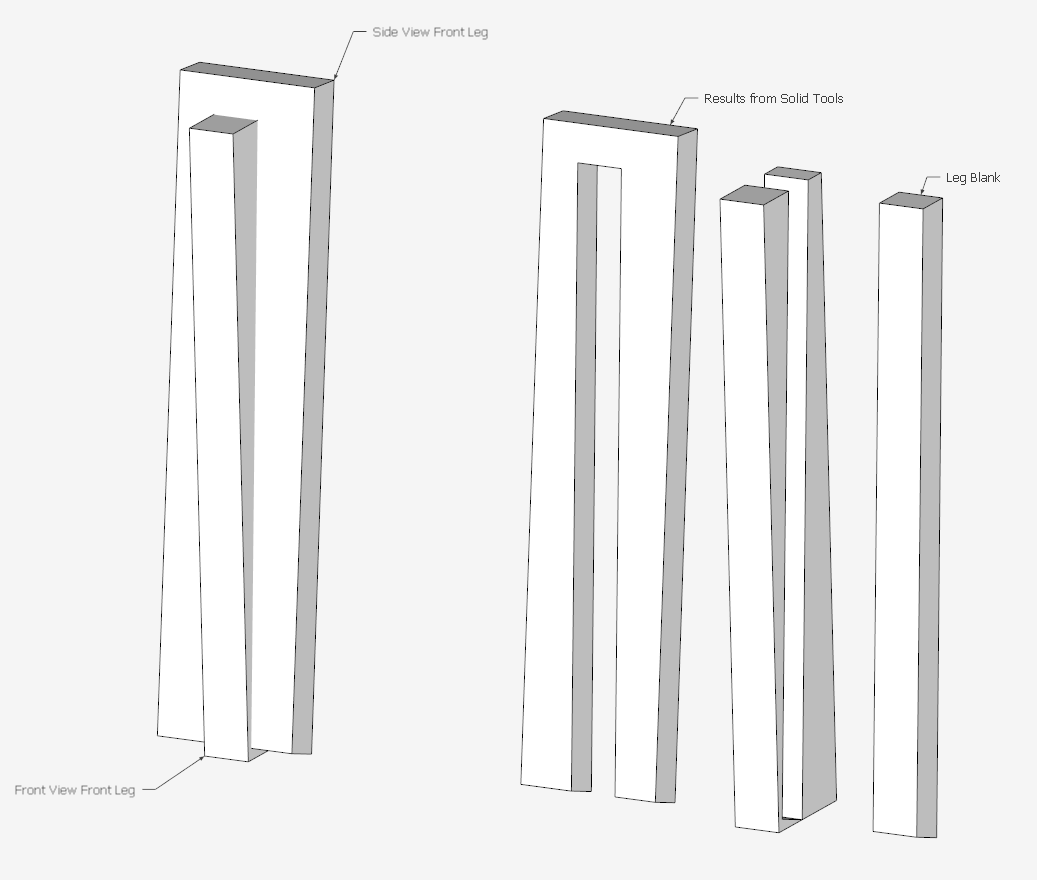
Next I gave these roughed-out shapes thickness and turned them into 3D Groups, then arranged them to Intersect the different views.
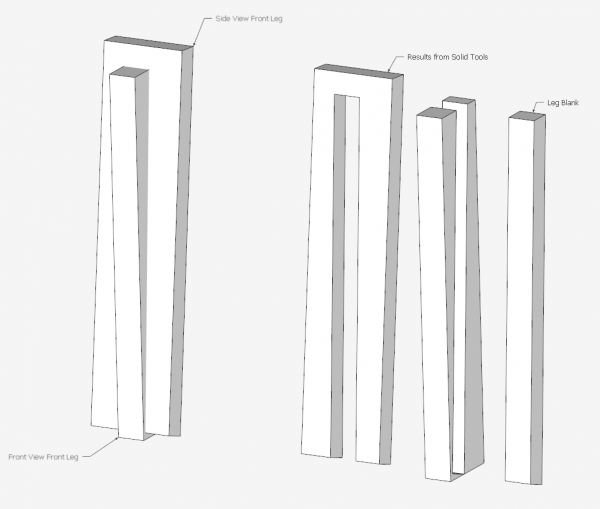
Here is the Front Leg Component using Solid Tools for the Intersection. For SketchUp Make users, you can use the standard Intersect functions.
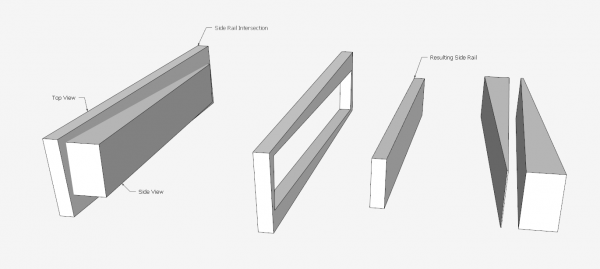
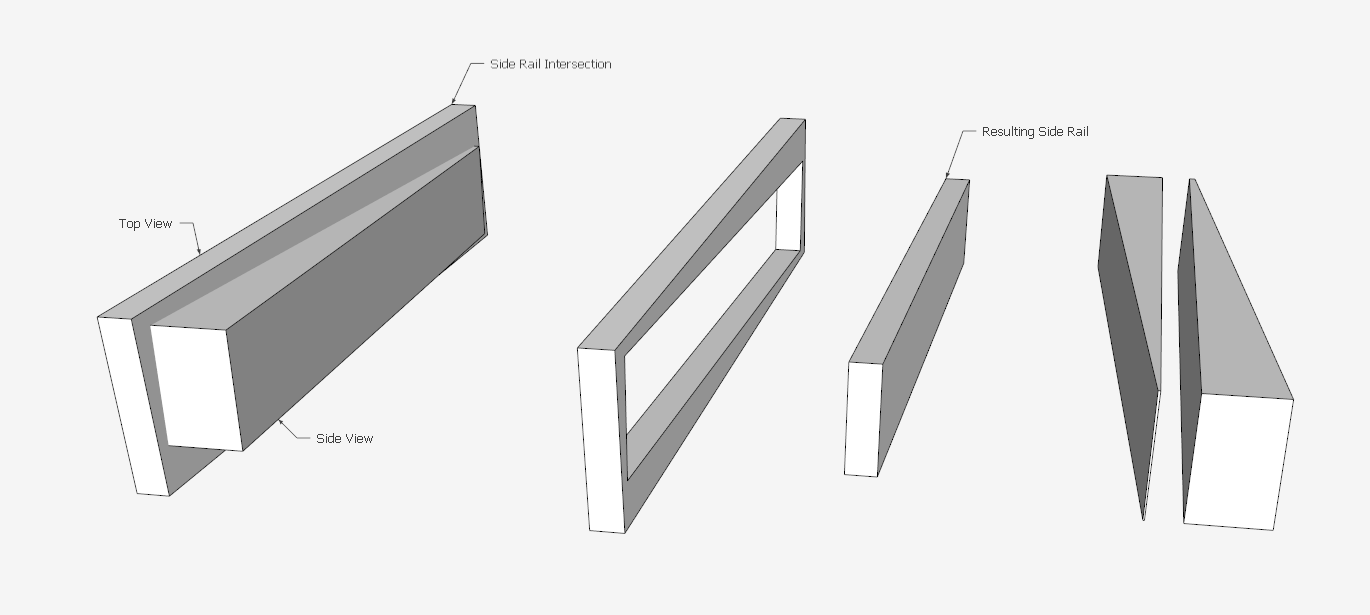
Here is the intersection of the Side Rails.
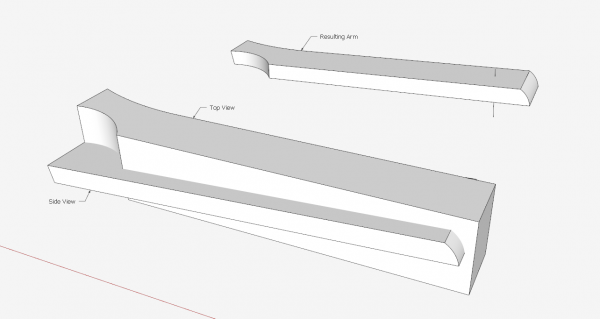
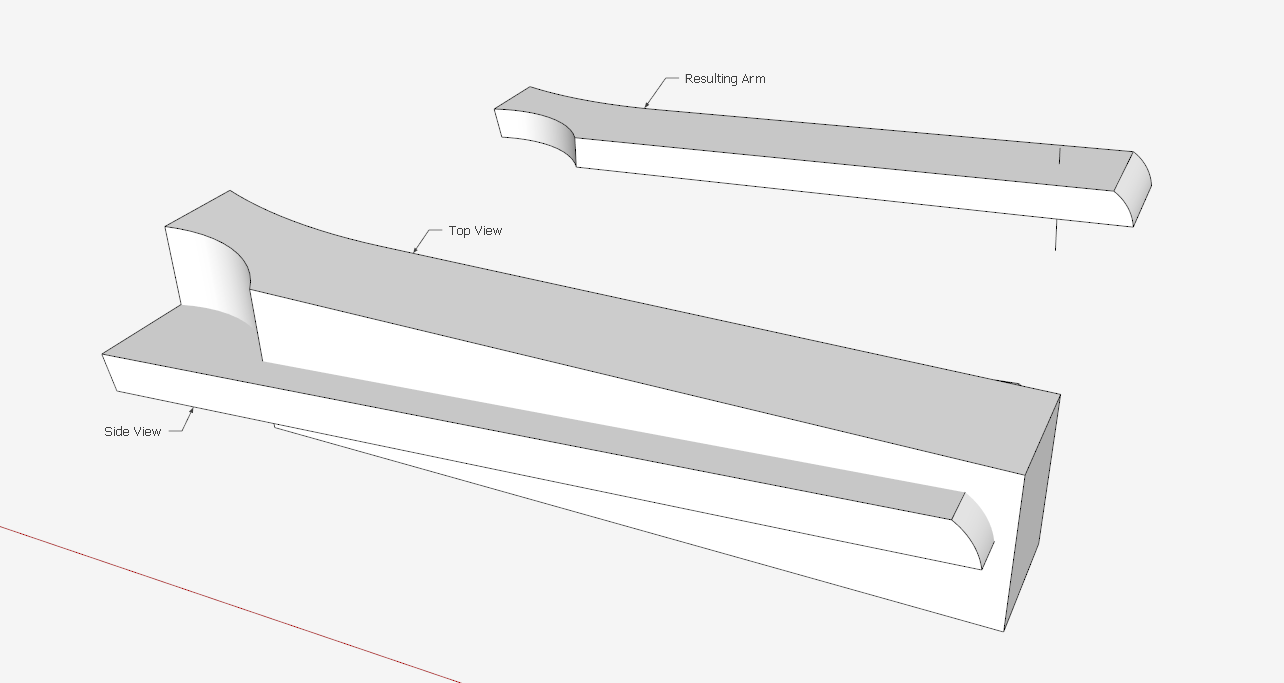
Here is the Intersection of the Arm Component.
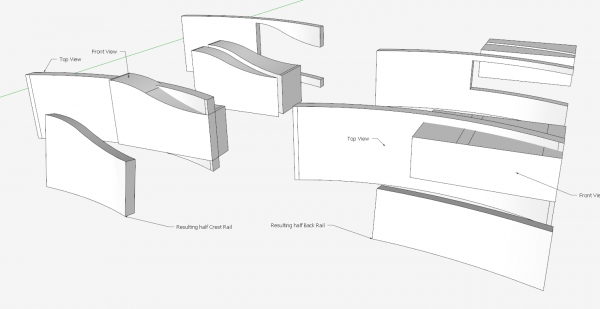
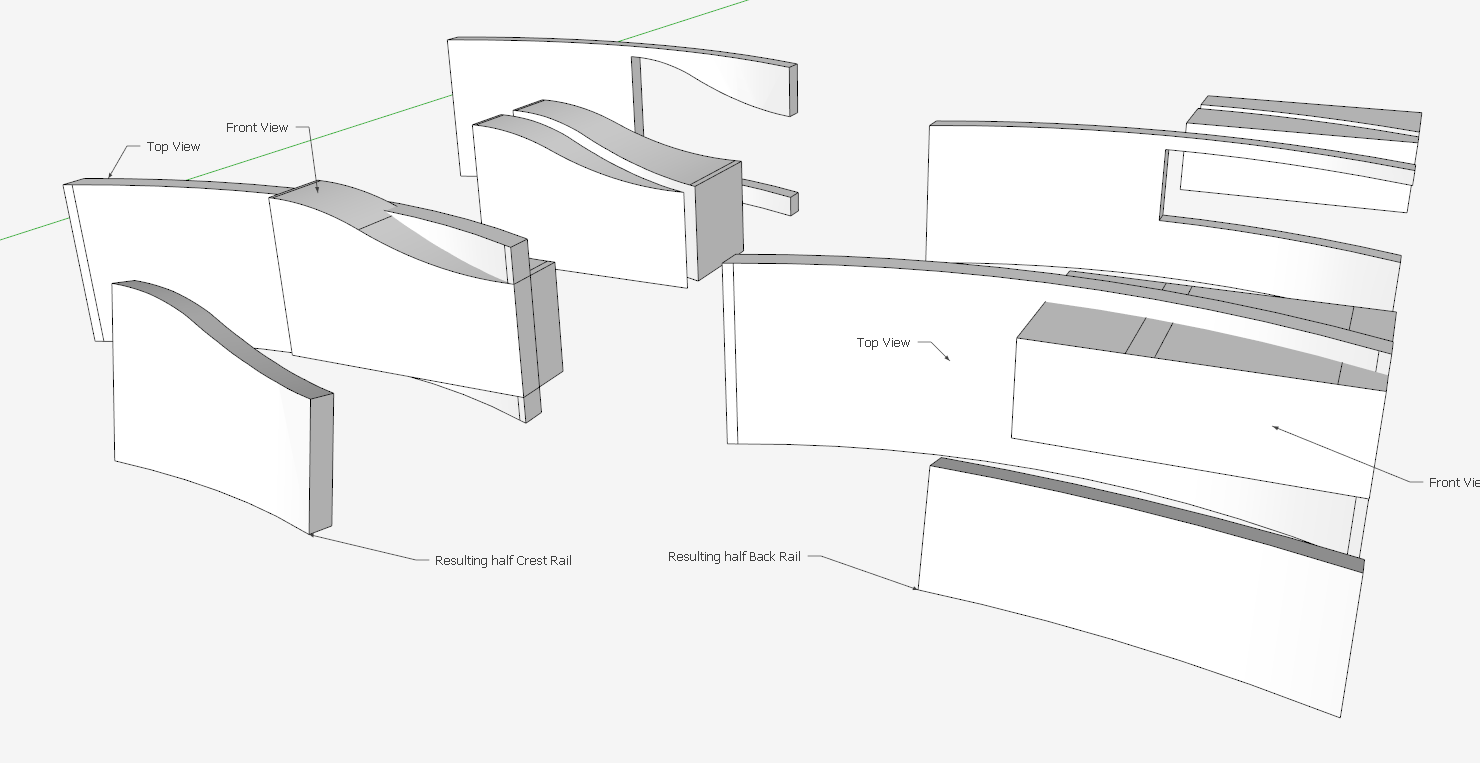
Here is the Intersection of the Crest Rail and Back Rail.
In working-up this model, I became interested in how I would show the joinery of these shapes that connect at compound angles. What kind of views and information will be needed in the shop to cut these components for successful connections at the joints?
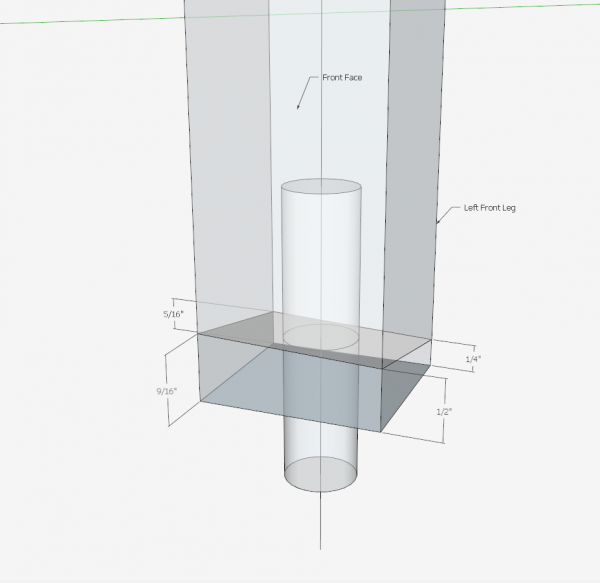
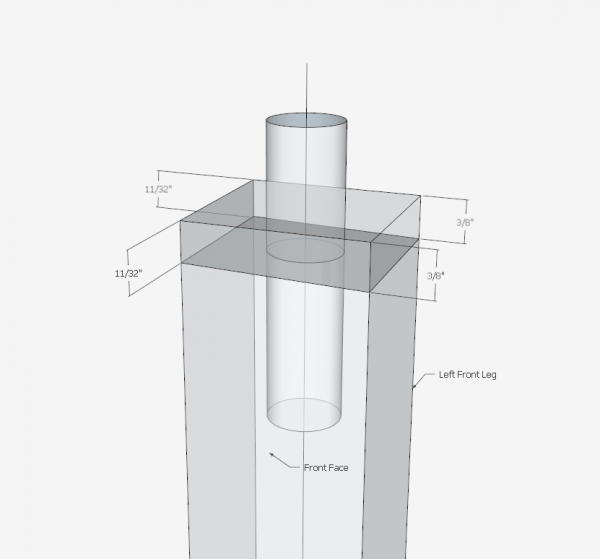
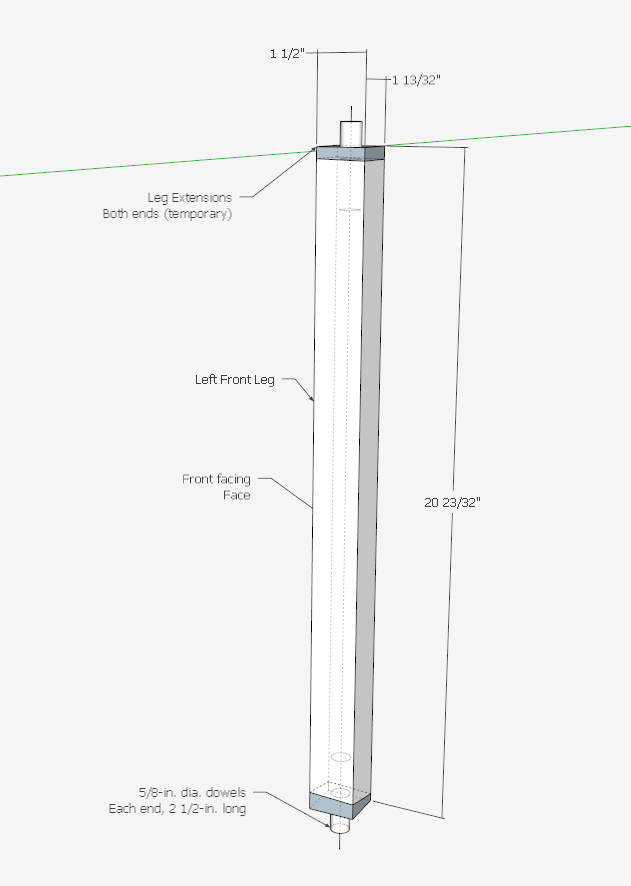
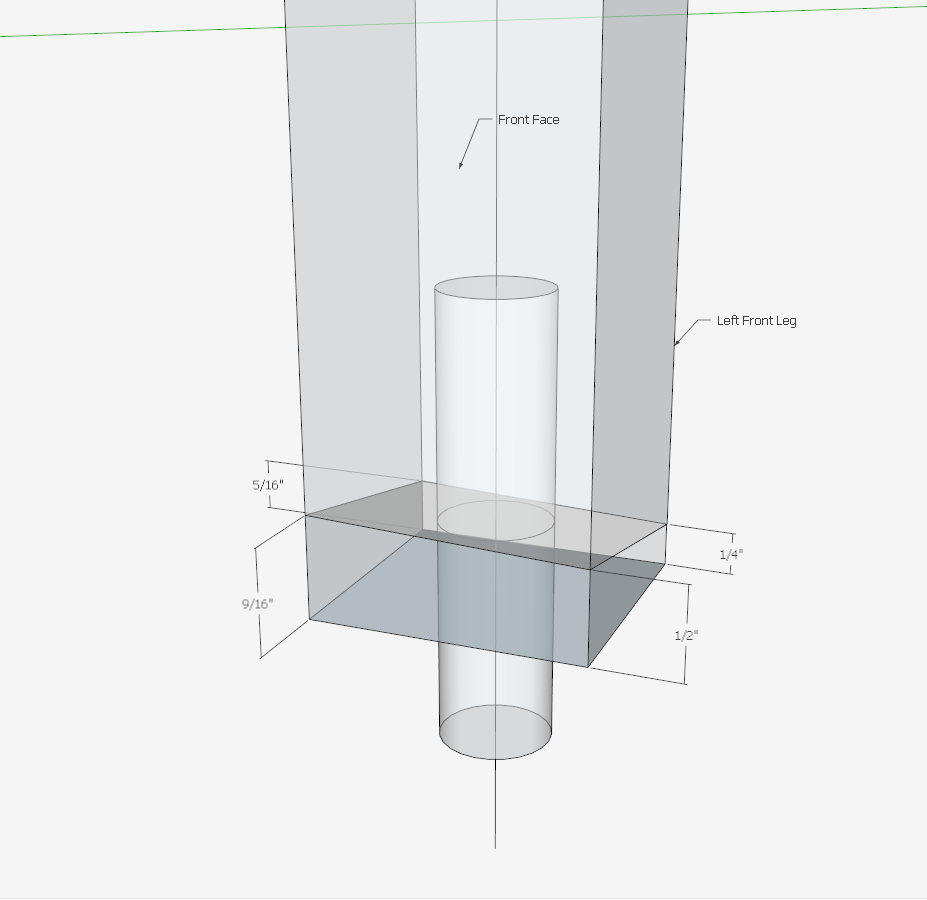
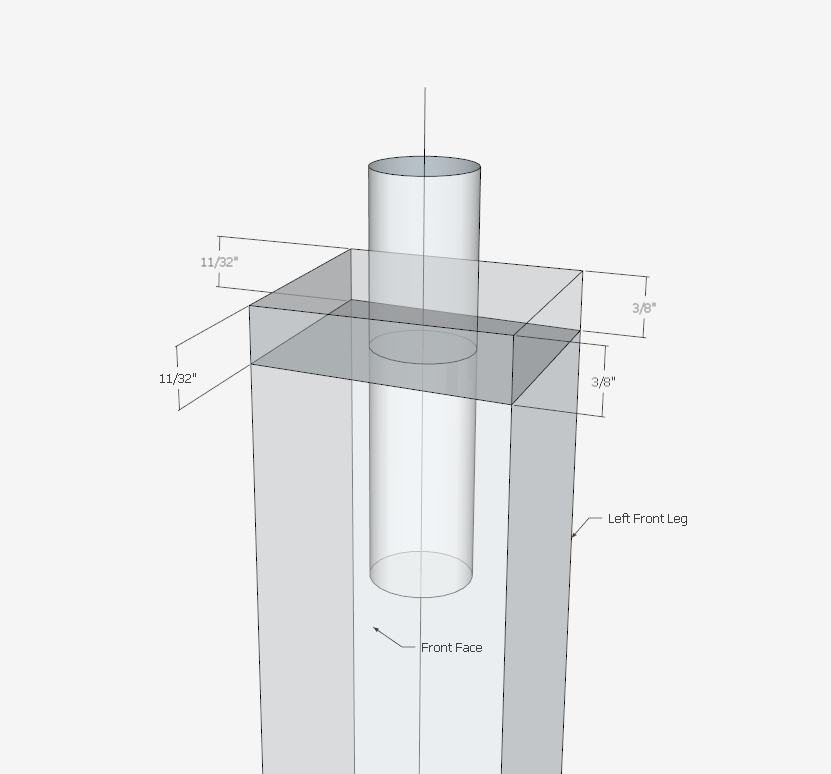
Taking the Front Leg as an example, I decided to create short temporary Extensions to the ends of Leg Blanks that provide easy and accurate measurements to effect the compound angle cuts. The temporary extensions (shown in dark background color) are such that the Leg Blanks are cut long and square at the ends. In the shop, I then can get accurate marking for the compound angle cut.
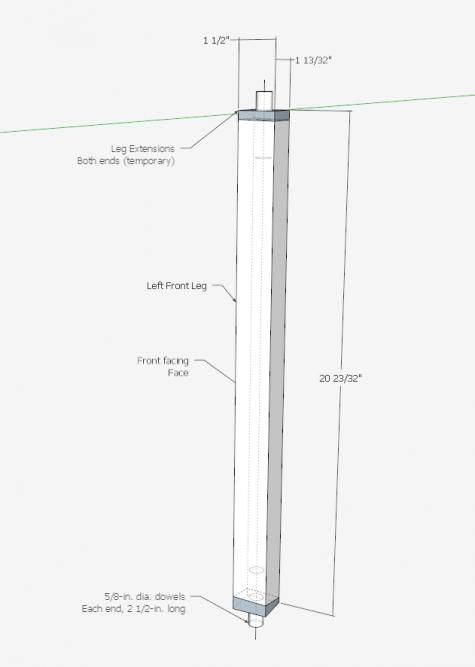
I then created close-up views of the Leg ends for detail dimensions.
Tim
http://killenwood.com




Comments
Dear Tim,
Thank your for your article on subtle angles on the Tacoma Rocking Chair. I live near Tacoma, WA, and would like to make this Rocker. Is your Scetchup file for this chair accurate enough to build a rocker from it? Would you be able to send me the Scetchup File?
Thanks,
John
John, Please send me an email at [email protected]
Tim
I found this chair at Value Village and have refurbished. I have attached some photos here. The back and arms have a little more detail.
Log in or create an account to post a comment.
Sign up Log in