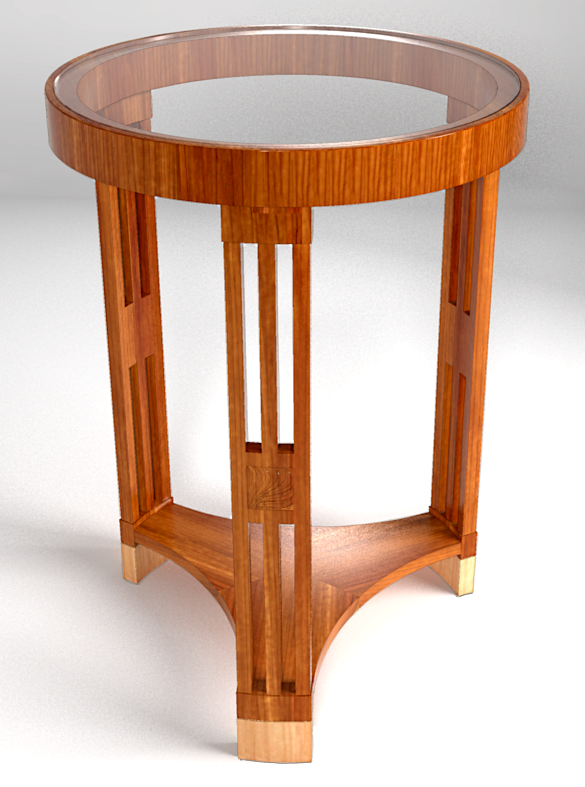
In this, the third and final installment of the video series on this little round Hungarian table, I’ll finish up the details and add some materials.
The first step will be to add the mortises in the legs for the tenons on the shelf. Then a quick carved detail on the legs before moving on to the texture.
When I need to draw something like the carved element on the leg, I draw it outside the component and when I’m satisfied with the shapes, I extrude them through the component’s surface before cutting and pasting the carving inside the component. In this case I made a number of faces which were extruded into the leg. I used the native Push/Pull tool but some readers may catch that I could have used the Normal Push/Pull tool in the Joint Push/Pull tool set. It would have been faster to do that but I wanted to show that no special tools are required.
If you watched the first and second parts, you may remember that I made the shelf as three identical components. I leveraged this when it came time to create the tenons on the shelf. It allowed me to create all three tenons at the same time. In this video I leverage the component thing again for applying the material. The shelf on the original table was veneered with three pieces of veneer that meat at the center. You can see that in the image, above.
After applying the materials to the shelf, the three components get exploded to make a single component. Although I omitted it in the video, there’s an important step you should remember. Do as I say and not as I did. 😉 If you explode components that have been associated layers other than Layer 0, the edges and faces will take on the layer association from the component. You should immediately re-associate the edges and faces with Layer 0. They will be selected immediately after exploding so you can easily change the layer association in Entity Info.
As always, I hope you find at least a little tid bit you can use.
–Dave


Comments
Hi Dave,
Thank you for the excellent series. I was wondering if I could get you to explain more about why you opened the component for editing before you applied the texture? I'm not sure I fully understand.
J
J, thank you.
There are several reasons for applying the materials to the faces inside of the component and not to the component "wrapper" which is what you'd do if you don't open the component for editing first.
The main reason is that you then have the option, if needed, to rotate or otherwise edit the position of the material as I did on the top surface of the shelf. Try it. Apply a texture to a component or group without opening for editing. Right click on the group or component and you'll note that 'Texture' is absent from the menu. This is because that isn't available in the situation. Apply the texture to a face, however, and you'll see 'Texture' in the Context menu.
You'll also note that by applying the texture to the faces in a component, all of the other components get the same treatment. I leveraged that when applying the texture to the shelf component. I left the shelf as three identical component so that when I applied the texture to the one copy it was applied to the others and in the right direction, to boot.
If I had applied the texture to the shelf component without opening it for editing, only the one component would have been painted. applying the material to the others would have resulted in the grain direction running the wrong way. this would also be applicable in creating things like book matched parts.
Another reason for applying the material to the faces instead of the component wrapper is it gives you an opportunity to apply different materials to different faces within the component. For example, In this image, I show end grain and plywood edge along with face grain. https://flic.kr/p/ebreuc
I hope that gives you some ideas.
-Dave
Awesome. Thanks so much, that explained it well.
J
After watching your excellent video the old draftsman in me surrendered to the advantages of digital design software. A wonderful tool that I now intend to purchase. Well done, Dave.
Thank you.
John Kristoff
Minnesota
@chordwizard, I'm glad that helped.
@John, don't throw away your old T-square though. They make fine wall decorations. LOL
Log in or create an account to post a comment.
Sign up Log in