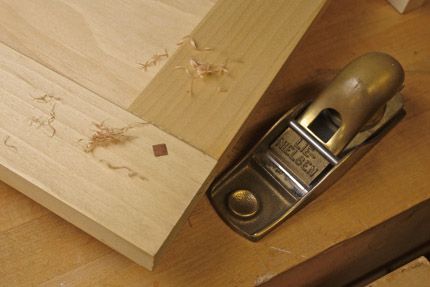
1) Read on to learn how to fit a square peg into a round hole and reinforce your frame-and-panel doors for the long haul.
For the past few weeks I’ve been hard at work building a simple pine vanity. The single door opening is somewhat large, necessitating the need for a frame-and-panel door with a center, vertical stile to stiffen up the assembly. The door on its own was somewhat plain, and I was hoping to add some additional strength to the mortise-and-tenon joinery so I opted for some simple pins made from a contrasting wood-in this case, cherry.
The pins are square (when viewing the cross-section) and are oriented in such a way that they form a diamond shape where they pass through the mortise-and-tenon joints at each corner of the door frame. This technique is easy to pull off, and it really serves to jazz up an otherwise boring Shaker door.
Square-Pinned Mortise-and-Tenon Joints
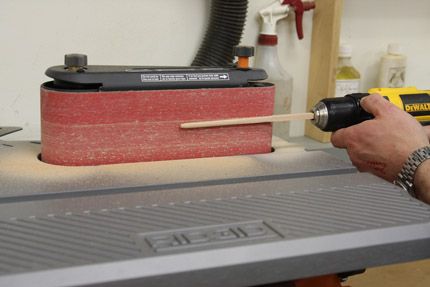
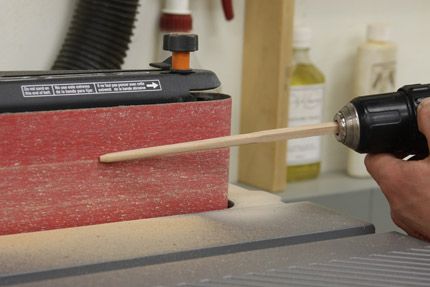
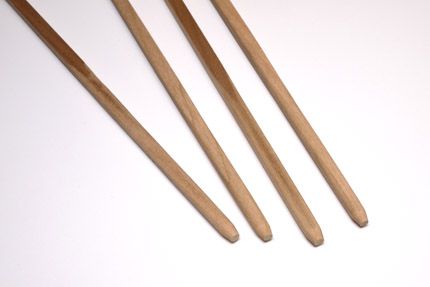
I began by ripping some cherry into 1/4-in. square strips. Although the resulting pins will be square in cross-section, I chucked each square peg into a drill and rounded them using a belt sander while allowing the drill chuck to spin at the same time. I rounded the first 2/3 of each peg and then went back and sharpened the tips a bit more, just to make it easier to pound the pegs into place later on.
More on Pegged Joints |
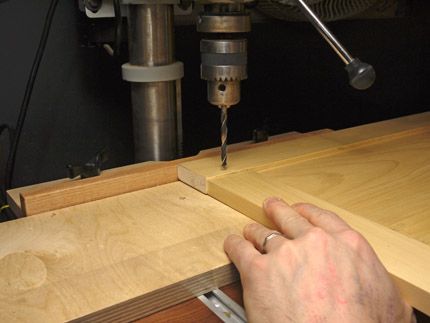
Next, I prepared the door for drilling by first marking the location of each peg with a pencil, and then using my 1/4-in. brad point bit as an awl to make a small depression at each joint location. At the drill press, I took care of my 1/4-in. holes and then headed to the bench.
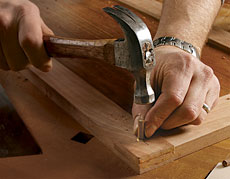
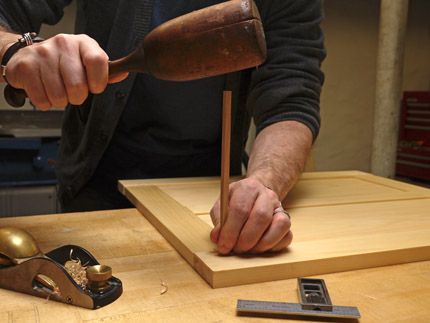
I applied just a dab of glue in each hole and then pounded the pegs in until I had passed the rounded portions and reached the square ends. The cherry is a bit harder than the pine, so as the square peg passes through the round hole, the hole will actually shape itself around the peg. Just be sure to pound each peg in over a dog hole – that peg will need someplace to go as it emerges from the back side of the door.
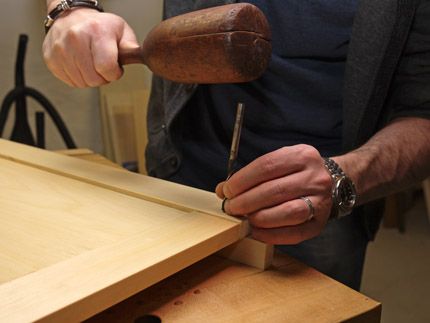
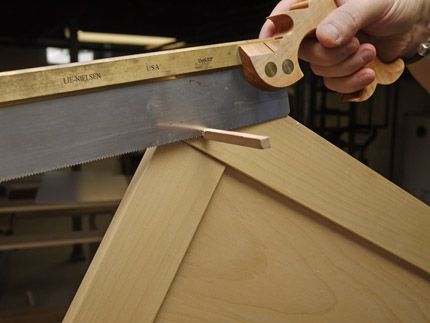
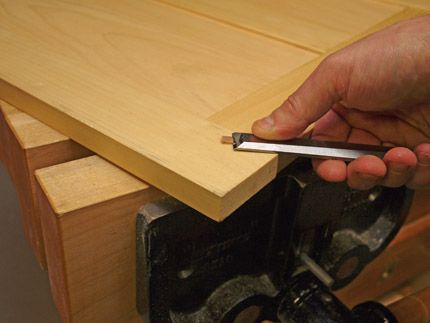
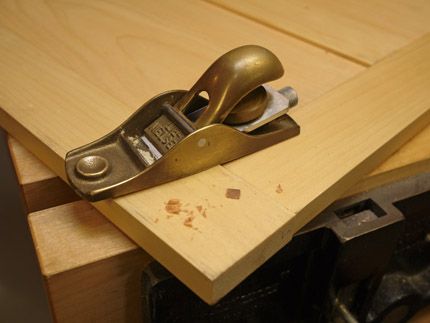
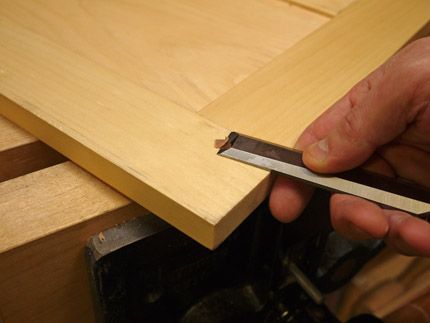
To wrap things up, I sawed off the excess, leaving each peg about 1/8-in. proud. To flush each peg, I began by using a chisel to scribe a line along each of the four sides of the pegs, where they meet the door frame. This will allow the wood fibers to break more cleanly as I use my block plane to flush things up. Use your block plane to pare away material until your pegs are about 1/32-in. proud and then finish things off with a sharp chisel. That’s it. Now my door is super-strong, and ready for decades of trouble-free service!


Comments
Adding pins to a mortise and tenon joint actually makes the joint weaker. This has been shown in many tests including fine woodworking magazine. However, I do think it adds visual interest.
Hi PurdueDan: I would disagree with that notion - especially with regards to drawboring pins. I've never had a failed joint in any of the M&T joints I've built and pinned. I'm a big believer in the mechanical strength offered by a pin. Of course, all of these topics are debatable, and none could ever be considered any kind of a panacea.
One thing I wish - in retrospect - I had done in this case - was a proud pin. I wish I had left the pins slightly proud, chamfering each of the four sides for a more tactile feel/look.
Best,
-Ed
I assume your directive to rip the peg stock into 4 in. square strips is a typo?
dnutty - hah! Yes - looks like the "1" and the slash didn't carry over - should be 1/4-in. Thanks much,
E
Ed,
I'm curious about your switch from plane to chisel at the end. Why the switch? I use a plane all the way to the end, and haven't had any problems. I do use a fairly heavy cut at first, and then switch to a very fine cut for the final clean up.
-Steve
I like your diamond-shaped pins. I tried this driving 1/4" walnut pins into cherry with mixed success. Walnut was not strong enough to consistently reshape the cherry. However, I like the look and the drawbore idea so I will keep trying. As for rounding the pins, especially small diameter ones, I have mixed luck with the sander. I went back to "drilling" 1/4" sticks of walnut through a succession of holes drilled into a piece of scrap steel. (Actually, the metal edge that wore off my snow shovel; how's that for salvage?) I wanted to make 1/8" dowels but settled for 5/32". Fun with walnut. Thanks for your tips, and for the comments.
I've been using half blind square pegs to re-enforce mortise and tenon joinery for years...never been a problem, although my technique is a little different than the one described here.
I prefer to square off my drilled 1/4" holes with a 1/4" dovetail chisel (carefully marked using a square and marking knife). I then cut my square dowel slightly oversized and use a small plane or sanding block to a tight fit. With a little practise, this is a fast and simple adornment.
The pegs add beauty and strength, and have become a hallmark of my bespoke pieces.
All the best, Ken Havinga
So I'm just wondering, is this technique actually draw boring? It doesn't seem so without an offset. If not, does it really add much for strength to the joint? It seems Bluecab has the right idea of cutting the square prior to driving the peg in. If the M&T wood is not significantly softer than the peg wood deformation of the peg will occur.
Just my observations...
The ultimate test of a technique is the test of time. I have doors salvaged from my grandfather's shop that are through-pegged. It appears that the glue has largely failed (there are gaps between stile/rail), but they hold together very well. These doors are on cabinets in my shop, I use them everyday.
When through-pegging, I use the hollow-chisel mortiser, set the fence and draw stop-marks on the table (wood accessory table added to base on machine), avoiding the need to mark ea. piece. I mortise the square peg-hole in the stiles, 1/2 way through, then cut the mortise. I turn the chisel 45 deg. to create diamond effect. I then assemble doors, drill through, shave the tip of walnut square peg round with knife, dab of glue, drive peg through, cut off excess with flush-cut saw, chisel flush.
I use this method to make the dowel. Cut some ¼ square pieces a few inches long. for the dowel stock. Grip one end in the chuck of a drill and spin the piece through a ¼ round hole drilled through a small slab of ⅛ or 1/16 in steel. It helps to sharpen the other end slightly at the tip before you spin the wood through the hole in the steel. Stop spinning when you have enough rounded dowel material. Cut off the square end at the end of the chuck and you will have a good combination square and round dowel. Very fast and accurate.
Has anyone thought of using a lathe to round the pins, then you could do a heap just from one piece of 1/4 stock, or am I missing something ?
Konrad
Down Under
No, Konrad, you're not "Missing something", I believe it's more a matter of what you're comfortable with and, of course, the tools you have available and your level of expertise and accuracy with them. Of course, if you're doing this sort of thing (woodworking) as a hobby, then the amount of time spent making and setting up tooling is just part of the experience - sometimes hand tools are actually quicker than (and just as accurate as) power tools for just a few receptive operations on a one off piece. However, if you're in the business of making several or many identical projects for profit, then jigs and power tools make much more economic, if not esthetic sense.
Steve (saschafer):
I find I have much more control using a chisel for that very last bit of paring. Usually, at this point in the construction phase, all of my rails and stiles were previously smooth planed. I don't wish to take off any material other than the peg stock. Too often, I find that the last swipe of a block plane takes off a bit of the surrounding material as well. The chisel is just easier for me to control.
And because "it's what Mike does"
HAH!!!!!
Best,
Ed
Hi Ed:
I think PurdueDan was referring to FWW #203 "Joinery Shootout" by Douglas Moore and Thomas McKenna. The article ranks common frame joints and puts a blind mortise and tenon at #4, but the pegged m & t at #8, with maximum loads of 1444 lbs. and 1162 lbs. respectively. The point wasn't that a pegged m & t joint is weak, just that putting in a peg weakens the joint. The visual trade off might be worth it for (relatively) low stress projects (which a door is); but it might not be the best choice for a chair leg that will get a lot of teetering. There, a surface plug, strictly visual, might be a better choice.
Log in or create an account to post a comment.
Sign up Log in