Dress Up Your Drawer Fronts
Add veneer and cock beading to make your furniture pop
Synopsis: Burl veneer and cock beading work together as beautiful and functional details on period furniture. Steve Latta used these classic design elements in his Federal table. Veneering the drawer with beautiful burl gives the table a visual focus; the cock beading provides a frame for the burl while adding a subtle, eye-catching three-dimensional look. Here, he shows how to add them both.
Photo: Ben Blackmar
Burl veneer and cock beading go hand in hand, working together as beautiful and functional details. They are classic design elements that were used a lot in early America, and I used both in the Federal table project on pp. 60-67. Veneering the drawer with beautiful burl gives the table a visual focus; the cock beading provides a frame for the burl while adding a subtle, eye-catching three-dimensional look.
In addition to looking great, cock beading helps protect the veneer by forming a raised lip around the edges, and it cleverly conceals the gap around the drawer. The cock bead also comes in handy when the drawer doesn’t quite sit flush, or the sides don’t line up perfectly with the opening.
Hammer veneering: low-tech but effective
Traditionally, veneer was applied using the ancient but effective technique of hammer veneering. laying down veneer with hot hide glue and a veneer hammer is not complicated, and doesn’t require a big investment in tools—you only need hide glue, a brush, and a glue pot to heat the glue in (I get mine from oldemill.com). You can get a veneer hammer at most woodworking suppliers.
Mix the glue granules with an equal volume of room-temperature water and let it soak for 45 minutes, then plug in the pot to heat it up to 140°F. Hide glue sets when it cools, so you can gain a little more working time by warming up your veneer hammer on a hot plate.
While you’re waiting for the glue to heat, prep the drawer front and the veneer. You’ll apply the veneer before cutting the joinery, so cut the walnut drawer front 3 ⁄4 in. longer and wider than the final size. It helps the veneer hold on better if you roughen the surface of the drawer front with a toothing plane. If you don’t have one, several tool companies offer toothed blades for their handplanes. Cut the veneer slightly smaller than the oversize drawer front, using a razor knife and straightedge. Put veneer tape across any cracks on the veneer’s face side.
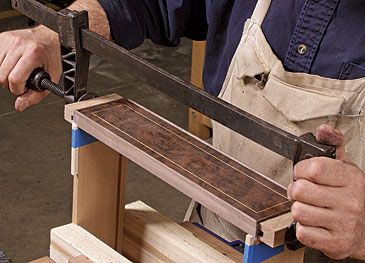
Brush glue onto the drawer front and the back of the veneer, and quickly set the veneer in place. Then brush some glue on the show face too, and begin to push the hammer over the veneer to force out excess glue and air pockets. This creates suction underneath that pulls the veneer tight against the drawer front. Work the veneer with the hammer until it is uniformly flat and stuck down. Next, clamp the drawer front between cauls. let it dry overnight, and use a card scraper to remove the thin film of glue and smooth the veneer. Then cut the drawer front to size.
For the full article, download the PDF below:
Fine Woodworking Recommended Products

Estwing Dead-Blow Mallet

Whiteside 9500 Solid Brass Router Inlay Router Bit Set

Starrett 12-in. combination square


Log in or create an account to post a comment.
Sign up Log in