Every Woodworker Needs a Cutting Gauge
This must-have layout tool will help you get tight joints every time.

Synopsis: The cutting gauge is indispensable for furniture making. It’s perfect for marking dovetail and tenon shoulders, and can be used to sever fibers and minimize tearout before making a crossgrain cut with a tablesaw or router. Timothy Rousseau takes a look at the two types of cutting gauge and shows how to sharpen and tune up the cutter so it will give you the precise line you need to make tight joinery.
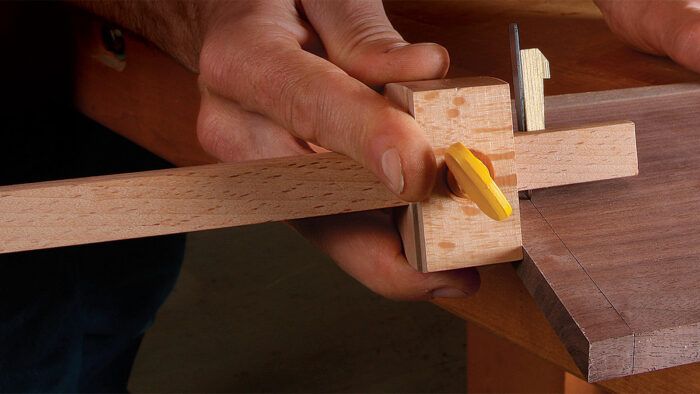
Tight joinery begins with crisp, accurate layout. This is why a scribed or cut line is better than a pencil line for most layout work. A knife and square can be used for most (if not all) layout jobs, but I find that a gauge is often more efficient and accurate. The three most commonly used in woodworking are the marking gauge, the mortise gauge, and the cutting gauge. Marking and mortise gauges use a pointed pin to scribe lines with the grain, while a cutting gauge has a knifelike blade that slices fibers across the grain.
All three are necessary if you cut joinery by hand, particularly the mortise-and-tenon. However, if you use a powered apprentice to cut mortises and tenons, then the marking and mortise gauges won’t get much use. The cutting gauge, however, is an indispensable tool for furniture making regardless of which tools you use to cut joinery. It’s perfect for marking dovetail and tenon shoulders, and can be used to sever fibers and minimize tearout before making a crossgrain cut with a tablesaw or router.
There are two types of cutting gauges. Wheel gauges have a steel beam with a round cutter at the end. The fence is usually round, too. These work fine, but I prefer the traditional-style cutting gauge with a wooden beam and fence. The cutter is often a spear-point knife that is held in the beam by a wedge. Because they have a wider fence, I find these gauges track the edge of the board more easily than wheel gauges. However, before you put one to use, it’s a good idea to give it a quick tune-up. It’s not hard, and I’ll show you what to do.
Tweak the fence and cutter
Start with the fence, which must be flat (check it with a 12-in. rule) so that it glides smoothly along the workpiece. Any hiccup caused by the fence is transferred to the cutter, leaving a hiccup in your layout line, too. The result? Joints that aren’t as tight as they could be. Check that the beam is square to the fence. If it’s not, use a chisel to pare the wall of the mortise square, then glue a thin shim to the pared wall so that the beam slides smoothly in the mortise. If the beam is square, slide it back and forth in the mortise. If it is difficult to move, file the mortise until the beam slides smoothly.
For the full article, download the PDF below:
Fine Woodworking Recommended Products

Olfa Knife

Veritas Precision Square

Suizan Japanese Pull Saw


Log in or create an account to post a comment.
Sign up Log in