Federal Details Transform a Simple Table
Tapers, veneer, and inlay give this table style to spare.

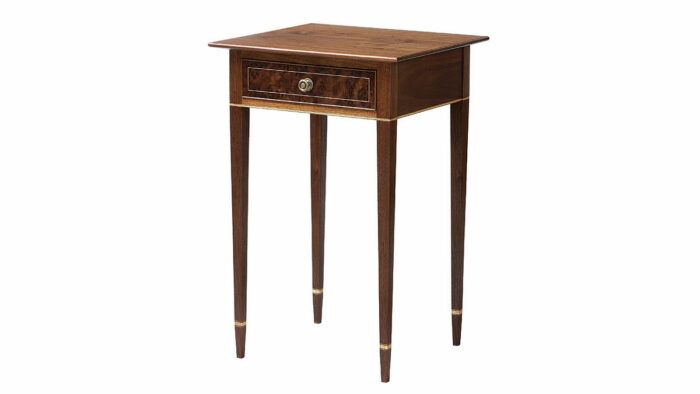
Synopsis: A Federal piece doesn’t have to be big or complicated to stand out. Combining details in a smart way can enliven even the simplest form. Without the banding on the legs and waist, and the stringing and cock beading on the drawer, this table by Steve Latta is rather plain. But add those Federal details to the mix and the piece goes from simple to stylish. Learn how to use these Federal details to transform your own furniture.
Video Workshop Series: Federal Side Table
Video Extra: Smart Woodworking Joinery Techniques
Download the plans for this table from the Digital Plans Library. Plus, browse 100+ other plans available for members only.
Since I began building period furniture more than 30 years ago, I’ve developed an affinity for the Federal style. The neoclassical lines and detailing in the furniture really speak to me.
A Federal piece doesn’t have to be big or complicated to stand out. Combining details in a smart way can enliven even the simplest form. Take this table, for instance. Stripped of the banding on the legs and waist, and the stringing and cock beading on the drawer, the piece is plain and unassuming. But add those details into the mix and the table goes from simple to formal, drawing attention from every angle.
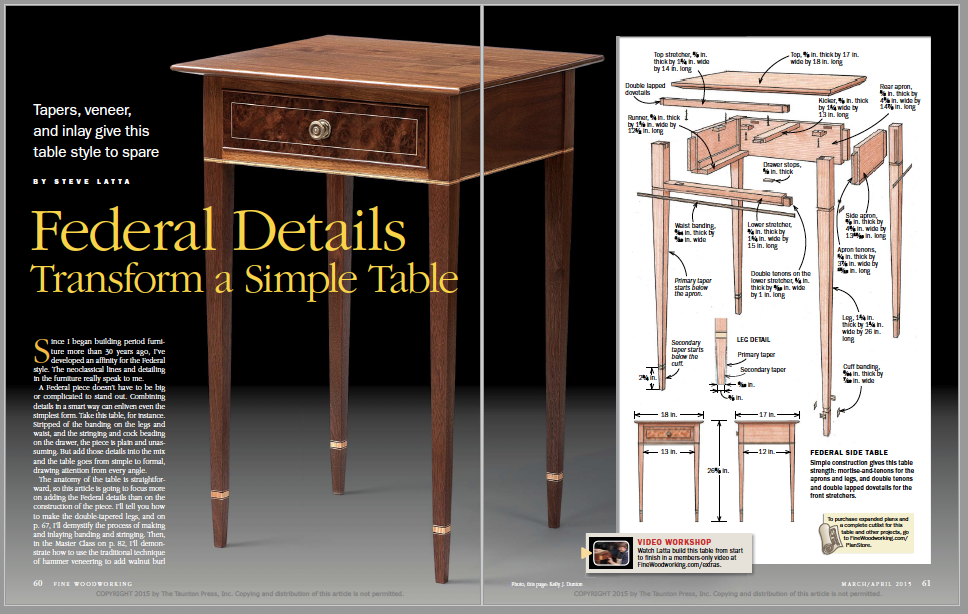
The anatomy of the table is straightforward, so this article is going to focus more on adding the Federal details than on the construction of the piece. I’ll tell you how to make the double-tapered legs, and on p. 67, I’ll demystify the process of making and inlaying banding and stringing. Then, in the Master Class on p. 82, I’ll demonstrate how to use the traditional technique of hammer veneering to add walnut burl veneer to the drawer front, and cock beading to the edges of the drawer. Let’s start with the leg tapers.
 Tapers And Banding Make Boring Legs More Exciting
The legs have a double taper on all four sides. The primary taper starts below the apron, and the secondary taper starts below the cuff banding. After mortising the legs, you’ll taper them in two steps. Cut the primary taper using a tapering jig on the tablesaw before installing the cuff banding. You’ll cut the secondary taper later, after the cuff banding is glued in (for more on the tapering jig and my method for using it, see “Perfect Tapers on the Tablesaw,” FWW #229).
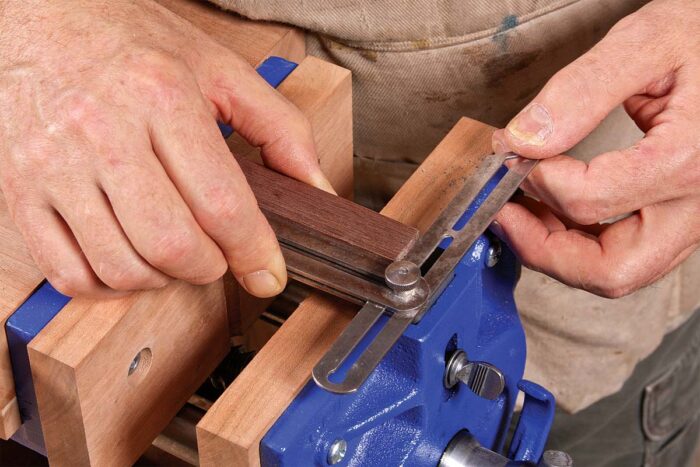
The cuff banding is mitered at the corners and recessed into dadoes on all four sides of each leg. First lay out and cut the dadoes. The primary taper puts the leg sides a few degrees off parallel, so use a sliding bevel gauge for the layout. Set the gauge by registering it against the bottom and side of the leg and locking in that angle. Mark the lower edge of the cuff first. Measure 23⁄4 in. from the bottom with a combination square, and then use the bevel gauge to knife a line all the way around the leg at that height
Next, mark the upper edge of the dado. Set the tip of the marking knife in the lower scribe line and use a piece of banding as a spacer to position the bevel gauge for the second cut. Remove the banding and knife the second line next to the bevel gauge. Chisel out the waste and use a small router plane to get the bottom of the dado flat, making it slightly shallower than the banding’s thickness.
 From Fine Woodworking #246
For the full article, download the PDF below:
Fine Woodworking Recommended Products

Blackwing Pencils

Compass

Dividers


Comments
I would like to give this table a go but with a quilted maple top and drawer front, probably Sapele for the case work.
Would this be too much?
Any thoughts?
When are the plans to be available coming soon has been on your site for several months??
@Panzer, do you mean these plans? https://www.tauntonstore.com/federal-side-table-project-plan.html
There are two different versions shown; printed and digital. They've been available since 2014.
Log in or create an account to post a comment.
Sign up Log in