Miter Blocks are a Great Tool for Cutting Tiny Trim
 Mar 13, 2015
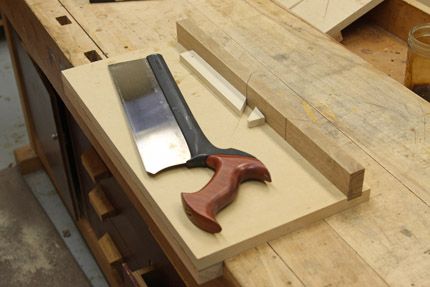
1) A simple workbench jig. This miter block makes quick work of cutting tiny trim.
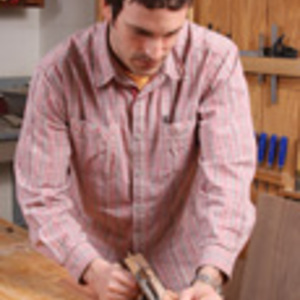
I’ve built several humidors over the years and the design I use incorporates small pieces of hardwood edging to protect the fragile veneers that cover my boxes. While you could certainly cut these pieces on a miter saw, it’s a bit overkill. For greater accuracy, I cut this joinery with a handsaw and follow-up at the shooting board.
In order to achieve accurate cuts, I use a simple miter block. Built from workshop scraps including a small sheet of MDF, some screws and glue, and a two hardwood strips, these little benchtop jigs come together super fast and last a surprisingly long time. Browse the photos above to get a sense of how I build my miter blocks.
Of course there’s more than one way to skin a cat. My colleague, executive art director Mike Pekovich, often uses an even simpler block. His is nothing more than a block of oak with a rabbet running along one of the long edges. The block is clamped down in his bench vise and works just as well. Be sure to check out Mike’s video blog on the subject.
A quick word on accuracy. The cuts produced on my miter blocks are generally very accurate however, I never worry if they’re off by a degree–that because I always follow up my cuts with a bit of clean-up at the shooting board. My shooting board fences are very accurate and by planing after my cuts are made, I ensure nice smooth, crisp joints.
-
1) A simple workbench jig. This miter block makes quick work of cutting tiny trim.
-
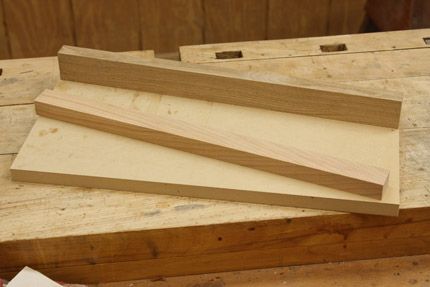
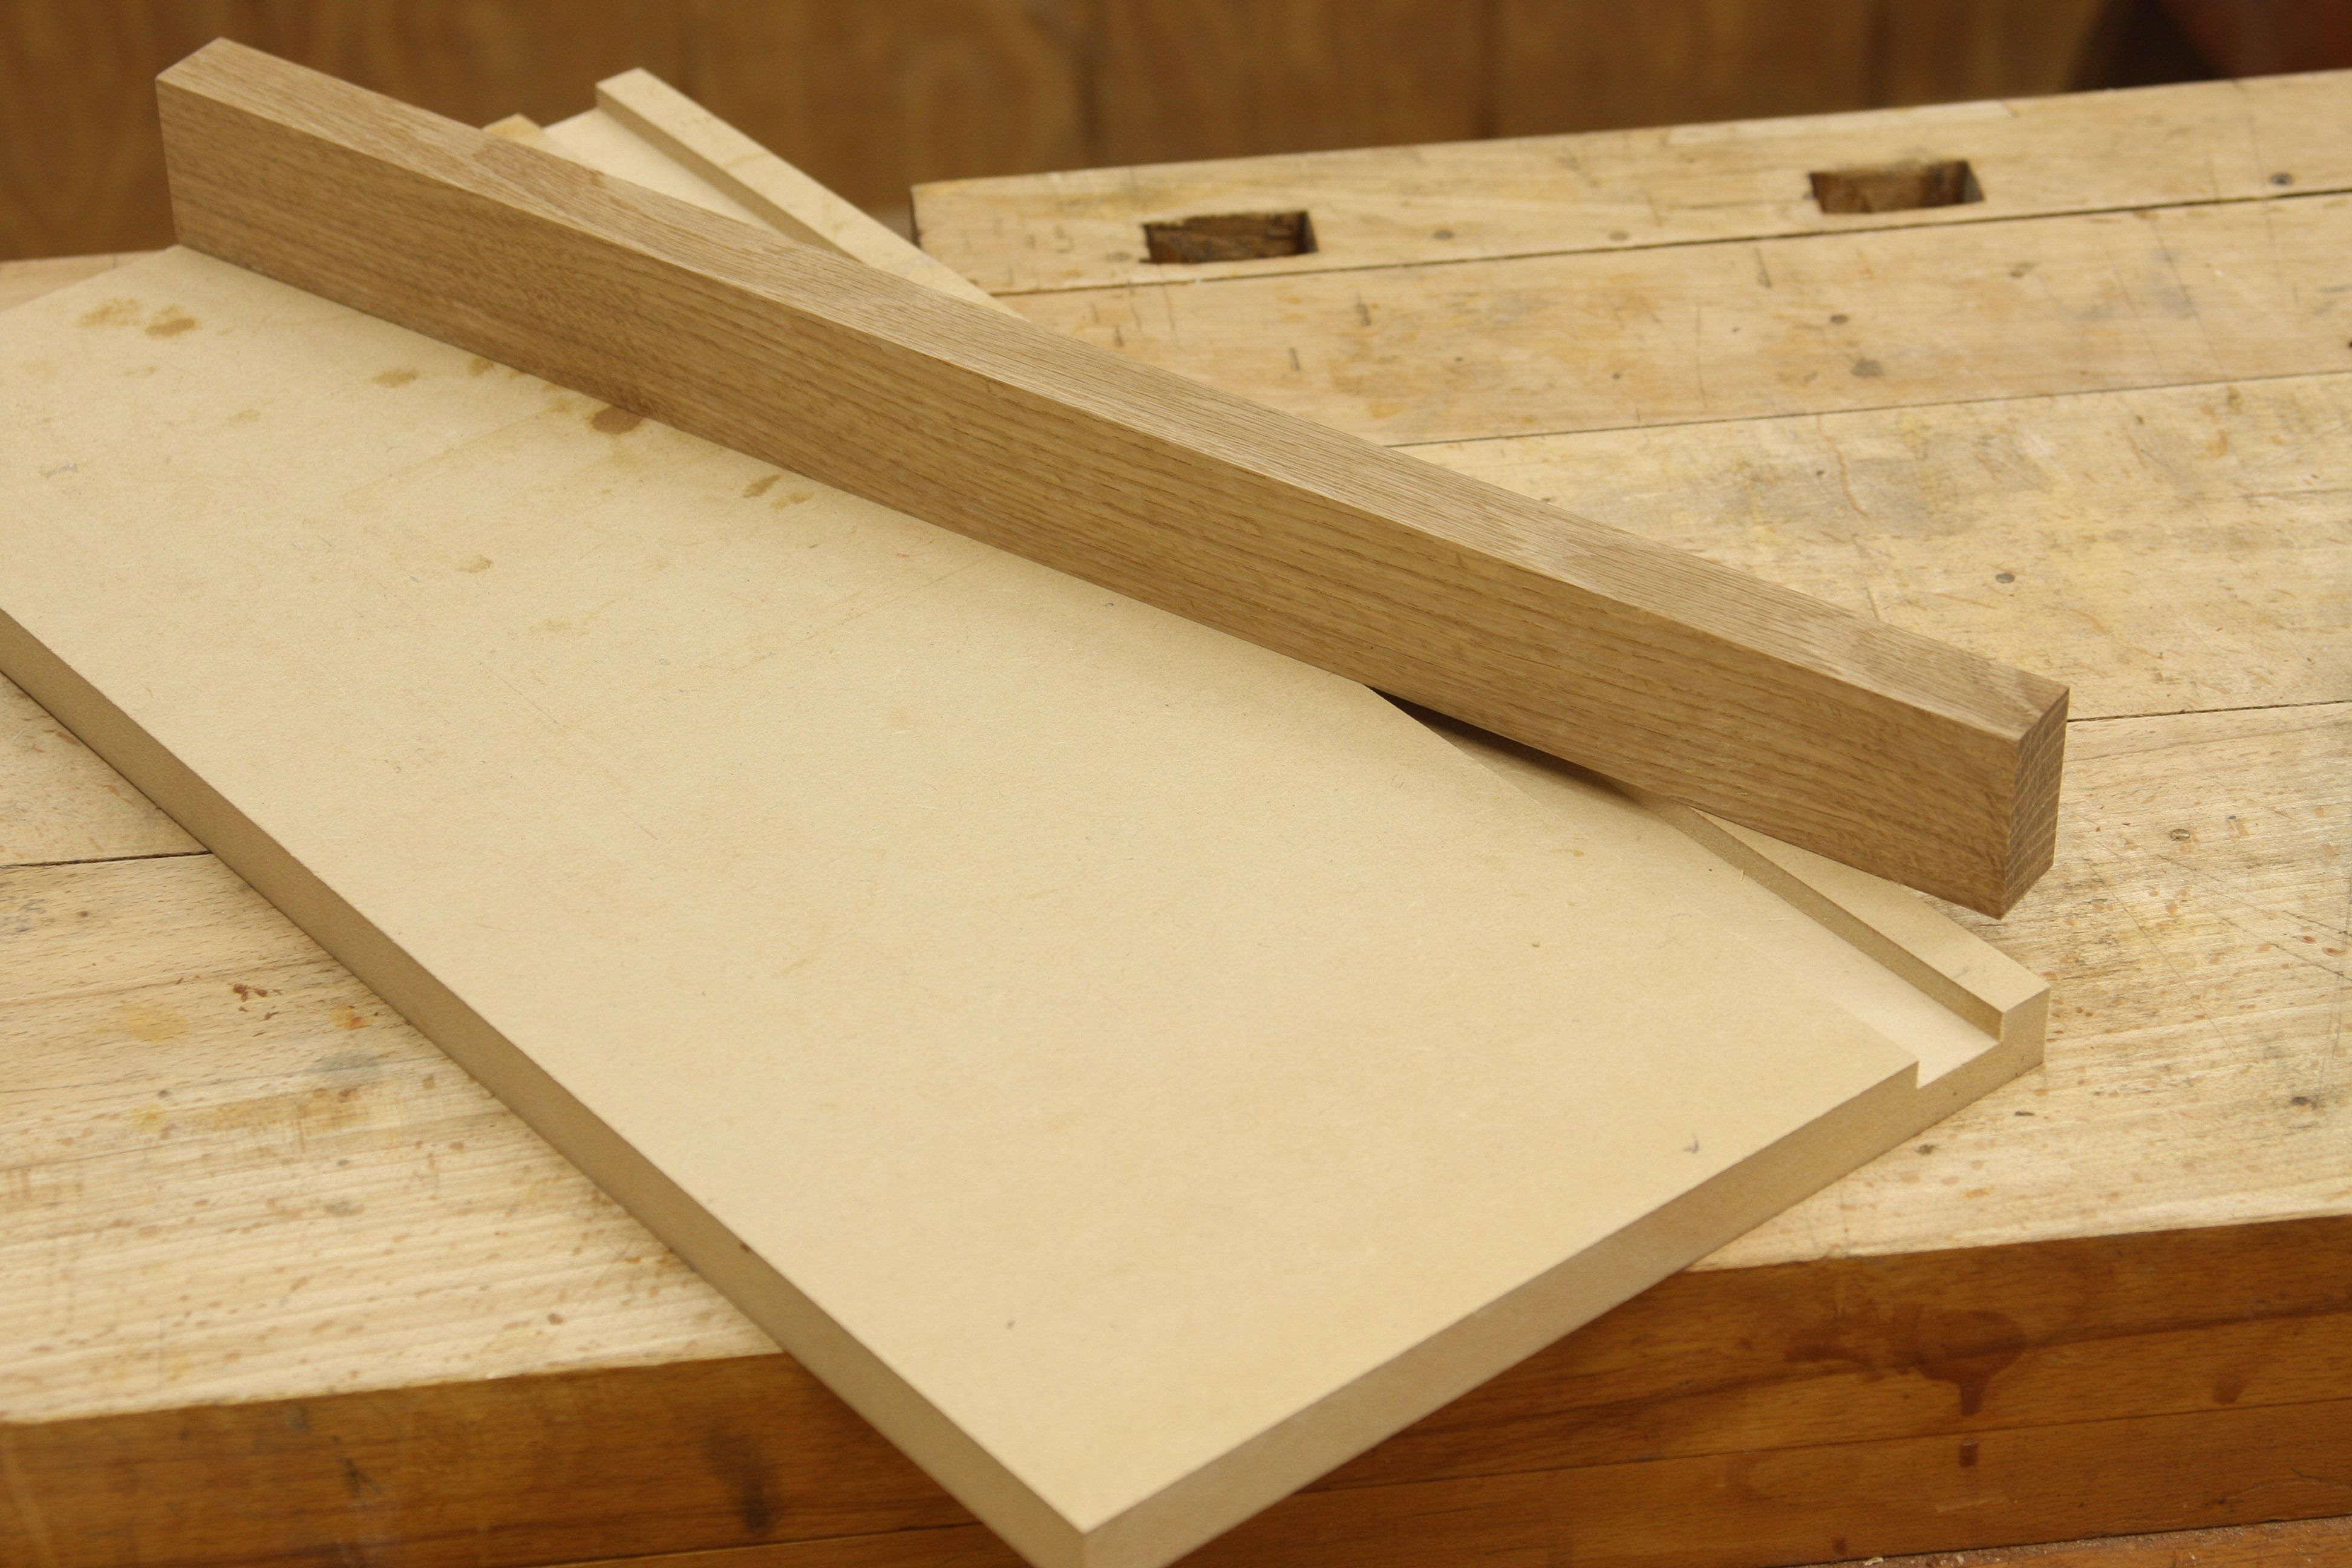
2) I begin by gathering my materials--including a small MDF scrap, and two hardwood scraps. One scrap will be used as a cleat on the underside of the MDF base, while the other will serve as the guide fence for my saw plate.
-
3) Shallow groove holds block in place. At the router table or the tablesaw, I cut a shallow groove set in about 3/4-in. in from one of the long edges. The actual guide for my saw plate will eventually be housed in this groove.
-
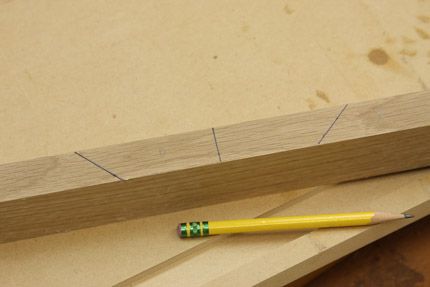
4) Mark your miters. Next, I mark out where I wish to have my straight 90-degree cut, as well as 45's in either direction. Those cuts are then made at the miter saw, after checking my set-up with some test cuts and a combo square.
-
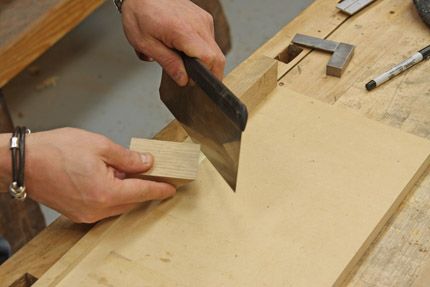
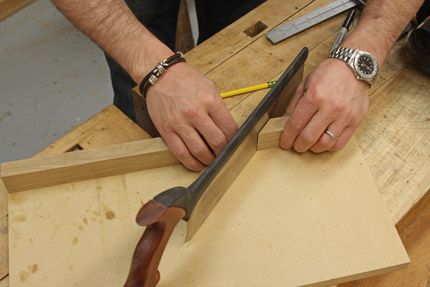
5) Glue it down. At this point, you'll have 4 workpieces which come together to form the saw guide. I start at one end and glue the first piece into place. Then I slide in the next piece, with my saw plate in place.
-
6) Not too tight. When you "trap" the saw plate in place during glue-up, just be sure not to bring the guide blocks on either side in too tight. You want to be able to saw freely.
-
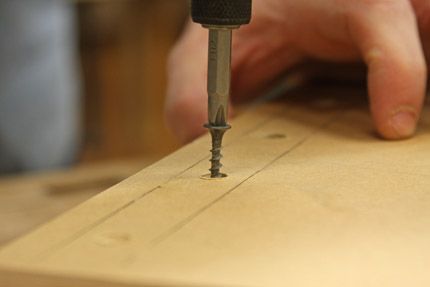
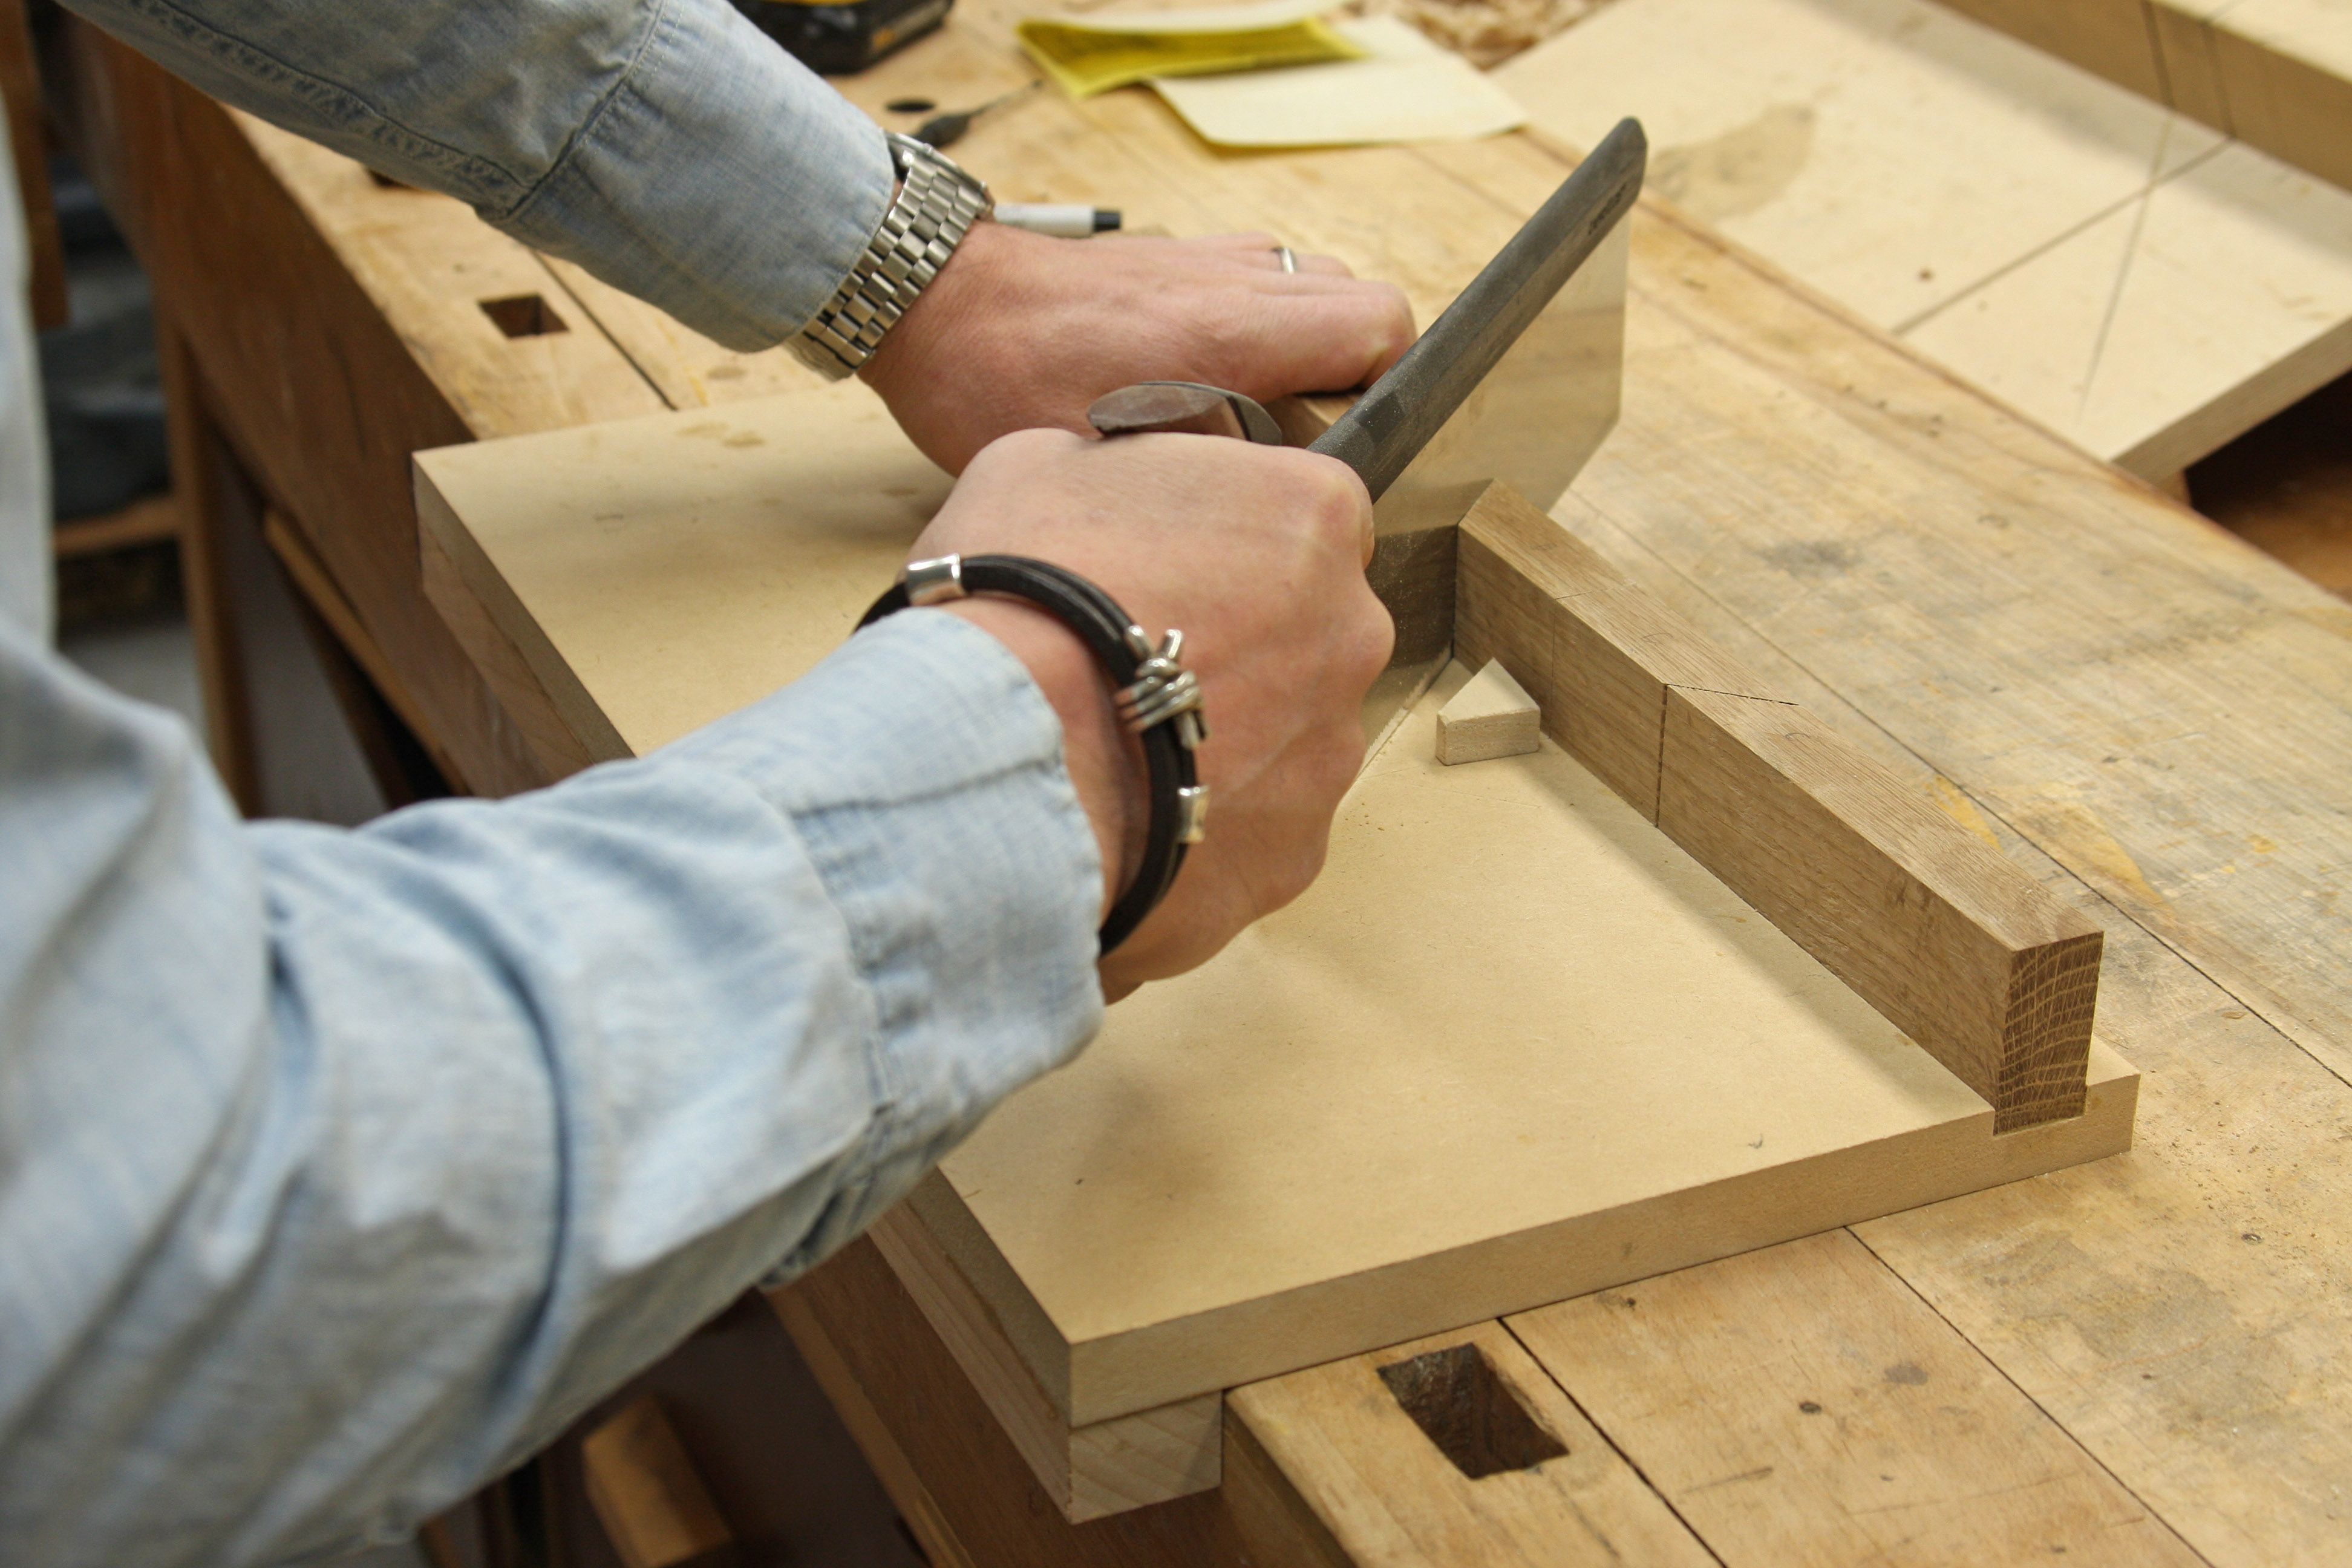
7) Screws seal the deal. Next, I flip the jig over and screw up from beneath for added durability.
-
8) Miter block in action. Notice how I've also added a cleat to the underside of the jig. The cleat registers against the front apron of my bench. Using a miter block like this, coupled with a shooting board, leaves me with crisp, clean miters and straight cuts.


Comments
Curious how you made the cuts to create the separate work pieces (in between steps 4 & 5)? Getting them cut accurately determines how accurate the jig will be, no? Thanks!
@mrossk I couldn't agree more! After all, being able to accurately cut those angles is what creating the miter block is all about.
Hi mrossk,
I must have forgotten to jot down that step. Here's the deal: I cut that am at the miter saw. I generally begin by making a test cut and checking it with a combo square to ensure accuracy. then I go in and make my two miter cuts and one straight cut. That said, if it's off by a degree, it's no big deal. That's because when I use a miter box, I follow up with some planing on my shooting board - and my shooting board is set up very accurately for miters or straight cuts.
I'll add some remarks to the blog to reflect this. Sorry for the confusion.
Ed
I agree with Ed that the Mitre Block should be followed up by a Mitre Shooting Board for fine furniture. Therefore, the Mitre Block does not require machinist-like accuracy.
Alternatively, I would recommend glueing/screwing on a one piece fence, then trusting your hand skills to saw the mitre kerfs using the saw for which the block is intended. For increased accuracy, knife walls can be used to guide your saw during the cut.
Chris Gochnour covers this and other bench hooks in his excellent article: "Expand Your Workbench with Versatile Bench Hooks" in Dec 2004 FWW.
https://www.finewoodworking.com/workshop/article/expand-your-workbench-with-versatile-bench-hooks.aspx
Oh, and FWW's own Matt Kinney depicts this knife-wall/hand sawn method of making the kerfs in his own bench-hook article, "Make Short Work of Small Parts". FWW, July 2010.
The angle cut in the miter back fence is usually cut after it is secured to the edge of the block by cutting with a saw other than the hand saw you will use. This makes the guide kirf to large or to small. But it is not reliable to cut it without some pattern or primary guide to assure angle accuracy. Cutting with a calibrated sled on a table saw or miter saw can provide two separate sides with precise 45 deg. facets but can't provide tight control for the hand saw plate width. Fixing one angle guide permanently and allowing the other to slide laterally to close in on the hand saw blade you will take up the difference in saw blade thickness but there is still the issue of the slope of the saw teeth which extend on either side of the saw blade plate . You either cut into the back guide making it progressively wider or the blade has some clearance which causes the blade to wonder during operation. One solution is to make the fence higher than the part to be cut and have it close on the saw blade laterally above the height of the part to be cut like an old time mechanical miter box. I make the miter guide fence high and out of high density polyethylene. One is fixed and one can slide laterally. I have them clamp the saw plate above the teeth by sliding them laterally and clamping them to a back fence. This is a sort of zero clearance guide to start the cut without any wandering. If you have two such fence guides, one in front of the part and one behind the part to be cut, it provides a miter cut that doesn't need to be worked on a shooting board. The cut can be smooth and won't wonder. It can be both the dimension cut and the finish cut and quite satisfying to do. In conjunction with length stops to assure the length of parts, a well prepared miter block will produce parts directly for final assembly. Cheers, red
If you aren't concerned about the accuracy being off by a degree, why not just screw the guide block into the groove, and make your cuts using the saw you are going to cut with? Then, when the grooves wobble out, you could move over a 1/4" and make new guide cuts.. When it gets too boogered up, get a new guide block.
It seems to me, that throwing in the extra steps at the miter saw, leaves more room for error..
Loved the accuracy of cuts and the miter… Envy your tools! http://www.maecanada.com/
Curious how you made that. I wanna see the complete video if you have.
Thanks
Log in or create an account to post a comment.
Sign up Log in