File Joints for a Perfect Fit
Finesse parts after handplaning to create snug joinery.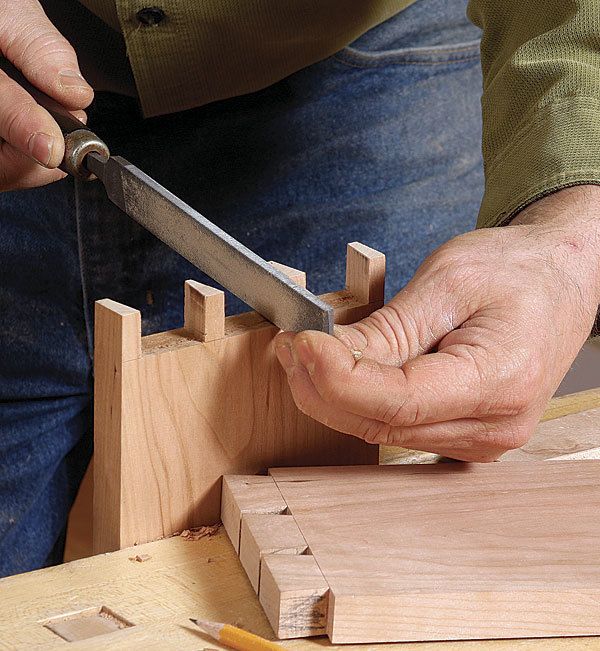
Synopsis: Files are great for removing wood when a joint is almost together—but not quite. A file will delicately trim a joint until it slides home with hand pressure and closes without gaps. And because files remove wood slowly, you have control and won’t go overboard. Hand-tool expert Chris Gochnour explains how to choose the right file and use it to ensure gap-free dovetails and friction-fit tenons.
Fitting a joint is best done with hand tools, because they remove wood slowly and with great precision. This is why so many furniture makers have a shoulder plane or two in their tool cabinet. Chisels are another popular tool for fitting joinery.
However, there are times when you’ve trimmed to your layout lines and the joint still won’t go together. At this point, a plane or chisel shaving would remove too much wood, leaving the joint gappy or loose. When the fitting gets that fine, I reach for a file to delicately trim the joint so that it slides together with hand pressure and closes up with no gaps.
Files are the perfect tool for this job because they remove material more slowly than planes and chisels, affording you a great deal of control. You can target problem areas without turning a close fit into a bad one.
To hit the problem spots with the file, you must know where they are. Identify them with an old woodworking trick: Mark one side of the joint (tails, mortise) with pencil and then bring the joint together as far as you can with hand pressure. Take it apart. Look at the side that needs trimming (pins, tenon). Some areas will be marked with pencil where they rubbed against the mating part. This is where you file. If the joint still doesn’t go together all the way, repeat the process until it does.
Gap-Free Dovetails
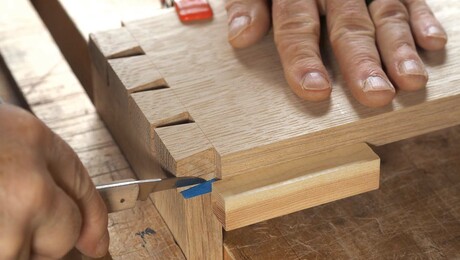
Pencil lead scribbled on the tails reveals where the pins need trimming. Use the file like an eraser, carefully removing the lead with a light touch. Repeat as needed until the joint comes together without gaps.
Spread the lead.
Line both sides of every tail with pencil. Several lines across the face are enough to get the job done. Knock the joint together, stopping when it begins to resist. Then pull the joint apart. High spots on the pins, which are keeping the joint from seating completely, will be marked with pencil lead.
Photo: Matt Kenney
For the full article, download the PDF below:
Fine Woodworking Recommended Products
Leigh Super 18 Jig
Lie-Nielsen No. 102 Low Angle Block Plane
Veritas Standard Wheel Marking Gauge





Log in or create an account to post a comment.
Sign up Log in