Pedestal Dining Table
Smart anatomy builds strength into a user-friendly design.

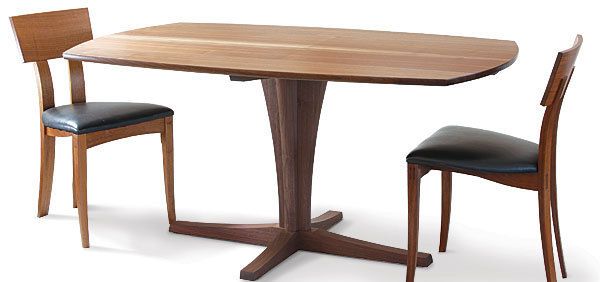
Synopsis: One of the great things about a pedestal dining table is that it lacks the four legs that routinely get in the way when trying to arrange chairs for diners. That benefit also comes with a warning—the central column has to be rock solid to resist tipping and twisting. This table, designed by Timothy Rousseau, is strong and solid, but also elegant looking. The base has three segments: the feet, the column, and the arms under the top. Gently curved sides add to the elegance of the top. Although the anatomy looks complex, all of the joints are easily executed with basic woodworking tools.
I have long admired Alan Peters’s graceful pedestal dining table, and the work of Sidney and Edward Barnsley that inspired it. So when I was asked to make a dining table for an exhibition sponsored by Maine Home and Design magazine, I jumped at the chance to follow in the footsteps of some of my woodworking heroes.
What is great about pedestal tables is the absence of legs. Without the usual four posts getting in the way, a chair can be slid into any position under the tabletop. However, like most things in life, there are trade-offs. The trouble with the single pedestal design is that all the forces are focused through the central column. Those forces include not only downward leverage when someone leans on the edge, but also twisting forces, especially with a large tabletop like this one. So you need a thick, rigid central column connected to the top with rock-solid joinery.
This pedestal design has a good balance between stiffness and elegance. It has been tested in the hostile environment of my own home. My three boys can smell weakness, and this table has been a worthy adversary for a few years now. At nearly 40 in. by 62 in., there is ample space for six people, eight in a pinch.
Although the anatomy looks complex, all of the joints are easily executed with basic woodworking tools, making this a manageable project. The base has three components: the feet, the column, and the arms under the top. The arms and column segments are the same thickness while the feet are thicker. Because this table is rectangular in shape, not square, the base has a long and short axis to echo that fact. I gently curved the sides of the top, primarily because I like the way it feels to sit around that shape.
 Base Starts With Arms And Feet
When milling the base components, make some test parts for setting up machines. They can be made from a different wood, but they must have the same dimensions as the table stock.
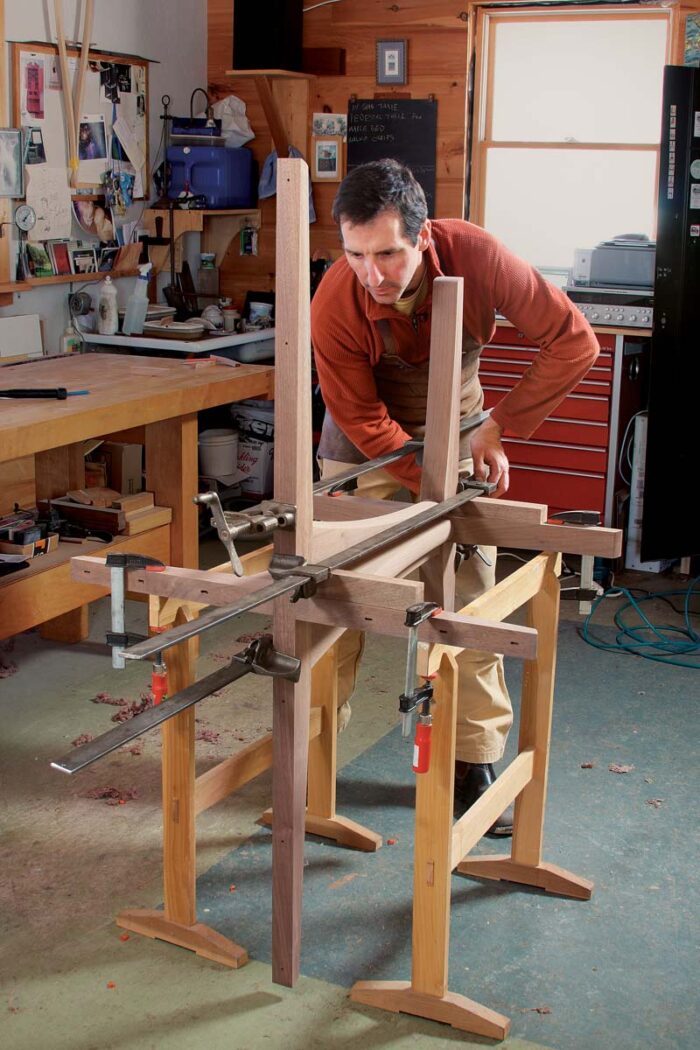
The general rule in furniture making is mortises first, tenons second. That’s why you’ll start with the feet and arms, and do the column last. You’ll also want to cut the mortises and half-laps in the arms and feet before shaping them, while the pieces still have square edges for reference.
The joinery on the feet and arms looks complex, but when you do the mortises first, the half-laps then cut across them and magically generate that sophisticated-looking joint.
Watch the video workshop.
Download the plans for this table from the Digital Plans Library. Plus, browse 100+ other plans available for members only.
For the full article, download the PDF below:
Fine Woodworking Recommended Products

Dividers


Stanley Powerlock 16-ft. tape measure


Comments
How can i get the video for this project:
Tim Rousseau's Pedestal Dining Table?
It's available to online members here here or the DVD is here
Log in or create an account to post a comment.
Sign up Log in