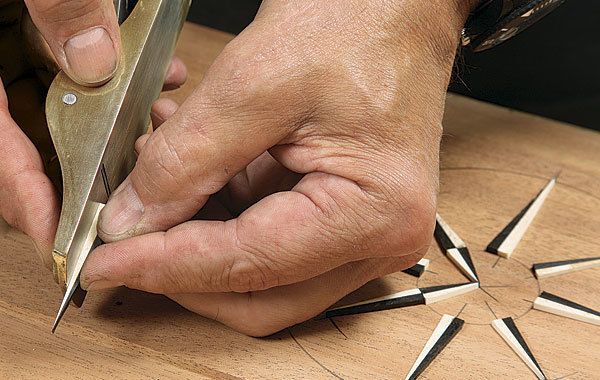
Synopsis: This classic inlay pattern harkens back to the New England furniture-making boom of the 1700s. It features a nautical motif that works well with contrasting woods. Here, you will learn how to inlay a compass rose using a pattern that can be adapted to any size. Michael Fitzpatrick has used the rose in all different sizes—in cases, tabletops, and drawer fronts—all scaled from the same pattern presented here.
I learned how to inlay a compass rose in 2006 while at North Bennet Street School in Boston. Longtime instructor Lance Patterson studied and taught this pattern from a secretary desk that lives at the Museum of Fine Arts in Boston and is attributed to a Massachusetts furniture maker.
This popular inlay was derived from the nautical heritage of New England during the furniture-making boom of the 1700s. The original compass rose was done in holly and rosewood. I like using ebony and holly for a more stark contrast, but any contrasting woods will work.
I first used the compass rose in the top of a small mahogany jewelry box. Since then, several other clients have requested the rose, in all different sizes—in cases, tabletops, and drawer fronts—all scaled from the same pattern presented here.
The rose can be inlaid in solid wood as well as in veneered panels, but if you are doing it in a solid panel in the summer, make the fit of the pieces a little bit looser. That way, when the substrate shrinks in winter, the pieces won’t press together too hard and possibly lift. In time there may be subtle gaps, but those can easily be filled with colored wax.
Layout leads the way
Layout begins by determining the locations and the sizes of the pieces. Bear in mind that each pointer is made up of two triangles, which meet at their fat ends.
The first step is deciding how long the biggest pointers will be. I use that and some simple ratio math to scale my original pattern up or down.
Each pointer is inlaid in two steps, one triangle at a time, which makes fitting much easier. The first step is joining blocks of ebony and holly, and taking slices off those to create the 16 black-and-white inlay blanks, plus a few extra to allow for errors.
The glued-up blocks will be sawn into 1⁄8-in.-thick slices, and the bond needs to hold while you trim and tap the pieces into place. I find that 5-minute epoxy works best. The ebony is very dense and oily, so I give it a quick wipe with acetone before applying the epoxy, to remove any surface oil.
For the full article, download the PDF below:
Fine Woodworking Recommended Products

Bahco 6-Inch Card Scraper

Whiteside 9500 Solid Brass Router Inlay Router Bit Set


Log in or create an account to post a comment.
Sign up Log in