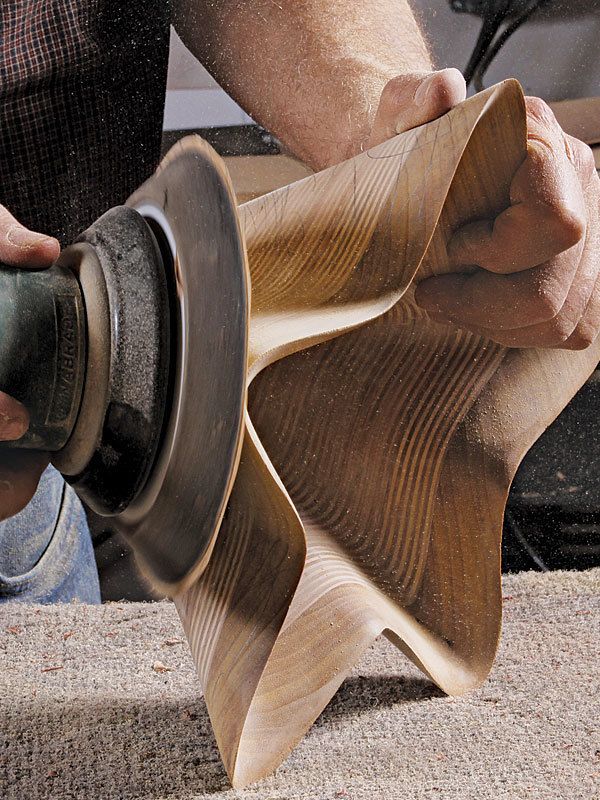
Synopsis: Multiple layers of birch plywood, cut roughly to shape and carved using power tools, are the basis of Kerry Vesper’s sculptural bowls. The flowing lines of the plywood’s edges add interest to the bowls, and the designs are limited only by the imagination. Here he shows how he designs his bowls, shapes the blanks, glues them up, and then uses a variety of power tools to end up with a finished piece.
My process of making vessels evolved out of a desire to create expressive forms in spontaneous fashion. My goal is to capture a fluid form in wood. I start by gluing up multiple pieces of birch plywood cut roughly to shape and then i use power carving and sanding tools to create a flowing, sculptural form.
I began using plywood decades ago because I had no room for the equipment needed to thickness-plane boards. I also was inspired by the stack-lamination work of Wendell castle, with whom I took a workshop in the early 1980s.
These days, I have a little more space, but by now I am hooked on the design possibilities offered by, among other things, the parallel lines of plywood’s edges. Flowing around the organic form of a sculpted bowl, those lines remind me of the rock strata in the Southwest desert where I live, carved into graceful shape by wind and water.
Cut a stack of rings
Each of my sculptural bowls is shaped from a “blank” created by stacking and gluing together a series of concentric plywood rings, graduated in size and built from the top down. Then I add a top rim and bottom made of solid wood. When I started making bowls years ago, I would draw ideas on paper, starting with the rim and imagining the shape getting smaller with each layer. These days I use a computer and a 3D drawing program.
I start by laying out and cutting the largest and topmost plywood ring. I draw a pattern for the exterior outline of this piece and then secure the pattern to a piece of 3⁄4-in. plywood that is cut to rough size. I cut the piece at the bandsaw using a 1⁄4-in. blade and with the table tilted at about 10°.
Once the exterior shape is cut, I mark a line for the interior cut as shown above. Then I take the work to the scrollsaw and, with its table also tilted 10°, make the interior cut.
This completed top layer now becomes the pattern for the smaller plywood ring that will go underneath it. To mark out for the next piece, I place the top ring on another sheet of plywood, small side down, and trace both the inside and outside edges.
For the full article, download the PDF below:
Fine Woodworking Recommended Products
Ridgid R4331 Planer

AnchorSeal Log and Lumber End-Grain Sealer

DeWalt 735X Planer





Log in or create an account to post a comment.
Sign up Log in