Stow-and-Go Sharpening Box
Simple project works as a sharpening station and storage box
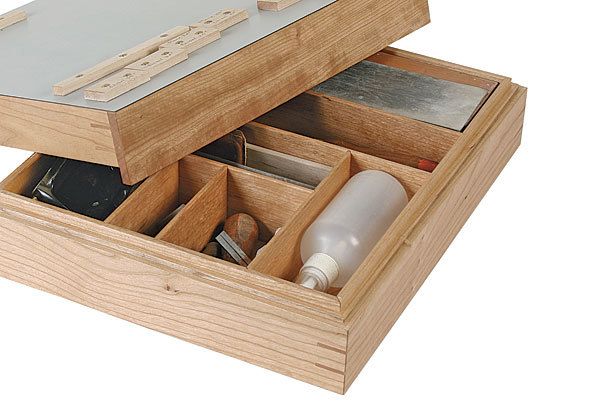
Synopsis: This mitered sharpening box has dividers for storing all your sharpening gear in dedicated spaces, and a laminated lid with cleats to hold sharpening stones and set up honing guides perfectly each time. Bob Van Dyke customized his box for the tools he uses regularly, and you can do the same for your own. Not sure what sharpening equipment you need? Also included is a basic sharpening kit that Van Dyke recommends to his woodworking students.
A few years ago while giving a sharpening demonstration, I realized how disorganized my sharpening equipment was: stones, honing guides and their projection jigs, and water sprayer in different corners of the shop. Getting it all in one place took forever. My solution was to build this box to keep it all together and give me a solid surface for sharpening. The simple splined and mitered case has a laminated top with cleats for stones and a projection jig for setting honing guides. Inside, a removable divider system keeps tools organized while remaining adaptable should your kit change.
Make the box
The unique feature of this case is how I cut grooves into the inside and outside faces of the sides to form a lip for the top to register on. It is easier and more precise to cut these grooves, as well as the ones for the top and bottom panels, and surface the stock before cutting any miters. I use a box-joint blade for the grooves because it leaves a perfectly flat bottom, but a good-quality dado blade would work as well. Start by ripping the offset grooves into the inside and outside faces. Mark the location of the inside groove on the outside face for reference. Once it’s glued up, those marks will help locate the cut to split the box.
Next cut the grooves for the top and bottom panels. Locate each groove so that the edges of the case sides will be slightly proud (they will be trimmed flush later). Surface both sides of the stock. To cut the miters, set the blade at 45° and test your setup on scrap until the miters close tightly. Cut the sides to length at the tablesaw and save a few offcuts—you will need them later. Dry-fit the box using blue tape or packing tape as a clamp, and measure the inside dimensions. Cut the top and bottom to that size, adding 3⁄8 in. to the length and width to allow for the grooves. Now cut the rabbets with a dado blade. Check the fit with the panels in, but don’t put the top and bottom in at the same time or you might not get it apart. When you’re happy with the fit, prepare to glue up.
Glue up the box
Spread some paper on the bench and clamp a straightedge to the bench. Register the box sides against the straightedge and tape them together. The tape should stretch tightly and cover the whole joint. Fold over the ends to make it easier to remove later. Turn over the assembly and spread glue in the miters, grooves, and rabbets. Put the top and bottom in place, fold the sides around it, and tape the last joint. I use liquid hide glue for its longer open time. When the glue is dry, remove the tape and any squeeze-out.
For the full article, download the PDF below:
Fine Woodworking Recommended Products

Norton Water Stones

Wen Diamond Grinding Wheel

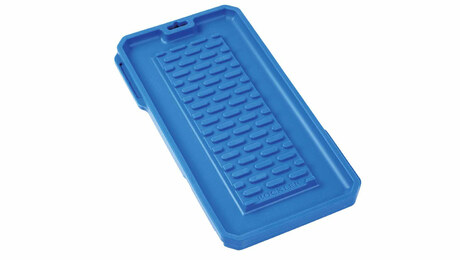
Rockler Silicone Sharpening Stone Tray


Comments
I LOVE this! I want to make one, but I'm new to this stuff and don't know what type of wood to use. (Why don't these articles ever specify what materials were used?)
That box looks like cherry. We don't always specify the wood because it's totally up to the builder what to use. The wood is purely an aesthetic decision on this project. If a particular type of wood is required for a functional purpose then we'll specify.
do you think it's cherry he used for the dividers and the little box he used to hold the stones, too?
I used cherry for mine. Looks and works nice.
Ready to go on this project - just can't find a Laminate sheet for sale anywhere here for less than $65 CAD, and less than 4' x 8'. So annoying.
@jbarduhn, is there a company in the area that makes countertops? Maybe they'd have a scrap large enough.
@DaveRichards - I tried a couple places, but to no avail - so I just ended up getting a 4'x8' sheet of white Formica. So, if anyone wants to make one in the GTA, I've got your laminate haha.
Now that I'm retired , this is going to be one of the first builds for myself. I have over 100bf of knotty alder that I need to use.
Log in or create an account to post a comment.
Sign up Log in