Frame-and-Panel Cabinet: Get The Plan
Give your joinery skills a workout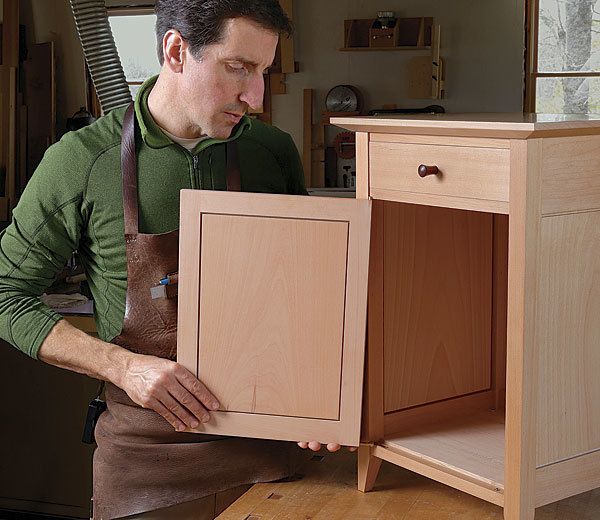
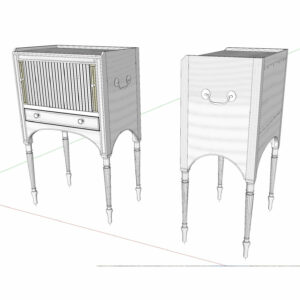
Synopsis: Part of the beauty of a frame-and-panel cabinet is all the steps between parts, which add shadows and detail to the piece. This small side cabinet employs frame-and-panels on all four sides and in the door, illustrating all the techniques required in a more complex case piece. Mortise-and-tenon joinery is used throughout, while the top rail connects to the legs with dovetails. This project also teaches a foolproof way to mortise for knife hinges.
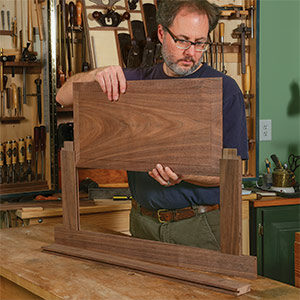
I designed this cabinet to teach frameand-panel case construction to students at the Center for Furniture Craftsmanship. What I like about frame-and-panel work is all the offsets between parts, which add shadows and details. All of that detail requires a lot of parts, and this small piece will give you a feel for building a complex case piece. I’ll also show you a stress-free way to install knife hinges. Start by getting your stock prepped and milled.
Build the case frames
The first step is to cut the rail mortises in the legs. When that’s done, cut the tenons on the rails.
I cut tenon cheeks at the tablesaw with a tenoning jig that rides on the rip fence and a pair of dado blades spaced to the tenon thickness. Once the size is dialed in, I get perfectly fitted tenons right off the saw.
I cut the tenon shoulders at the tablesaw with a standard blade. But before doing that, I remove most of the waste at the bandsaw to prevent the offcuts from becoming projectiles. With the tenons all cut, I miter the tenons on the side and rear rails where they meet in the rear legs.
With the rails fitted to the legs, the next step is to cut grooves for the panels. I use a wing cutter in the router table. Start with the leg grooves, setting the height of the bit so that it’s centered in the mortises. Add a zero-clearance fence to control blowout. run grooves from mortise to mortise in each leg face.
To mark the side and back rail grooves, insert a rail into a leg and transfer the groove location to the rail with a knife. Then readjust the cutter height, add a fresh zero-clearance fence, and groove the rails.
With the leg joinery done, taper the feet at the bandsaw and clean up the saw marks with a hand plane. Now it’s time to focus on the connections at the front of the case.
Handling the rails
The front rails connect to the legs in two ways. The top rail is dovetailed into each leg and the lower two rails are double tenoned into the legs. The double-tenon joinery method I use was covered in “Float the Top”.
For the full article, download the PDF below:
Fine Woodworking Recommended Products
Bessey EKH Trigger Clamps

Starrett 12-in. combination square
Bessey K-Body Parallel-Jaw Clamp

Get the Plan
Part of the beauty of a frame-and-panel cabinet is all the steps between parts, which add shadows and detail to the piece. This small side cabinet employs frame-and-panel construction on all four sides and in the door, illustrating all the techniques required in a more complex case piece. Mortise-and-tenon joinery is used throughout, while the top rail connects to the legs with dovetails. This project also teaches a foolproof way to mortise for knife hinges.






Comments
Your magazine said to go to Finewoodworking.com/PlanStore to order expanded plans and a complete cutlist for the frame and panel cabinet beginning on Page 26 of the September/October 2016 issue. First, I received a message that no such page existed. Then, I was able to log in (I think) and found the cabinet, although it was date July 2016 on the site. But, I cannot find any place to order plans. I've spent half and hour attempting to do this. Suggestions??
Jon Whitney
Apologies for the screw up Jon. I've updated this post with a link.
Wonderfully illustrative video for this project, very helpful for those like me who barely qualify as intermediate-level woodworkers: https://www.finewoodworking.com/videoworkshop/2012/08/frame-and-panel-cabinet
I bought this plan and there seems to be an error on the dimensions for the "notch around the rear leg" for the Kicker and Drawer Runner. It is listed as 14" deep, but the pieces are 11" What is the correct dimension?
Log in or create an account to post a comment.
Sign up Log in