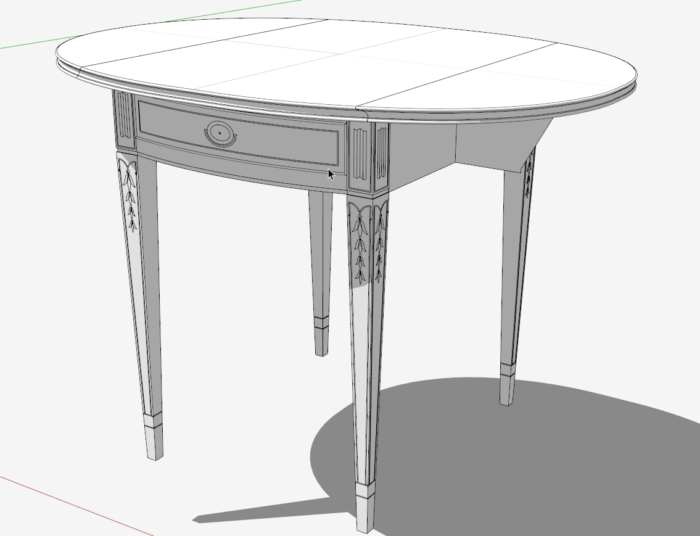
The school’s Fall semester has started, and we are tackling an 18th C. Pembroke Table, shown below. The first activity in the shop will be working the Legs, and I’m struggling to effectively show all the dimensioned joinery in these Legs. There is a lot going on at the top of the legs – stringing, mortises and inlays. These complexities make it hard to read dimensions and know what they mean.
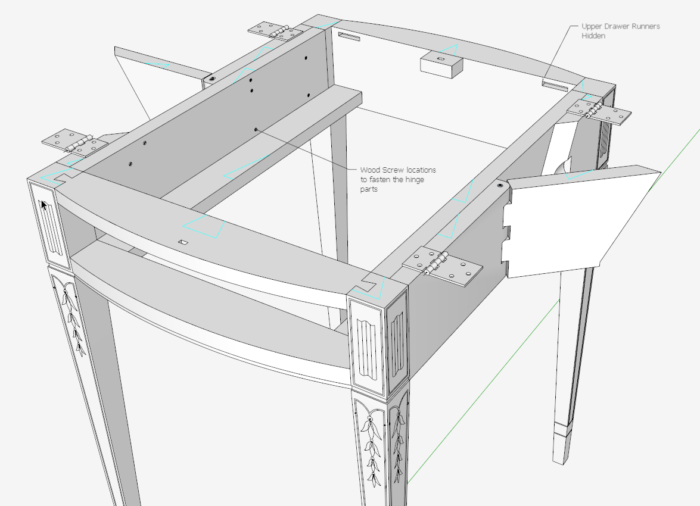
Also, the drawing should be clear on the position and orientation of the Leg component – is it a Front or Back Leg, and are we looking at a front or side view. For this issue, I included “triangle marking” on the component parts in SketchUp. These same marks are placed on the lumber components in the shop to distinguish front, back, top, bottom, etc. In SketchUp, I showed these triangles in Cyan color, as shown in the following inside view of the table.
With SketchUp you have unlimited options to create views of components in 3D space. So it is quite easy to show a component from many directions and orientations. However, I would also like to have an efficient and clear drawing that is easy to interpret.
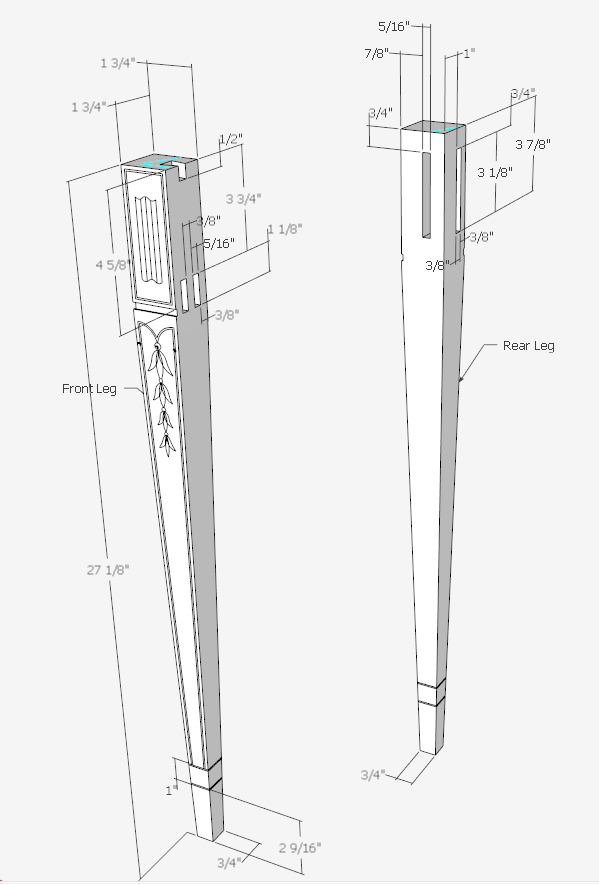
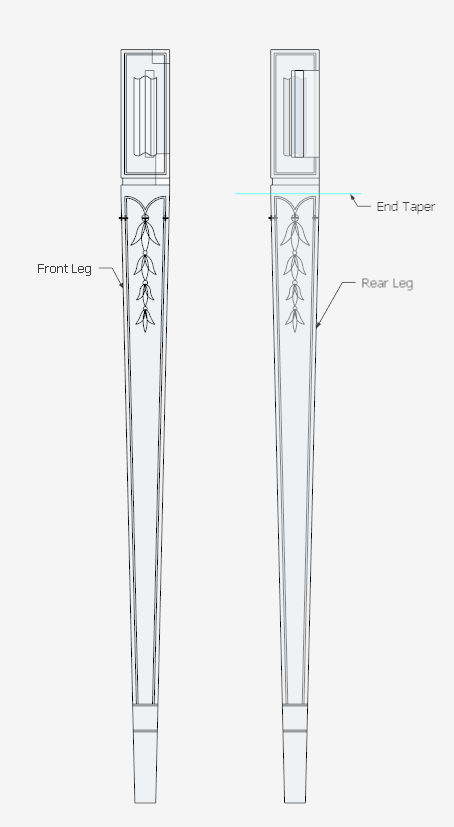
I’ve ended up with several views of the Leg components, starting with the overall perspective view shown below. As these components have the triangle marking (on the top face), the reader can determine that this is the Front Left Leg and Back Left Leg, along with their orientation.
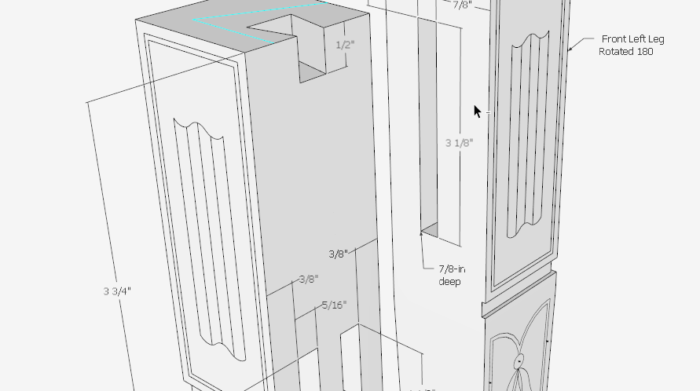
Since most of the complexity is at the top section, I included separate close-up scenes of the same components. The dimensions in these scenes are set on separate layers so there is no conflict of overlapping and redundant dimensions. The next two scenes show dimensions for the mortises.
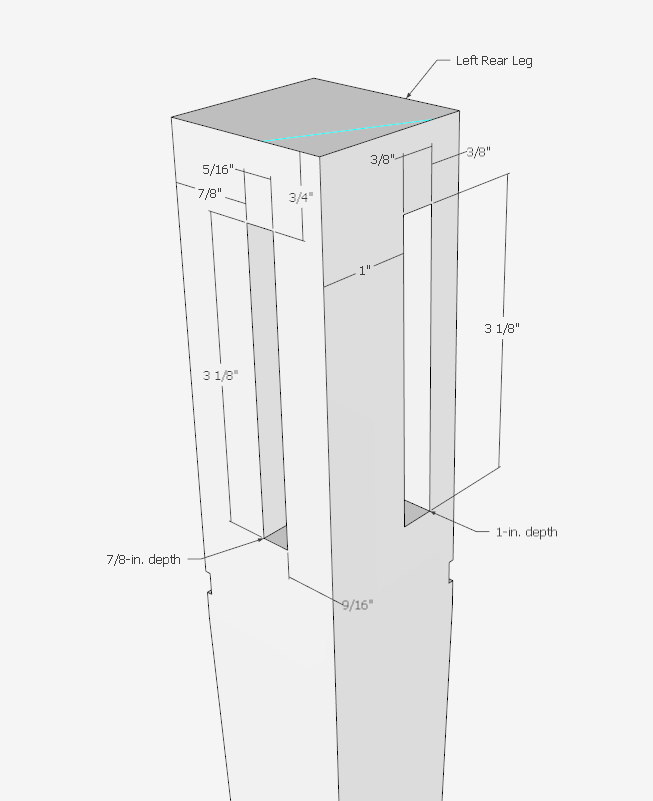
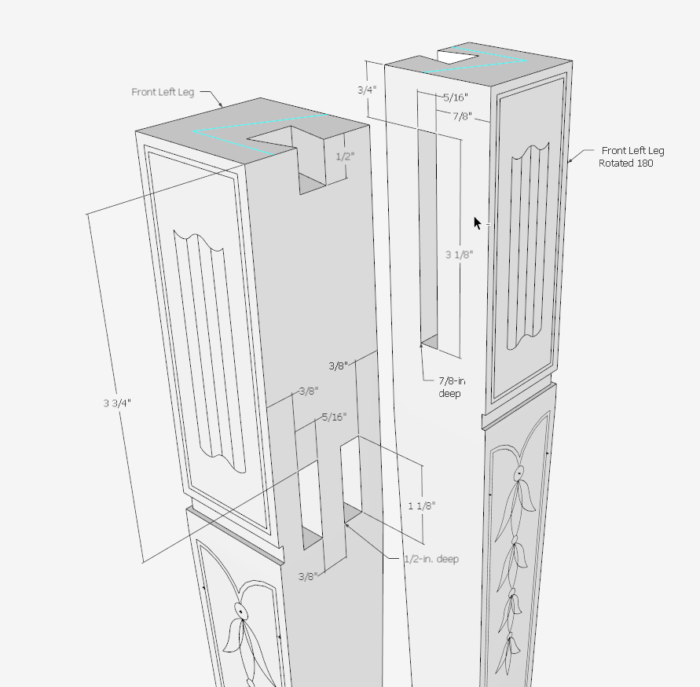
I created another scene for the layout and dimensions on the inlay pieces.
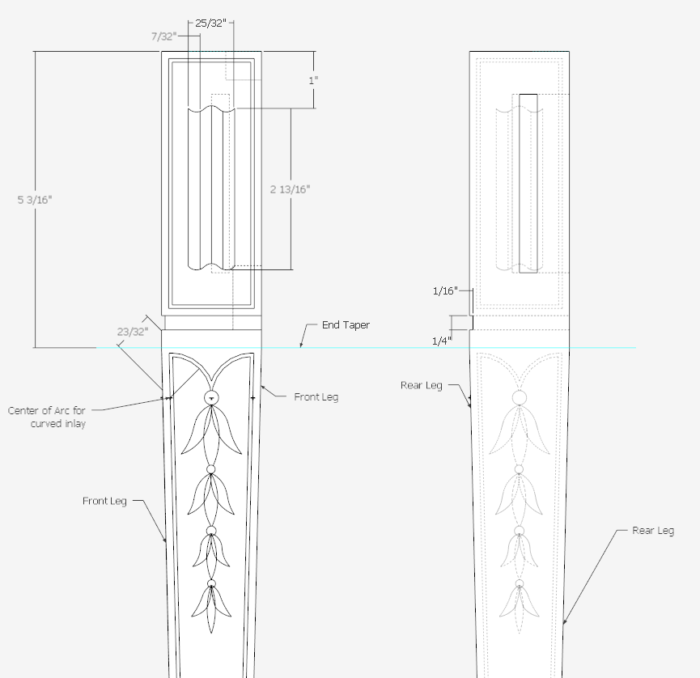
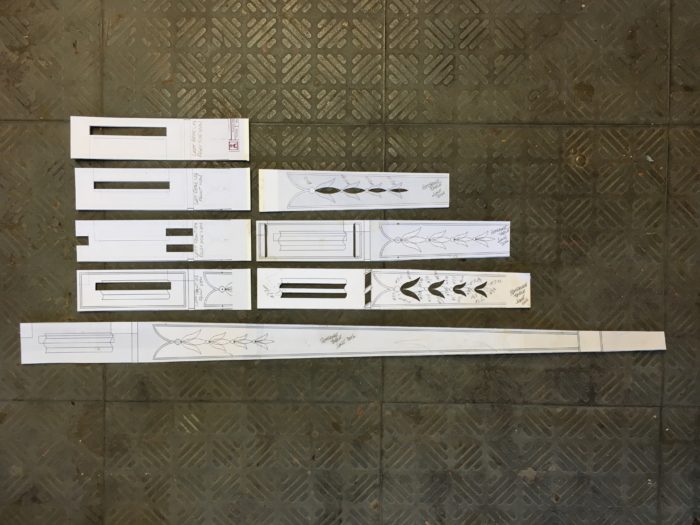
I needed a way to check the marking and layout of mortises and inlays, so I created full-size templates in hidden-line mode of all four faces of the top of the legs. In the poster-board templates, using an X-acto knife, I cut out the mortise positions.
In the shop I positioned these templates over the mahogany leg blanks to verify my markings of mortise locations.
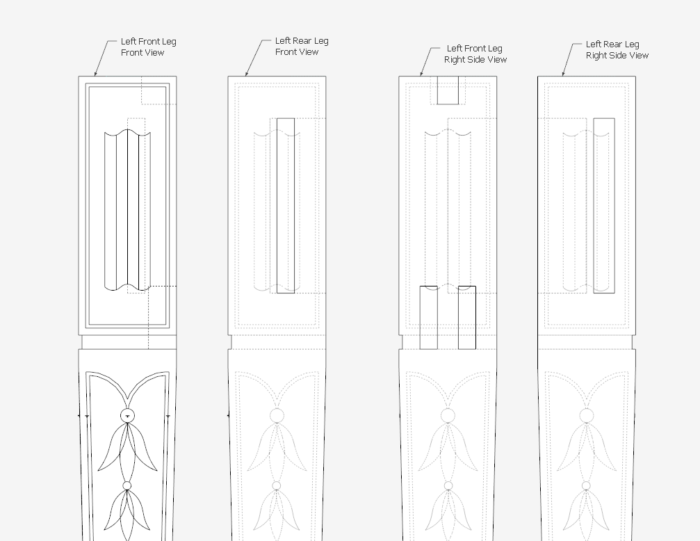
Finally, I created full size templates for the full length of the Legs. These are used to mark out the taper on the mahogany pieces.
Below is a photo of all the templates used in marking and layout of leg details.
Tim
@KillenWOOD




Log in or create an account to post a comment.
Sign up Log in