School Garden Box
Step by step instructions for elementary school students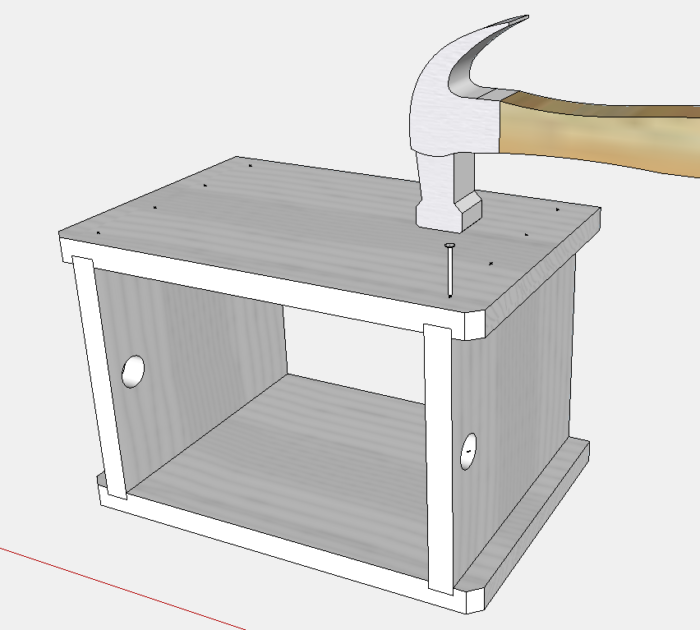
Our woodworking group (Diablo Woodworkers) will be teaching 75 elementary school students (and their teachers) to build a Garden Box. These students, 2nd through 5th grade, are already engaged in outside garden activities requiring each student to have a box to plant seeds and grow plants. The teachers see this as an opportunity to have students also experience woodworking skills.
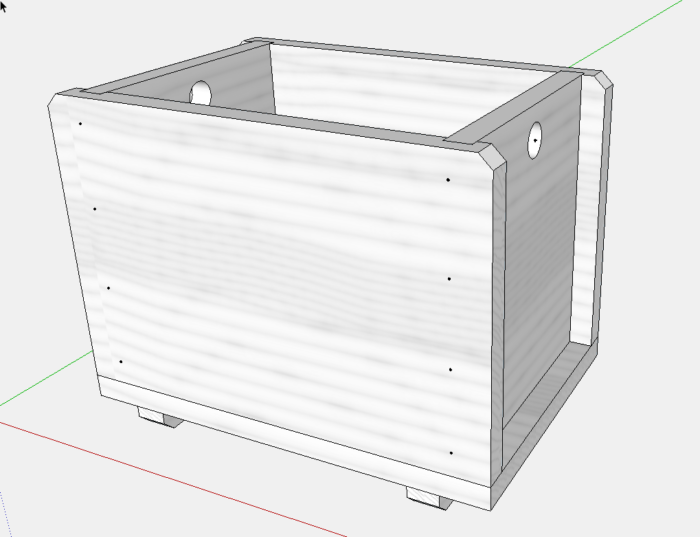
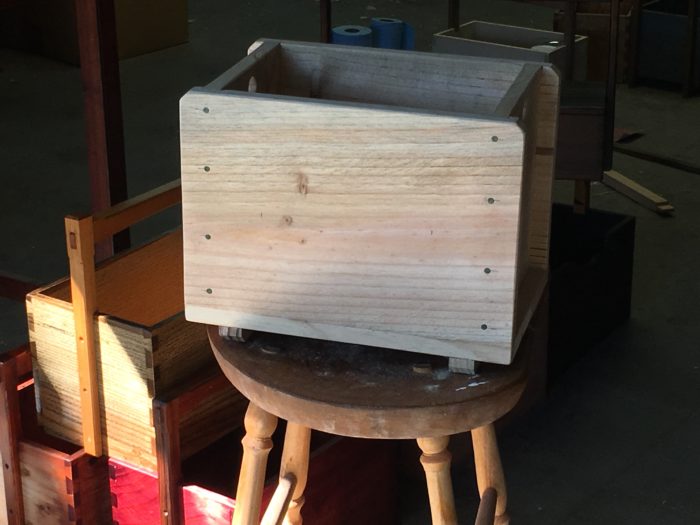
The school did not have a design, so SketchUp became an important collaboration tool. I was told that the box should be 12 x 12 – the only specifications – so there was much flexibility. The following image shows the final approved design, after sending several SketchUp views and dimensions. Also I’ve shown the prototype in Monterey Pine.
SketchUp will also be used in the classroom building sessions, as it provides a step-by-step procedure for the construction at school. This should help teachers and children to orient and join the box components. Also it shows where woodworking tools are introduced, such as the hammer, awl, hand drill, and screwdriver.
Step 1 – Position the Front piece flat on the floor with its top edge facing you. Insert the two Ends into the dado joints as shown. Make sure that the top of the Ends is vertical and facing you.
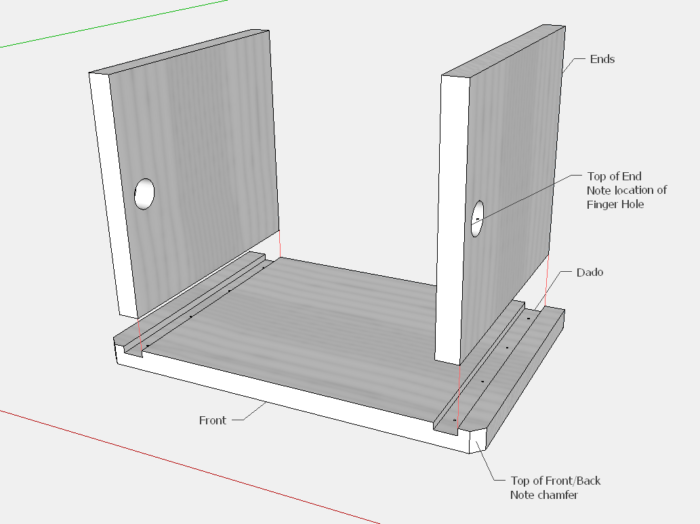
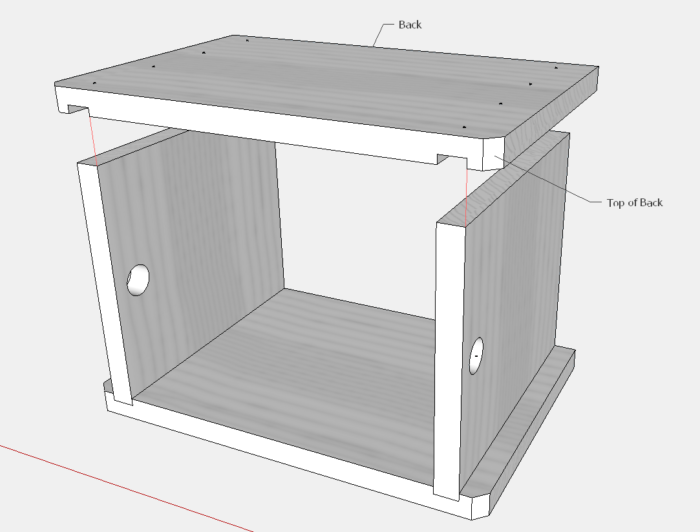
Step 2: Place the Back piece on top of the Ends with the dadoes lined up. Make sure the top edge of the Back is facing you. Push down on that the Back so that it fits over the Ends.
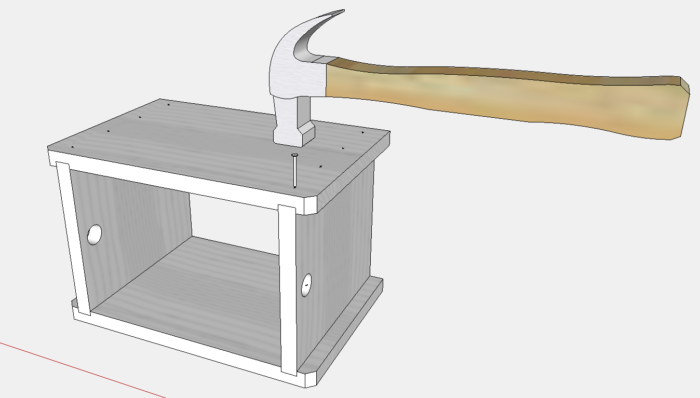
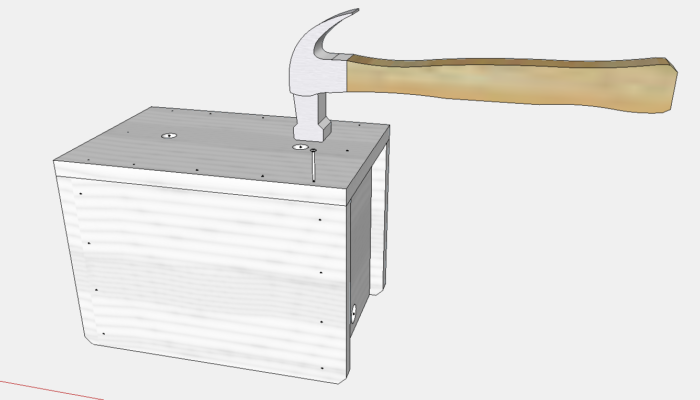
Step 3: Hammer the nails into the drilled shank holes
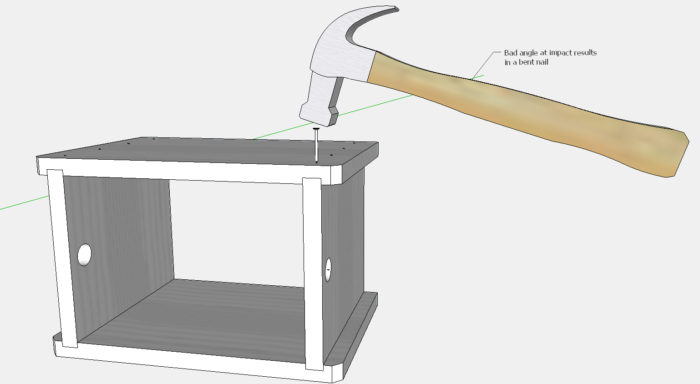
Note: Make sure to hit the nail head with the hammer flat, not angled as shown below:
Step 4: Turn the assembly upside down, and position the Base on the bottom of the assembly
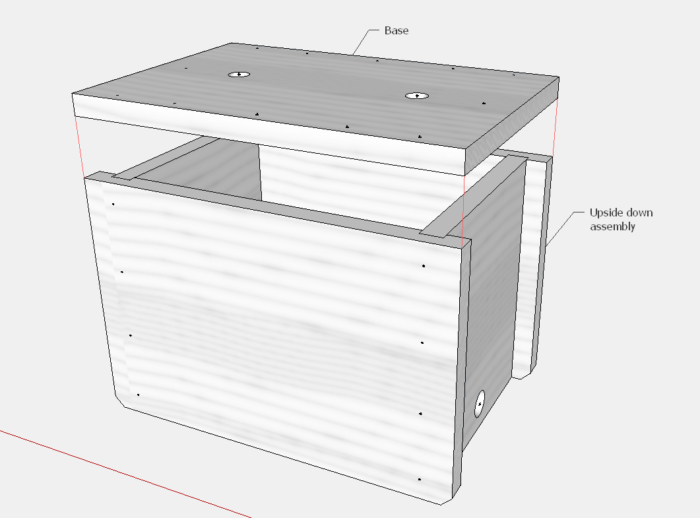
Step 5: Hammer the nails into the Base.
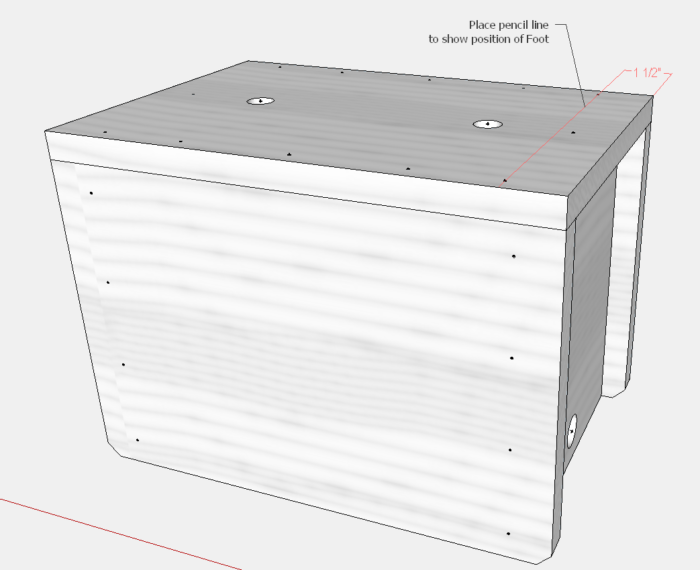
Step 6: Place a pencil line across the Base as shown, to locate the position of the Feet.
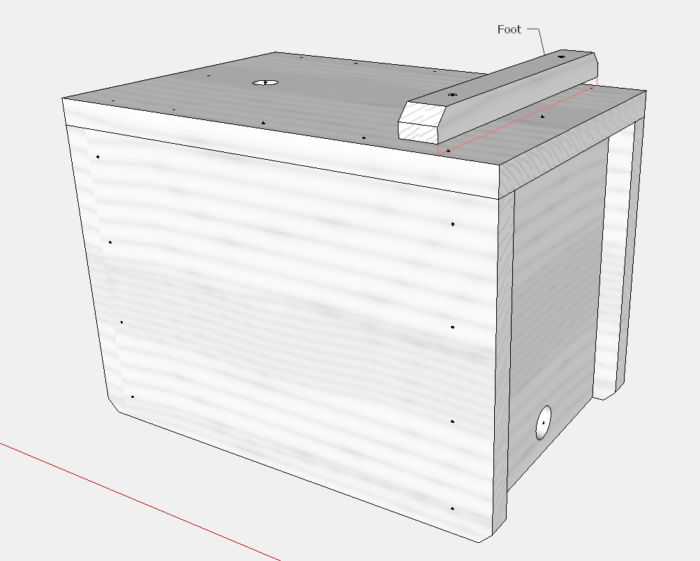
Step 7: Place the edge of the Foot on the pencil line.
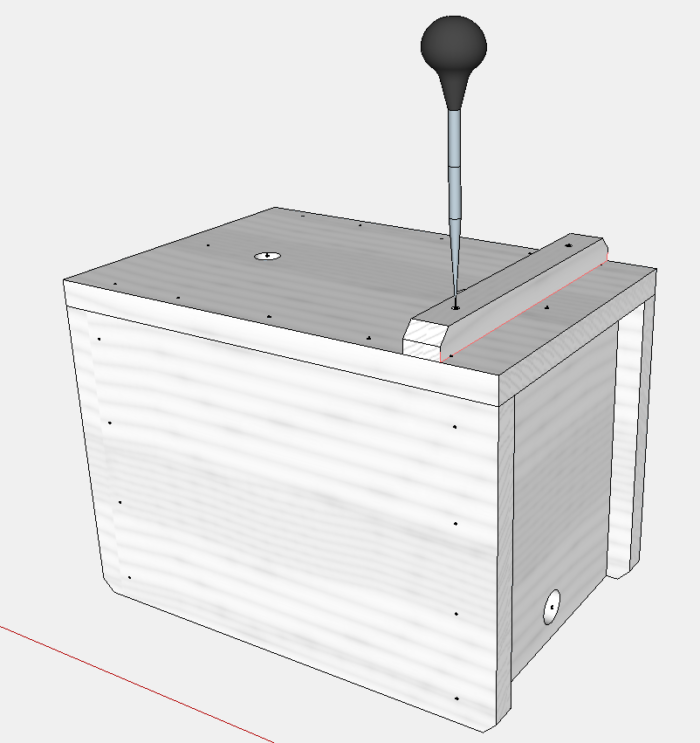
Step 8: With the Awl, poke through the hole to mark the location of the screw pilot hole in the Base.
Step 9: Move the foot, and use the drill to make screw pilot holes in the Base. Locate the drill point in the mark made by the Awl.
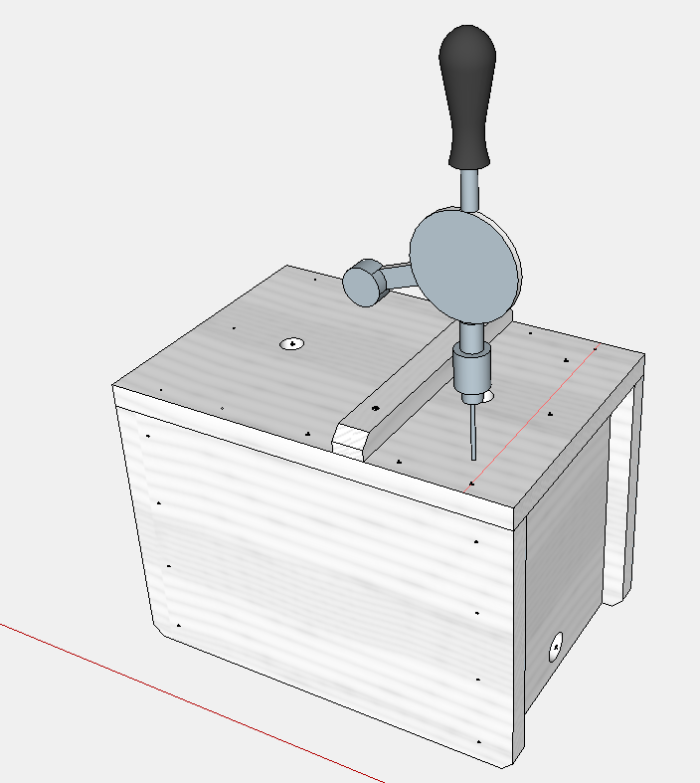
Step 10: Use the Screwdriver to insert the flat head wood screws.
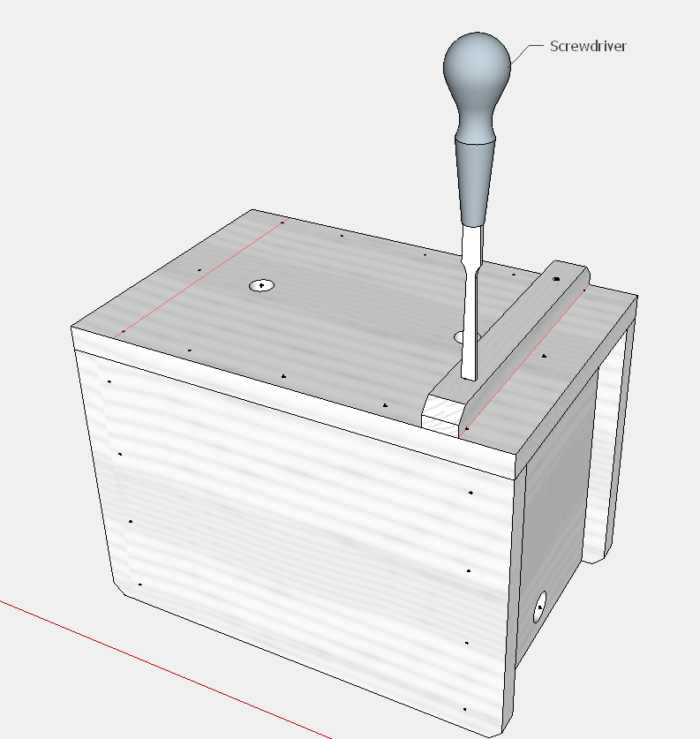
Step 11: Repeat those steps for the other Foot.
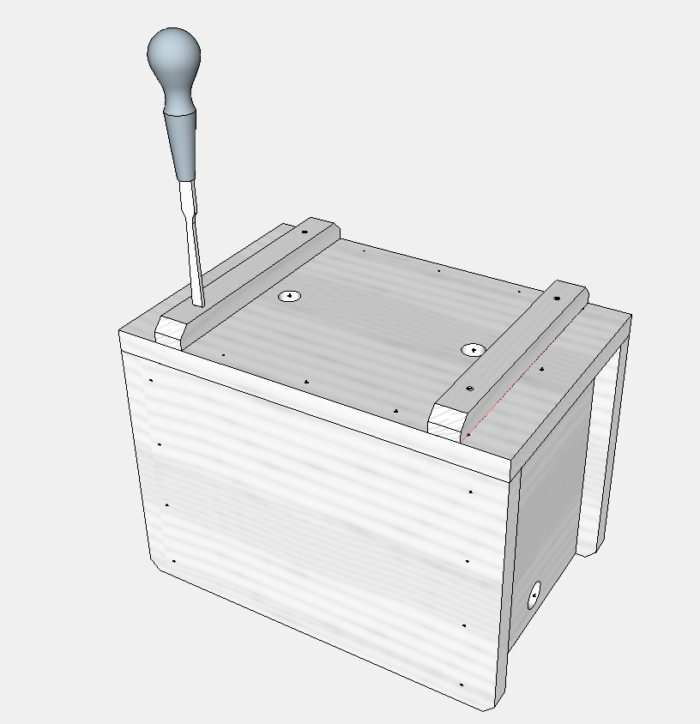
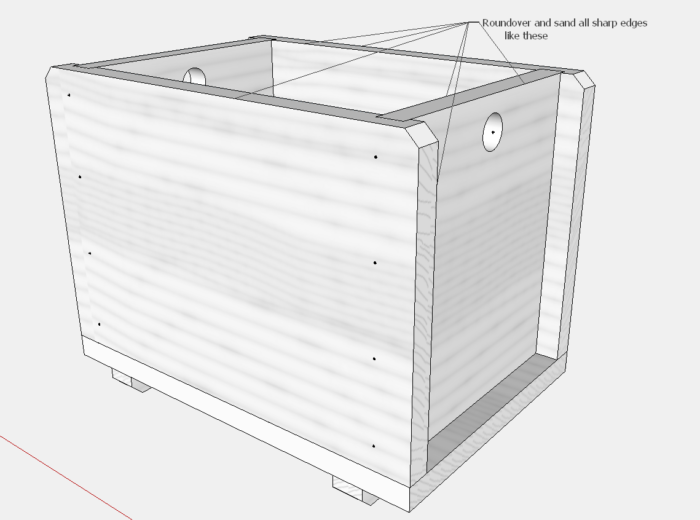
Step 12: Use files and sandpaper to round over and smooth all the sharp edges.
Tim
@KillenWOOD
Fine Woodworking Recommended Products

Suizan Japanese Pull Saw







Log in or create an account to post a comment.
Sign up Log in