Display Cabinet on a Stand
Eye-catching details and contrasting woods make this a case to remember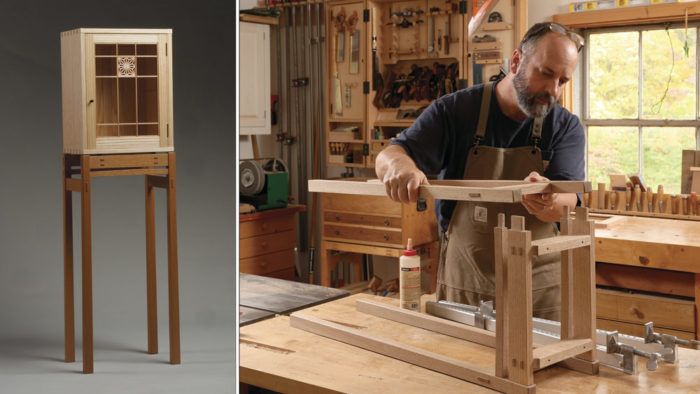
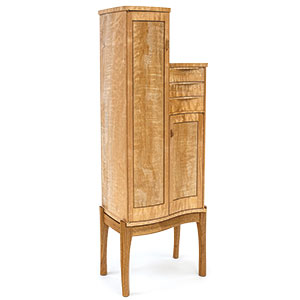
Synopsis: Joinery takes center stage in this cabinet-on-stand. The base and case are made with contrasting woods, but the straight grain of the riftsawn stock unifies the two. An apron and rail on each side of the case make for a strong, light-looking base. A wide upper front apron paired with a narrow lower rail accomplishes the same objective. The base is joined with through-mortise-and-tenons, lightened with tapers and curves. Latticework on the front door dresses up the dovetailed cabinet on top.
I first came across the writings and work of James Krenov while in college, and they have influenced my approach to the craft ever since. His signature piece was the cabinet-on-stand, and he made many throughout his career. Each one was an exploration of joinery, grain, and form. While this cabinet is definitely an ode to Krenov, my aim wasn’t to create an exact reproduction. Instead, I wanted to tackle the design challenges the form presents. I hope this article prompts you to try a case of your own, whether based on this project or by following your own muse.
I had a few goals in mind when working out the design. Like a lot of my work, my aim was a quietly interesting piece, rather than something that shouted too loudly. on a quiet piece, small details make a big difference. To that end, I made the joinery the star of the show. I also added some contrast by building the case and base in different woods. I chose ash and white oak because while they differ in color, each has very strong grain that complements the other. To further unify the different woods, I used riftsawn stock for each species. Its tight, straight grain kept the two woods from clashing, and helped to reinforce the lines of the cabinet. getting riftsawn stock required a different strategy for each wood. For the base, I started with an 8/4 flatsawn white oak board. I looked for a board with tight rings that dove at a diagonal at the edges. The base parts were taken from those edges, where the rings ran corner to corner and yielded tight straight grain on each face. For the ash case, I started with the widest flatsawn 4/4 boards I could find and ripped off the outer riftsawn sections to glue up for the case sides. I usually try to minimize glue-ups in case parts, but the straight grain of the riftsawn stock made for almost seamless joints, and the quiet grain was worth the effort.
For the full article, download the PDF below:
Fine Woodworking Recommended Products

Blum Drawer Front Adjuster Marking Template

Get the Plan
Printed and digital plans and a cutlist for this project are available in the Fine Woodworking store.





Comments
There doesn't appear to be a finewoodworking.com/PlanStore - I am considering building this and would like the expanded plans - but seem to be in a continual loop of logging in etc. This is just bad.
same issue. can't find the plan for this project.
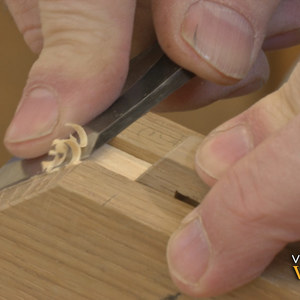
I am currently working on this project in order to improve my technique when it comes to through tenons and getting a very neat show face where the tenon emerges. Improvement yes, a challenge yes. A wonderful skill building project and really nice design, thanks Mike. If you have one, the mortising machine works very well with a sharpened and squared chisel to get nice square mortises and clean cuts on the face. What I would add is: start the mortising from the face side (the show side) of each mortise and also final fit the tenon inserting it into the face side to get a really nice tight fit. I cut the mortise to the inside of my mark line on the face and to the outside of the mark line on the butt side of the mortise. That allowed me to get a really great fit and avoid binding when assembling the joint. A couple of thousandths larger on the back side makes a difference when fitting the through tenons. All of the final fitting was done from the face side. Also be mindful to off-set the mortise in leg where the cross member joins the front and back of the stand. Move the mortise 1/8" off center to the interior of the leg. Since the leg is tapered it is possible to get too close to the face side of the cross member that joins the front and back of the stand. This is especially so if the mortise in center cut in the leg before it is tapered. The magazine text for this project does not mention to off-set the mortise to the inside. The diagram does show the mortise centered on a tapered leg but since this is not mentioned in the text it is easy to miss. Don't ask me how I know that. Just a heads up.
Robert Prevost January 2nd 2017
I am experiencing the same problem as dcdarcy, I want to obtain
a printed full size plan as stated in the revue; I will cal back after
Tuesday when you comeback from this holiday.
Thank you.
The link to the plan is directly above this comment box.
https://www.tauntonstore.com/kumiko-cabinet-on-stand.html
Yep, made the same mistake as hotdogman and ruined the last of my rift sawn stock. Make sure your figure in the taper on the legs when marking out the mortises.
I finished making this cabinet on stand. I learned more about through tenons and accenting the curved legs. A nice exercise, a learning experience. However, it is the last cabinet on stand I will make. This project is esoteric; a specimen project. Lots of wasted space in the stand that is only a stand and the cabinet is too small to really be useful. I think I will go back to more utilitarian projects but thanks for the experience.
This is actually not simple
I am getting ready to tackle this project. Ben/Mike, any chance this could make it to a video series some day? Mike is an excellent instructor (my favorite) and I think a video series would be well received by all. Especially arts and crafts style enthusiasts.
Hi, thanks for this cool project.
I did not purchase the full plan, however following the dimension of the pdf, I find that my back is shorter by 1 1/8". Did anyone have the same issue?
Thanks a lot.
Short by a whole one and one eighth inches? I wonder what dimensions were off in your case? The plans and the article both show the side panels at 19-1/2 in. long and the back stiles at 19 in. long.
Sorry, I should have added more details.
The space inside the two gables results in 14 3/8'', considering the 1/2'' rebate to host the back. However the back results smaller, having two stiles 2'' wide, and rail 10 1/4'' long, with 1/2'' long tenons, resulting in a total of 13 1/4''.
Let me know if I'm think i'm doing something wrong please!
thanks!
"The space inside the two gables results in 14 3/8''..."
Do you mean between the sides? The width of the space for the back is 14-1/4 in. With the 2 in. wide stiles there's 10-1/4 in shoulder to shoulder on the rails. With 1/2 in. long tenons that makes the rails 11-1/4 in. long.
I don't see where you are getting your 13-1/4 in. dimension.
I tricked myself considering the 10 1/4'' rail as the final dimension, including tenons.
I think just followed the logic of page 36, where all the dimension on the drawings are reported including tenons!
Anyways thanks for quick support, luckily I was doing this project on sketchup before cutting up my stock :)
Good deal. I was referring to my SketchUp model of it to confirm those dimensions. ;)
Something worth noting: the digital plan (pdf) materials list specifies only one door stile, where obviously there are two. More importantly, the plan contains an illustration of the left side door stile with details of the measurements of the mortises and their placement, but does not illustrate the stile on the right side. This is annoying because the omitted stile is the one that needs hinge mortises and it would be helpful to see those illustrated in detail. I'm surprised this has not been corrected over the last 5 years. If it has been corrected, I'd like to see the revised version.
The door stiles are the same overall dimension so the materials list should say 2 instead of 1. Fixt. The hinge mortises are not dimensioned because their exact dimensions depend upon the exact hinges used. The front view of the cabinet shows the hinges aligned with the door rails but the location is at your discretion.
Log in or create an account to post a comment.
Sign up Log in