If you’ve read a few of my blog posts regarding workflow in SketchUp, you know that I advocate drawing the parts in situ and leveraging the use of components. These reduce your work and improve accuracy over drawing the parts separately and then assembling the model. In the shop there comes a point when you have to start working to what you’ve already built to make sure things fit correctly. I think it’s the same in SketchUp, too.

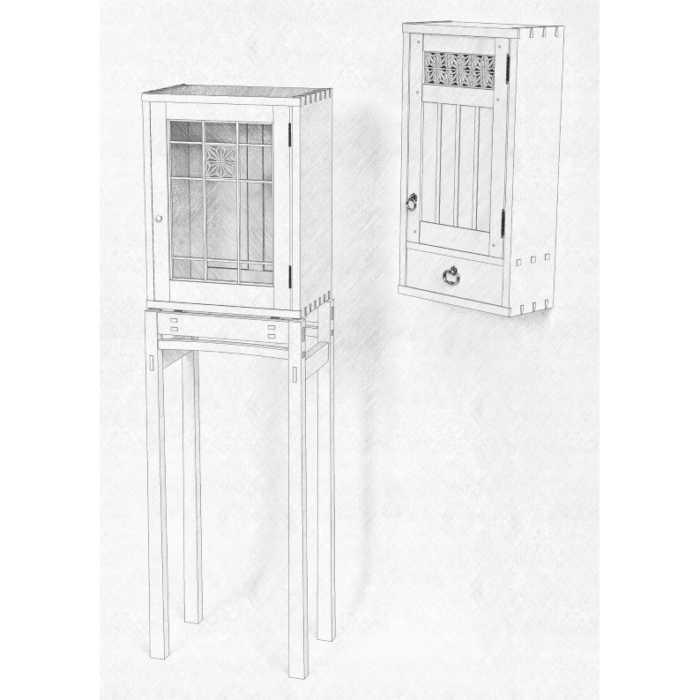
In Fine Woodworking Magazine #259 (Jan/Feb 2017), Michael Pekovich shows how to build a lovely, delicate Display Cabinet on a Stand which features a kumiko panel in the door. He and Ben Strano made a relaxing short video called The Quiet Art of Kumiko showing how to cut and fit the parts for the panel.

When I was drawing the SketchUp model of the display cabinet for use in the digital and printed plans, I had the opportunity to draw that panel. As I was drawing it, I was thinking about how to simplify the construction by duplicating parts as much as possible. I found that I really didn’t need to know all that many dimensions in order to draw it accurately and it was enjoyable watching it all come together.
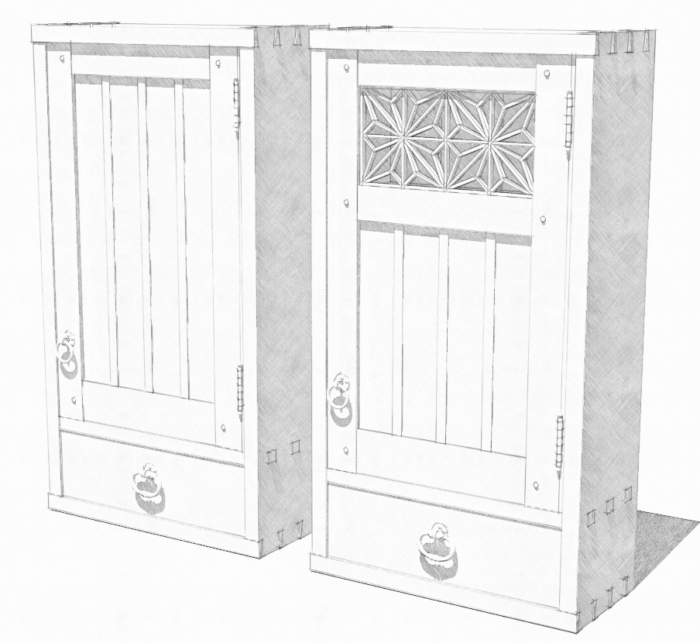
While I was watching Ben’s video, I noticed in the background a version of Michael’s wall cabinet from FWW#254 with a double kumiko panel in the door. Since I already had the model for that cabinet, I thought I’d make a version like the one in the video. Here I’ll show you how I went about adding the kumiko to the door of the cabinet.
There’s a few key points here.
- Use the existing door to help figure out the size of the kumiko panel.
- Use components that are already drawn to make additional parts. Remember to use Make Unique when appropriate.
- Use adjoining parts to guide laying out cuts. I think of this in much the same way as tracing the outline of one part on another in the shop.
–Dave


Comments
I'm a relatively small-time woodworker with an Mac and several years experience with Sketchup but I'm far from efficient with it. Your video was VERY Helpful. Is there a way to subscribe to more sketchup videos to continue honing my drawing skills? I feel like I do everything the slow/hard way!
David, I'm glad you found my video helpful. As for subscribing to my videos, if you click on the YouTube icon in this video, it will take you to my "channel" and you can subscribe there. You should get notified when I upload a video for a new blog post. You can also see the past videos although there's often some useful description to accompany the videos in the Design. Click. Build. blog posts so you might also want to look through the blog here.
If you want some basics you might check out the DVD I did a few years ago. Although it's done with an older version of SketchUp, all the drawing stuff is still the same. There's a downloadable version as well.
If you'd like to see a bit more about using an efficient workflow to create a model, take a look at my blog post here: https://www.finewoodworking.com/2013/01/06/drawing-a-shop-cabinet-in-sketchup-part-i
And part 2 here:
https://www.finewoodworking.com/2013/01/13/drawing-a-shop-cabinet-in-sketchup-casters-and-drawers
DVD: https://www.tauntonstore.com/index.php/fine-woodworkings-google-sketchup-guide-for-woodworkers-the-basics-061117.html?source=WX111XAN&utm_source=ppc&utm_medium=ecom-rtg&utm_campaign=criteo
-Dave
Dave, I make flag cases for veterans. I am having trouble trying to make working drawing in sketch up. The sides of the case are 4" wide and 3/4" thick. I route grooves for the glass and a rabbet for the back. I can get the groove and rabbet ok by using push pull but I can't "cut" the miters. I have tried selecting the end and rotating but everything gets distorted. I tried intersect axis but am having trouble with it also. It may have to do with components or groups. There are some subtle conditions that I don't understand. How does one get your DVD?
Your video on making a drawing of a kukiko was excellent. I followed your step by step and learned some excellent tips. I also have made several of the kumikos based on Peckovich's article.
@Dovetailrose, your flag cases are something like this? https://flic.kr/p/pcYcjG The rabbet for the back can be cut after the miters if you outline it on the back edge of the board and push in the waste side with Push/Pull. The groove for the glass is a little trickier. There are several ways to manage it, though. If you put the groove in before mitering the end, try this: Draw the miter on the edge of the board. Prepare to push away the waste with Push/Pull but before you start, hit Ctrl on the PC or Option on the Mac. Then use push the face all the way through the groove and to the opposite edge. Next, select all of the geometry of the "board", right click and choose Intersect Faces>With Selection. Then erase everything that isn't the mitered board. I hope that makes sense. It's hard without being able to post pictures with the comment.
-Dave
Your suggestion of using push/pull with the ctrl key did the trick for the miters side of the flag case. Thanks for your help.
@Dovetailrose, that's great! Thanks for letting me know.
-Dave
Nice Dave, Kumiko is a great example of creating fast complexity with components.
Log in or create an account to post a comment.
Sign up Log in