Mid-Century Credenza
Thoughtful details and modern joinery merge in this sleek design
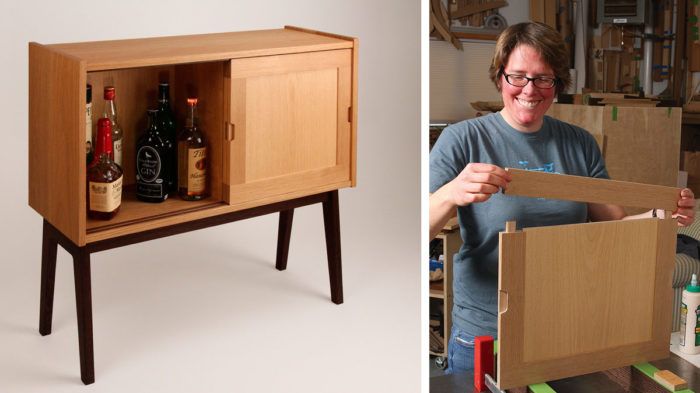
Synopsis: Libby Schrum’s Mid-Century-inspired liquor cabinet is an elegant solution for large and small spaces. It has sliding doors with runners set into the carcase, custom door and drawer pulls, an angular base, and offset reveals that add interesting detail on the top and bottom. The straightforward construction lends itself to using a Festool Domino for the joinery, with simple jigs that make the tool more versatile.
Mid-Century Modern furniture has not been wildly popular since, well, the mid-century. But fashion is cyclical, and with its simple, elegant lines, the style has returned to the limelight at auction houses, on eBay, in woodworking shops, and in the media. This cabinet’s straightforward construction is a perfect application for the Festool domino joiner. growing in popularity, the domino is a great joinery tool for building cabinets. I will explain how to build simple jigs that expand the domino’s capabilities and add personal details in keeping with the style.

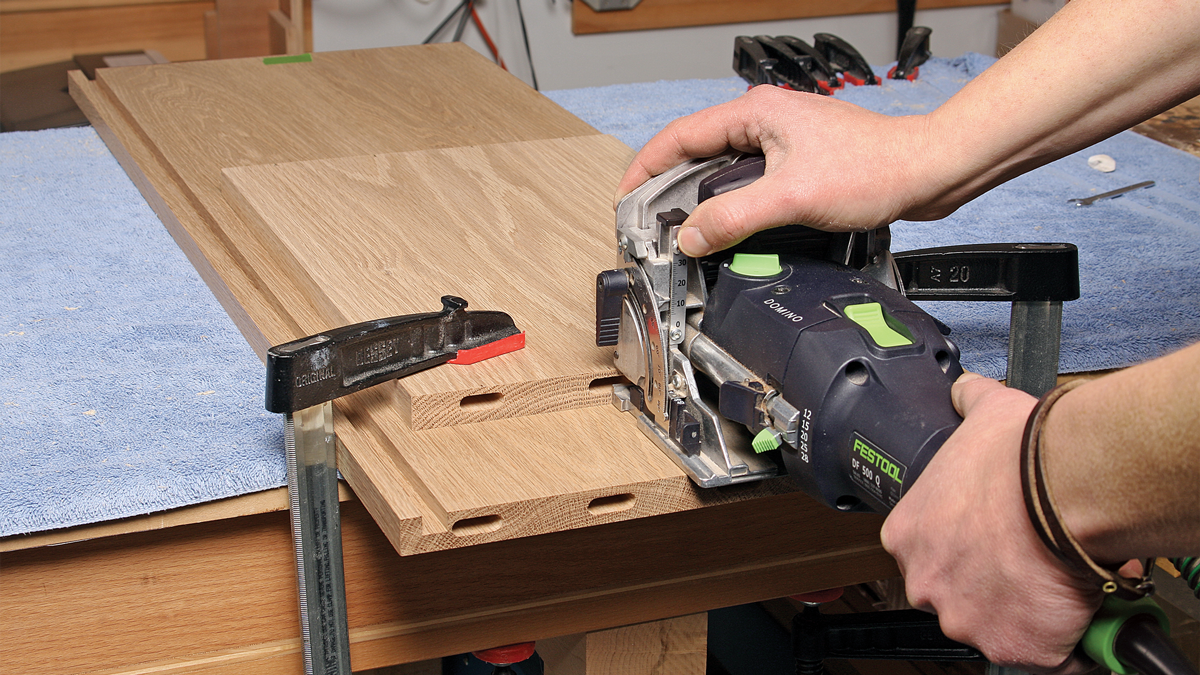
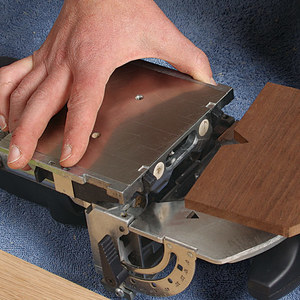
To add visual interest to the cabinet, I created offsets where the top and bottom of the carcase meet the sides. I made the top offset deeper to accommodate a sheet of glass. You can simplify cutting offset mortises by using shims with the domino. For the carcase, I made two shims the size of the fence on the domino, and cut out a notch in each so the guide line would be visible. I made one shim 3⁄8 in. thick and the other 1⁄8 in. thick. Using the shims allowed me to offset parts while limiting the number of joinery setups and taking out some of the math. With the 3⁄8-in. shim in place, set the Domino’s fence so the cutter is centered in the thickness of the top. Then, with the depth of cut set to 25 mm, cut mortises into each end of the carcase top. Remove the shim, reduce the depth of cut to account for the thickness of the sides, and cut the mortises at the top of each carcase side. Repeat these steps using the 1⁄8-in. shim to cut the mortises at the bottom of the cabinet.
Rout a groove for the back panel, then tackle the center divider At the router table, using a 1⁄4-in. straight bit, cut a groove for the back panel. The top and bottom pieces get through-grooves, but you’ll need to start and stop the grooves on the sides of the cabinet. After each pass, adjust the fence away from the bit a little at a time until the 3⁄8-in.-thick back panel fits in the groove. To cut mortises in the carcase top and bottom for the center divider, I clamp a piece of 3⁄4-in. MDF in place as a fence. I draw lines on the fence to guide the mortise spacing. I also transfer those lines from the fence to the divider itself to guide the mortises I’ll cut into its ends.
 For the full article, download the PDF below:
From Fine Woodworking #281


Comments
Hi, Libby - I noticed you finished the inside of the cabinet before glue up. Did you run the tape over the joint lines before finishing to protect them? Curious if you could share some more information about that process?
Hi Matt. I definitely tape off joints before pre-finishing. I have several different methods I use. Regardless, I always try to keep the tape 1/16” narrower than the thickness of the piece that will adjoin that surface. Sometimes you have to get creative! The only joints I don’t usually tape off are joints in the end grain, like mortises, or narrow grooves like the ones the runners are pressed into. Hopefully that answers your question.
Today is 11/1/2020
I’m looking for the full size plans for this cabinet, does anybody have them. They are no longer available from FW. I’ll gladly pay for them.
[email protected]
You just need to search the store for Mid-Century Credenza.
Log in or create an account to post a comment.
Sign up Log in