Add a Drawer to a Table
A well-engineered pocket guarantees that a drawer will run true in all seasons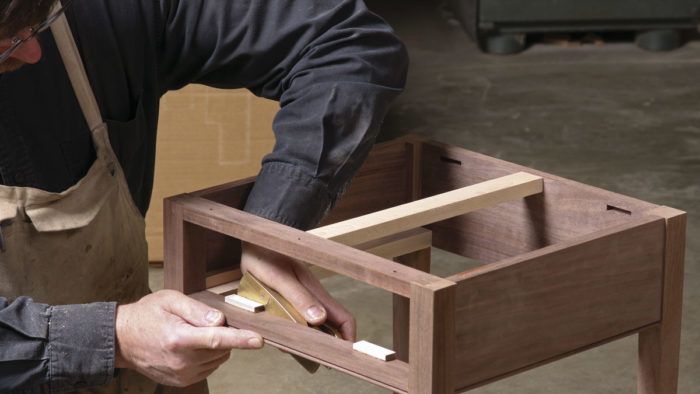
Synopsis: Drawers that work properly do so because an invisible infrastructure allows them to slide in and out without binding, stop in the right place, and avoid tipping. That infrastructure is made up of drawer runners, guides, a kicker, and stops. There are many ways to approach construction, but Steve Latta’s simple methods are time-tested, producing drawers that fit well and operate smoothly all year round.
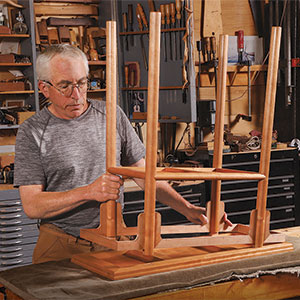
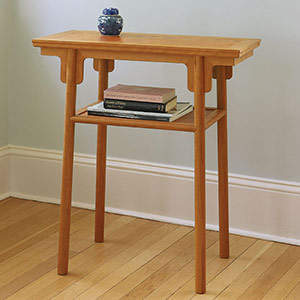
As is often the case with furniture, the parts we don’t see can be just as important as the ones we do. This nightstand has a single drawer and for that drawer to work properly, it needs an invisible infrastructure that allows it to slide in and out easily without binding, stop in the proper location, and avoid tipping too far down. That means installing drawer runners, guides, a kicker, and stops. There are lots of ways of approaching all of this, but the simple methods shown here work in the vast majority of applications.
If you mill parts for the drawer infrastructure at the same time as the rest of the piece, you’ll save time and increase accuracy. On just about every table I have made, the bottoms of the lower stretchers line up with the bottom edge of the back and side aprons. Consequently, the runners will end up the same thickness as the lower stretcher, and the kicker the same as the top stretcher. Rather than trying to match them up later, simply take all those parts to thickness at the same time. And since the runner and kicker require no specific width, it makes sense to match their width to the stretchers.
I lay out the mortises for the kicker in the rear apron and top stretcher using a marking gauge and knife, then cut them by hand using a chisel. After the mortises are cut, I dry-assemble the table, measure the distance from the rear apron to the top stretcher, and add 1⁄2 in. for each of the 1⁄4-in. tenons. Then I cut the tenons on the tablesaw using a miter gauge with an auxiliary fence. I plane and give a final sanding to all the pieces and glue up the table, including the kicker. I add the runners, guides, and stops later.
The runners provide the track that the drawer runs on while it moves in and out of the table. I notch mine around the back leg. Using a small double square, transfer the two offsets of the rear leg to the back of the runner. Although they should be the same, differences occur.
For the full article, download the PDF below:
Steve’s Federal Side Table Video Workshop can be found here
Fine Woodworking Recommended Products
Dubuque Clamp Works Bar Clamps - 4 pack

Estwing Dead-Blow Mallet
Bessey EKH Trigger Clamps




Comments
This looks like a great, straight forward, project. How do I get to the video?
Fine Woodworking Issue 262 has an inset in the Steve Latta article that states "Watch Latta build this table from start to finish in a members-only video at FineWoodworking.com/262". My guild hand tool working group wants to make this. It doesn't indicate when I should watch it, but I assumed that it would be available now. Where is it?
Posted on that page and it can be found here: https://www.finewoodworking.com/videoworkshop/2014/04/federal-side-table
Sorry for forgetting to add that link.
Ditto, This is the second time over the past several months that I have tried to access a referred-to video from Fine Woodworking and have not been able to locate it. Where is it for the Latta article?
A. Jelks
Apologies, I forgot to link that in the issue page. It can be found here: https://www.finewoodworking.com/videoworkshop/2014/04/federal-side-table
still looking for the video
Ditto with regard to the comments above. I guess we should conclude that the video doesn't exist?
The link is posted in my comment and on the page linked in the article.
Where is the video?
Great article as always! How would you attach the runners and guides if this were expanded into a 3 drawer table? The sides would be done as above, but how would the middle guides and runners get attached to the front and rear apron since there is no structure to attaching them to as there is with the side aprons. Here is a photo for reference.
If I were going to do that, I would add what are basically duplicates of the upper and lower drawer rails to the inside of the rear apron. Then add kickers and runners centered on the vertical dividers with guides also centered between the dividers. Something like this:
https://flic.kr/p/2i1zSp8
I didn't put them in but you could put vertical dividers in at the back between the long rails. This assembly also gives you great places for screws to attach the top. Just remember to elongate the holes towards the ends of the kickers.
If you haven't glued up the table already, you could omit the rear horizontal rails and put mortises in the rear apron. I modeled it as I did thinking you might already be past that point. The rear horizontal rails and kickers/runners can be assembled and slid into position.
Dave, Your effort to learn to draw must really be paying off! That is amazing. A picture really is worth 1,000 words! My photo was a dry fit, so I did a mortis and tenon in both aprons and it worked great! I guess I confused myself by doing a stub tenon on the front of the kicker, and a dove tail on the back. I didn't want to do that on the bottom for the runners as the weight on the drawers would always be trying to push the dovetail out. Thank you for the advice!
Thank you sir. You're right, dovetails on the bottom wouldn't have been a great solution. Happy I was able to help clarify for you.
Log in or create an account to post a comment.
Sign up Log in