Conquering the curves of the tripod table
Tim Killen shows you how SketchUp can help do more than design a piece, it can help you build it!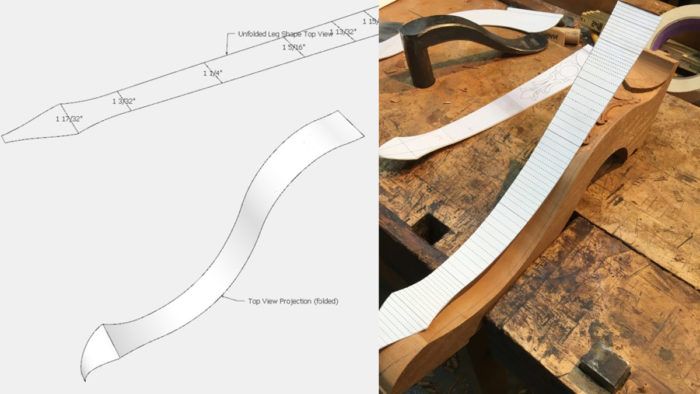
In my last blog, I showed how SketchUp facilitated shop work on the turned Post of the Tripod Table. In this blog, I show how SketchUp is again helping but with shop construction of the cabriole legs.
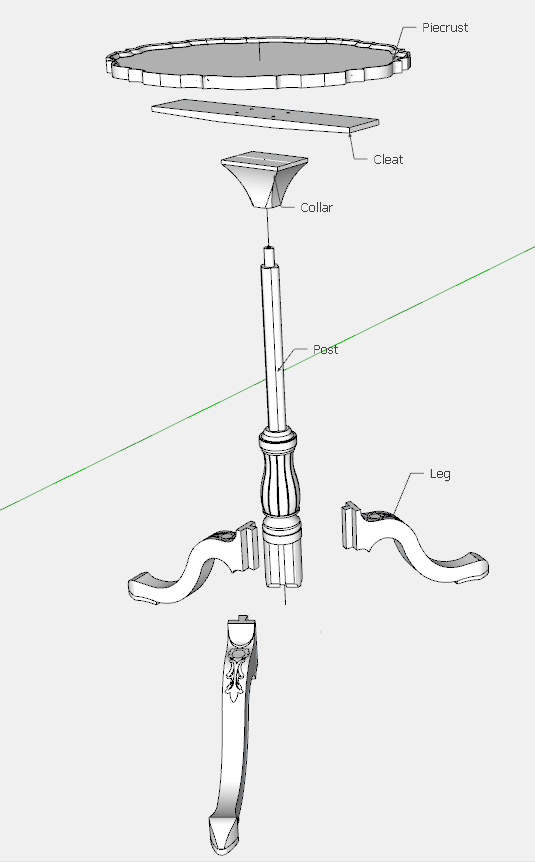
For reference, here is the exploded view of the Tripod Table.
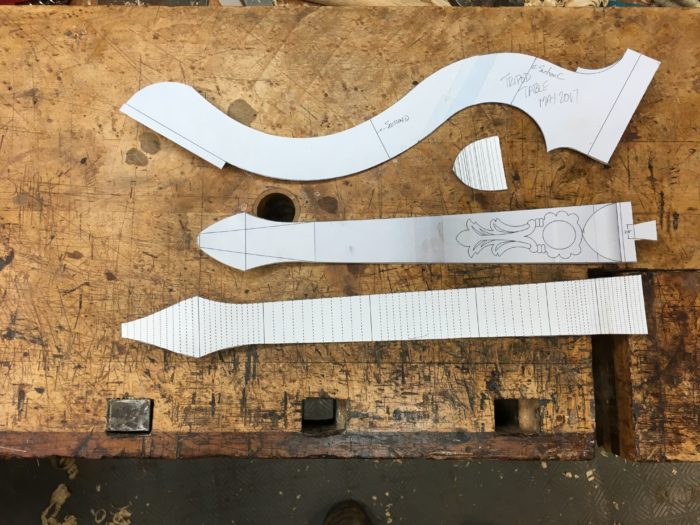
The primary full size templates for the Legs are shown below. The top template is the full size Side View. Next down is the small teardrop template that is a flattened or “unfolded” full length of the curved shape. The next template down is a top view projection that also includes the carving template. The last template is an “unfolded or flattened” template of the curved top face of the Leg.
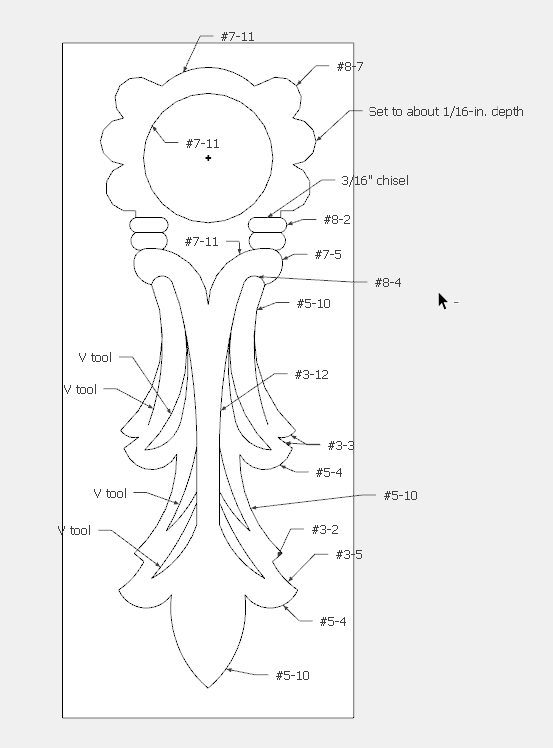
Here is the carving template with carving tool sizes indicated. When executing the carving, the tool callouts are critical for gaining an acceptable productivity, especially in doing this three times, once per leg.
To “brand” the carving on the knee of the leg in SketchUp, I used the Push/Pull Tool through the top surface, executed the Intersect function and removed the waste. These steps are shown below.

To help make an accurate marking of the shape of the Leg, I “flattened or unfolded” in SketchUp (using a plug-in) the curved top face of the leg. This flattened template could then be placed on the mahogany blank and pencil the tapering throughout its length.
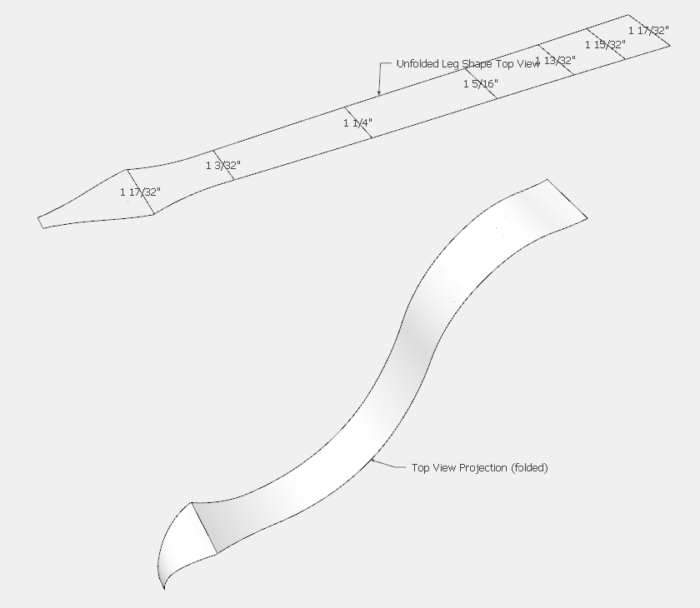
Here is the “flattened or unfolded” template used to accurately mark out the shape of the leg. This can be pushed against the mahogany curvature as its length equals the full curvature length. Note the pencil lines showing the taper for bandsaw roughing out.
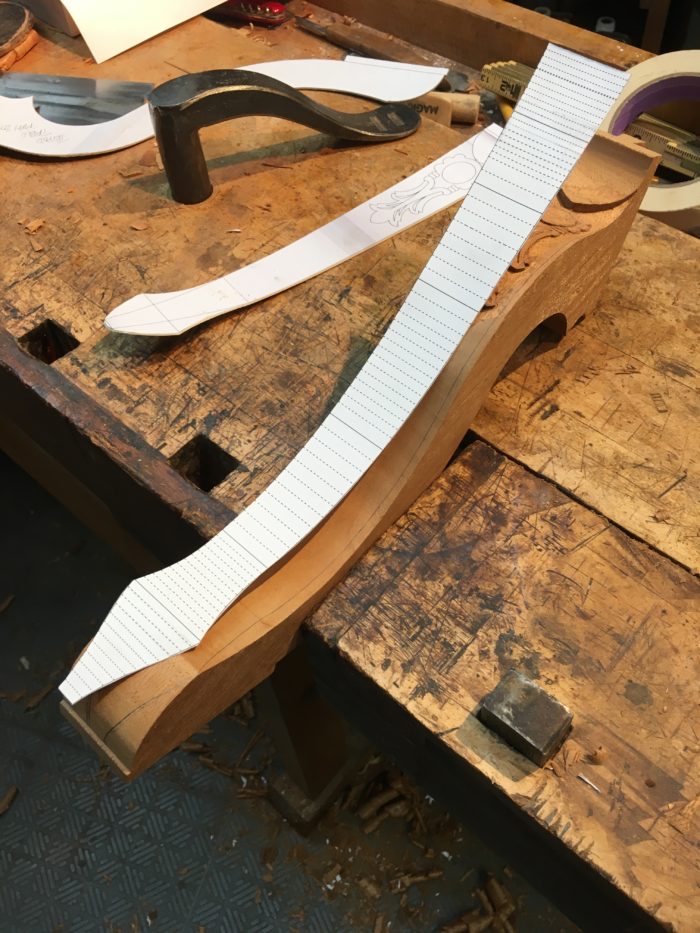
Typically, I would glue the carving template paper to the mahogany as shown below. But this time I used an acetone process to transfer the laser-printed toner ink onto the mahogany. This process is shown in the video at the end of this blog. By using this process I did not have the drudgery of removing bits of paper and glue after carving.
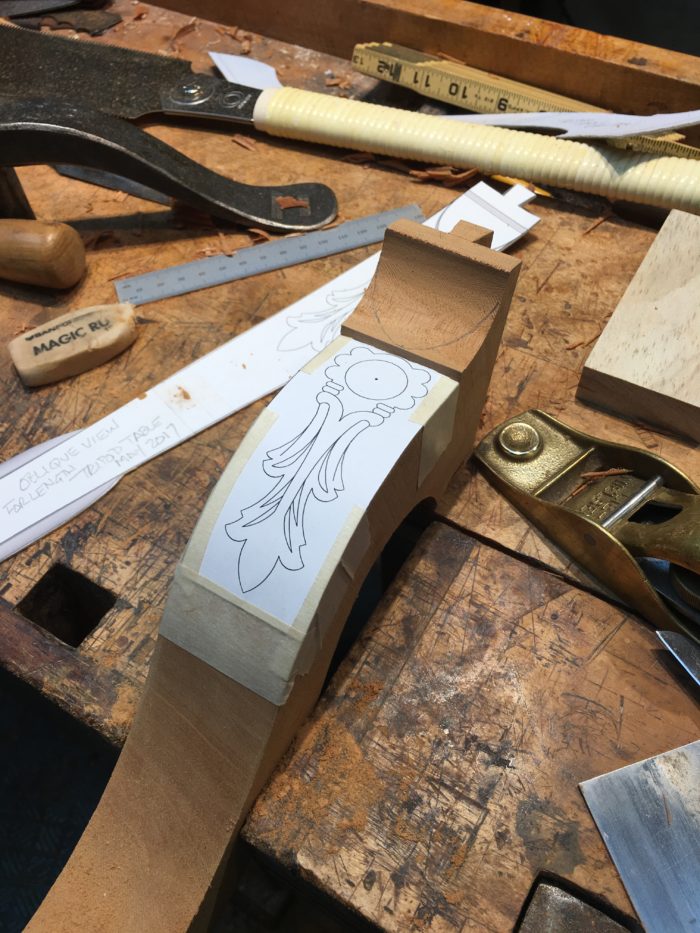
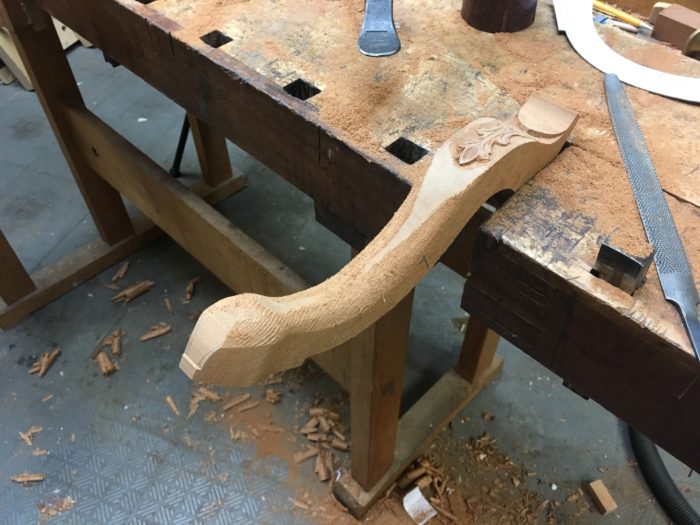
After bandsawing the taper, I used various files, spokeshaves, and scraper blades for final shaping.
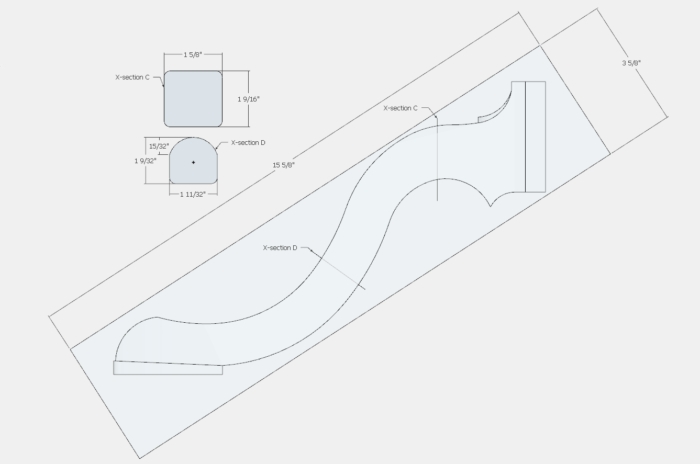
To help with the shaping, I had cross-section views in SketchUp as shown below.
Here is a picture of the final project. I dyed the mahogany with Brazilwood extract, then raw linseed oil, and seedlac. The seedlac coats were followed by sanding the next day, then this cycle of shellac and sanding was continued until the pores of the mahogany were filled. Finally, the finish was rubbed-out with pumice.

This is the video showing the acetone method of transferring the carving design directly to the face of the mahogany.
Tim
@KillenWOOD
Fine Woodworking Recommended Products
Ridgid EB4424 Oscillating Spindle/Belt Sander


Comments
Hi Tim.
I noticed that you were using acetone for the transfer method of the pattern to the wood. I believe that since the Laser Jet printer uses a powder that is transferred to the paper by means of heat, the powder should be transferable to the wood from the paper also by means of heat. In the past, I have used my wife's iron on flat surfaces to accomplish this transfer. I think that using a hair curling iron of a correct diameter might just work in your application. No Acetone required.
I have not tried using a Color Laser Printer output on wood but the same principle should apply here given a lighter toned wood surface.
Nice article.
Best Regards
73-gramps, thank you for the comments. I have not tried heat but will do that soon.....
Tim
Log in or create an account to post a comment.
Sign up Log in