How to use SketchUp to help create illustrative carvings
Using acetone to transfer a laser printout to wood, Tim Killen goes from a photo, to SketchUp, and finally, to a beautiful carvingRecently, I was eager to try a new project in wood, but surprisingly it was not a piece of furniture. I wanted to do a picture, a wall-hanging, you could even call it a piece of art.
This summer we hiked to an old ruins in Yorkshire, England, the Bolton Abbey. It is a large striking and beautiful structure in limestone built in the 12th C. Naturally we took several pictures to capture this visit, but soon I was thinking how to re-create a view of this building in wood and accompany other framed artwork on our walls.
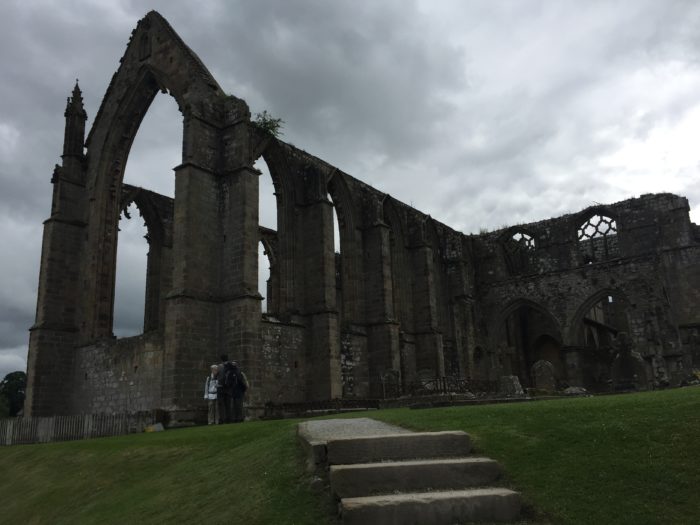
Upon returning home and reviewing our photos of the Abbey, I opened SketchUp and began modeling the structure. Here is the photo I chose. (Note the people in the lower left of the photo, as this is a gauge of the structure’s size.) I imported this to SketchUp as a “New Matched Photo” and used Arc and Line Tools, to trace over the structure details.
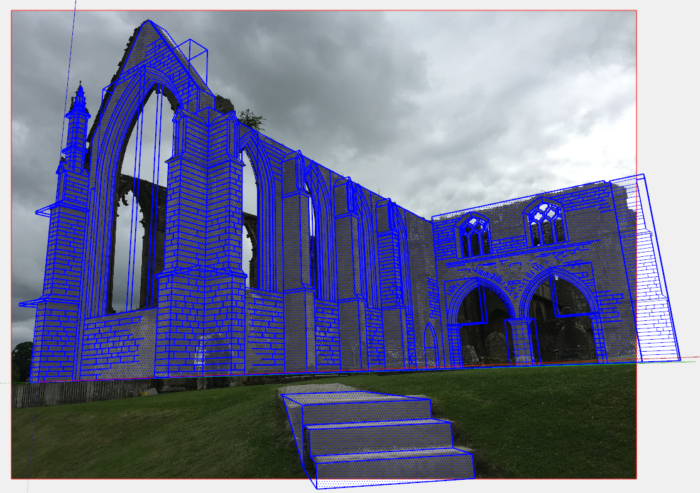
In the following picture, I’ve selected the SketchUp modeling (Lines and Arcs in blue color) so you can see the SketchUp work over the background photo of the structure.
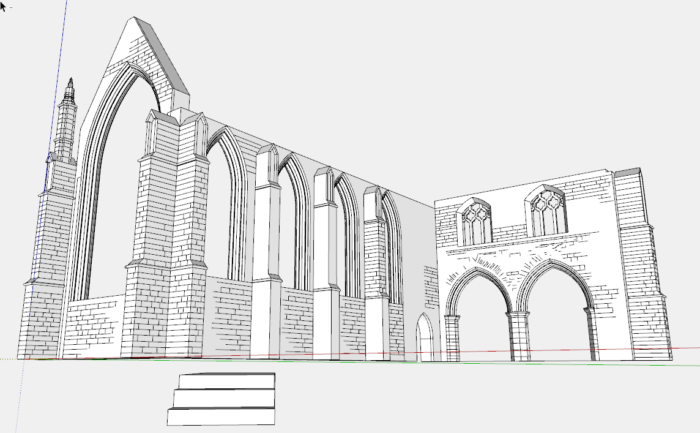
Below is the SketchUp only without the photo background. Note that I intentionally did not trace over all of the stone layers and joints.
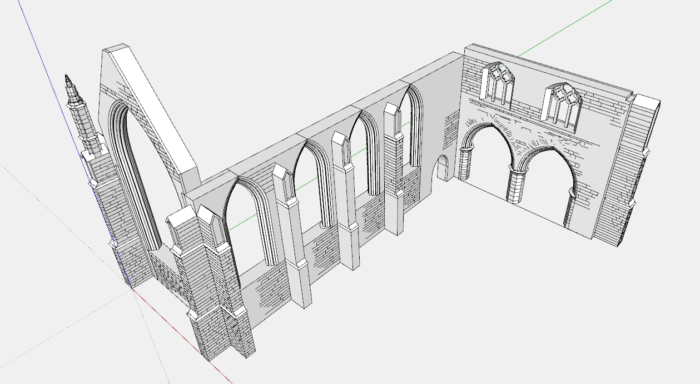
Here is another view of the SketchUp model. I modeled three walls. There is no roof in the ruins, and much of the structure was missing. The ruins are very open, so a visitor is free to walk all around and explore inside and out.
From SketchUp I printed a flipped view of the Abbey that you can see below. This print was placed face down on the piece of basswood. I used an Acetone process (shown in video below) to imprint the basswood with the Abbey structure.
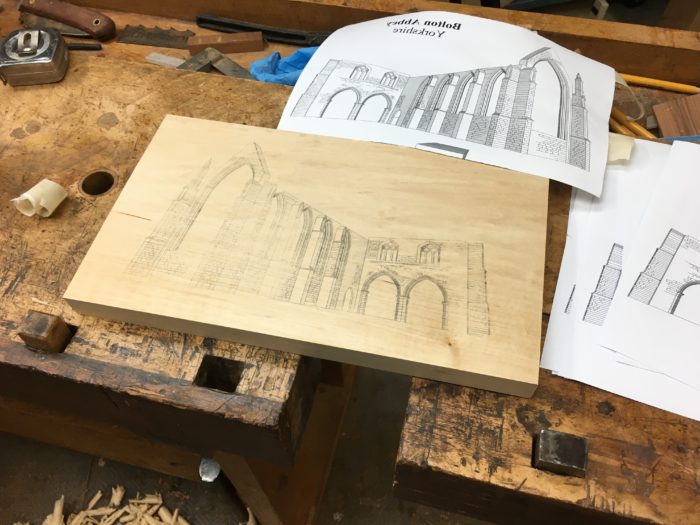
Then I used a selection of V-tools to carve the lines of the structure, including many of the stone layers and joints. I also used these same tools to do the lettering. I used a Garamond font for the lettering.
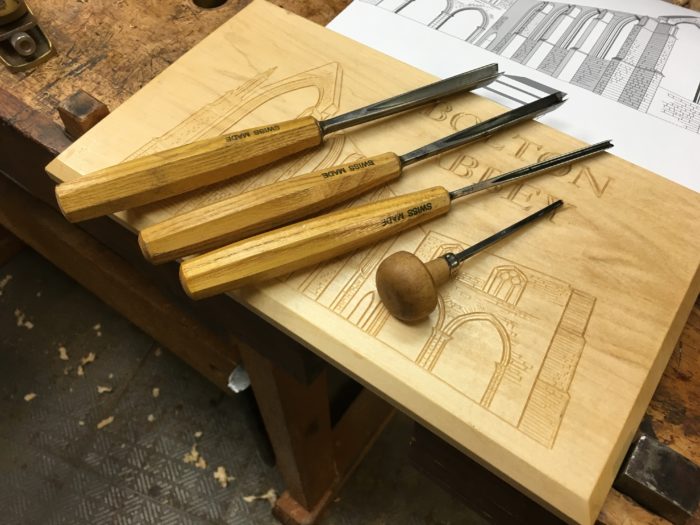
Here I am filling the carved elements with a mixture of Plaster of Paris tinted with lampblack. I taped-off the lettering as I did not need the filling there.
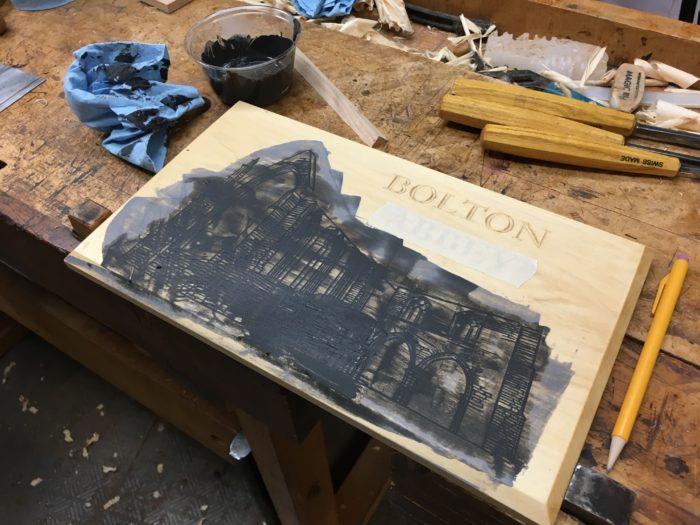
With some light sanding with 320, I’ve removed the excess filling on the surface. The carved out grooves still retain the dark filler.
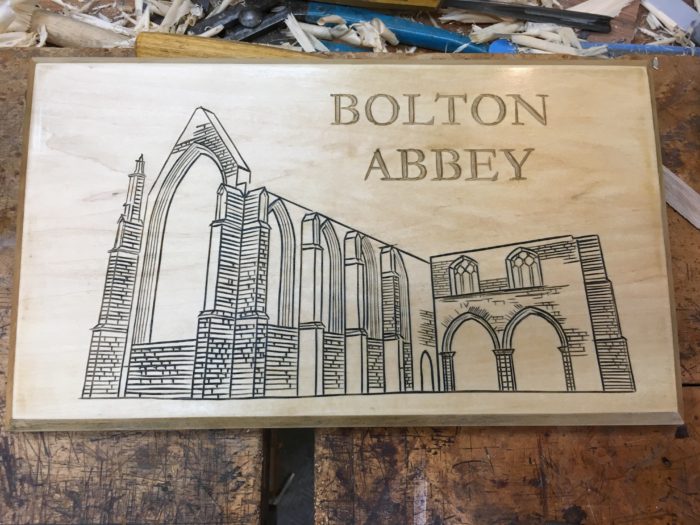
I’ve included a video showing all of these procedures. There are five parts to the video; Transferring the image from paper to wood, Carving the structure, Shaping the letters, Applying the filler, and Finishing.
@KillenWOOD
Thanks to Mark Olesko for creating the video…..
More on FineWoodworking.com
- Duncan Gowdy’s Illustrative Carving – A signature that makes his work unique
- Turning and Carving Piecrust – Traditional methods still pay off
- Dress Up your Furniture with Surface Carving






Comments
Have you tried transferring the toner image to the wood using a clothes iron?
Yes, I have tried the clothes iron and for me, this was not successful. There would be some transfer of the image but many gaps. I tried holding the iron on the edge as well to make sure I was getting down to any undulations in the wood.
Tim
Log in or create an account to post a comment.
Sign up Log in