STL 145: Shooting boards and Chair Making
In this stripped down episode, Mike and Ben discuss chair making, shooting boards, chisel bevels,wide boards, and all time favorite tools and techniques... for this weekThis episode of Shop Talk Live is sponsored by Audible.
Head over to Audible.com/ShopTalkLive to get a free audio book.
04:50 – Question 1:
I have a 400/1000 grit combination diamond stone, a high quality honing guide, and a leather strop. People always talk about removing the burr on the back of the blade after sharpening. I try to do that, but it seems to just bend back around and doesn’t come off. I end up with a tiny sliver of iron on the end of my blade which is not straight and that I can bend with my finger. Why is this happening, what am I doing wrong?
-Theo
11:00 – Question 2:
Is there a maximum board width you are comfortable gluing up for a table top? I’ve heard that wider boards that are ripped down somewhat are more stable in the long run. I’m using some hickory for my top, and the boards will be around 10″ wide following stock prep. I’d prefer not to rip them down.
-Eric
16:45 – All Time Favorite Tool of All Time… for this week:
Mike – Clamping cauls
Mike Pekovich: Arts and Crafts on Display
Ian Kirby: Gluing Up
Michael Fortune: How to Tame Tricky Glue-Ups
Ben – Lie Nielsen – Boggs curved spokeshave
37:50 – Question 3:
I recently made my first shooting board and modeled it after Mike’s shooting board with the sliding speed square for miters. My fence is dead square, checked with multiple hardware store squares but my cuts have yet to yield a square result. The consistent result is a cut that is high on the fence side of the board. After squaring and re-squaring many times I am at a loss. What am I doing wrong?
-Wes
Mike Pekovich: 6 Essential Bench Jigs
Video: Mike Pekovich’s Go-To Work Holding Jigs
46:20 – Ben’s Audible recomendation:
Why We Make Things and Why It Matters: The Education of a Craftsman
By Peter Korn
Narrated by: Trabber Burns
Head over to Audible.com/ShopTalkLive to get a free audio book.
52:10 – Question 4:
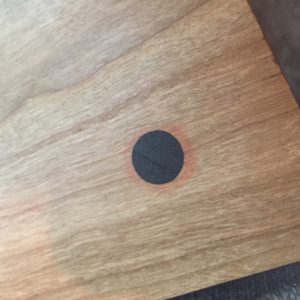
A few months ago, I made a small side table out of cherry for my wife. The table came out great but I’ve noticed in the past weeks that the glue line has turned into an obnoxious orange color. The table has sat in indirect sunlight since finished. The dowels have a “starburst” effect of glue around them and the glue line between the boards in the panel are now clearly visible. I was wondering if you’d ever experienced this. I had thought I’d sanded enough to remove any residual glue but perhaps not. Now that the project has been finished with Arm-R-Seal, would it work to sand off the finish to remove the glue marks and then re-finish it? In the end, I’d like to make this project look great again. Any thoughts would be most helpful. Thanks for your time.
56:00 – All Time Favorite Technique of All Time… for this week
Ben – Using a finder of a glove to seal your squeeze bottle of finish
Mike – Breaking up a complicated glue up into multiple parts
1:02:30 – Question 5:
When sharpening chisels, do you put a micro bevel on them or just a standard 25 degree?
-Richard
 |
 |
|
|
Ben Strano |
Mike Pekovich |
Every two weeks, a team of Fine Woodworking staffers answers questions from readers on Shop Talk Live, Fine Woodworking‘s biweekly podcast. Send your woodworking questions to [email protected] for consideration in the regular broadcast! Our continued existence relies upon listener support. So if you enjoy the show, be sure to leave us a five-star rating and maybe even a nice comment on our iTunes page.


Comments
Re: Daniel's question, I used to clean up with the red shop towels that auto mechanics use (they sell these at Lowes). I noticed that the lint they leave behind sticks around even after I thought I had gotten rid of it. The red color of these little lint bits leaches pretty easily into surrounding material.
The planer sled conversation was long over due for me. I really don't hear many people ever talk about this. I made one of the sleds that Keith Rust shared on a video for FWW. Incase your interested it was for a table top I had nice wide 10" white oak boards and didn't want to rip them to 8". That sled worked flawlessly I was very impressed. I made 7ft sled and its been enough, Ben I used the same sled for smaller lengths but haven't need bigger one yet, but I'll let you know. You guys did amazing just the two of you, but Matt and Tom are always missed. Cheers David.
I’ve had the same thing happen with the orange glue line. It was also with cherry and it made its self evident after I put the table in the direct sunshine to darken after finishing. I, like Daniel, also finished with Arm-R-Seal. I’m fairly certain it was just the sun darkening glue squeeze out that could have been removed more thoroughly but I’m curious (though I think unlikely) if anything in Arm-R-Seal reacted with the glue line to give it that orange color.
Re: Daniel's question...most likely the discoloration is due to a chemical reaction of the cherry's tannin and the glue. Cherry, like oak and walnut, have a very active and high content of tannin, a poly phenolic biomolecule that aids in darkening the wood when exposed to sunlight. This polyphenolic is a weak acid made up of a litany of macromolecules of hydroxyls and carboxyls. These polyphenols assist in protection from predators and also are given off as flavor during the aging of wines and spirits.
The distribution of the polyphenols is higher in the heart wood and lower in the sap wood. This is commonly misidentified as blotching in the wood where the wood ages or darkens at different rates. What actually is being observed in the glue joint of your table top is the water of the glue creating a saturation of the tannins that then are leached into the surround woods.
I made this same mistake back in the early 2000’s when first learning how to work with cherry. I purchased some cherry from a local sawyer who harvested it from a stand on the edge of an overused cornfield (one where they have to pump numerous chemicals into the ground just to grow anything resembling a green crop). Cherry will go into protection mode and produce copious amounts of polyphenols as a defense mechanism against the acids and bases in the ground water and soil.
These ‘tannins’ make finishing cherry very difficult and frustrating. I made a table top that did exactly the same thing, tannin staining at the glue joints. I tried everything from a chemical mindset to fix it, but the stains remained. I eventually scrapped the table top and the wood I purchased and went to get sustainable harvested cherry, which has less tannin due to the environmental controls in place.
The fix is in the preparation of the wood prior to sealing. Some woodworkers will soak cherry in fresh tanks of water, changing the water often to leach out the tannins. Some will seal with a 10% mixture of glue and water or light cut of shellac to seal in the tannins prior to using any other finish. The home remedies are endless, but the goal is the same…tame the cherry’s flame.
What I believe Daniel is seeing is a trifecta of issues; a higher than normal tannin content in the cherry, water introduced by the glue (normal PVA glue is 10-15% water depending on manufacturer), and additional interaction with the walnut tannin. While it is pure conjecture, it is possible that there was insufficient time from the commencement of glue up to the sealing of the table top in an oil-urethane finish to allow for complete curing and evaporation of the water from the PVA glue. Seal all that under an oil-based sealer, with no chance for the moisture to evaporate, and you have accelerated the aging of the wood and concentrated the tannin in an unsightly area, the glue joints.
Sanding the top back to the raw wood and resealing may work as most likely the surplus tannin has already interacted with the glue leaving little remaining to react the second time; however, the tannin has most likely stained the wood deeper than what a light sanding will be able to fix. There's no harm in trying! You could also attempt to force age with shining artificial UV lighting directly on the top or even lightly ebonize the wood with a weak vinegar and iron mixture applied to the wood prior to sealing. This will cause cherry to instantly age and my hide the tannin staining; but caution, too much iron in the vinegar and cherry will turn brown, not red! Whichever way you choose, the top will still most likely look better than it does now.
This was the best episode of Shop Talk Live ever! Topics were explored and discussed much more in-depth than usual and with an obvious reverence for the craft. Keep it up!
clbrz1678, thanks for that fantastic explanation!
Ya... that was fairly impressive!
I agree, this was a great episode! Ben asked great follow up questions and the topics were explored fully. Would love to see more one-on-one episodes in the future (maybe the next run of vacations)!
Hi guys,
Love the podcast!
Regarding Mike's wax, be careful with citrus solvents. I used a citrus solvent to remove some beeswax from a fretboard that had been coated with CAB Lacquer, and it melted the lacquer off instantly. Those citrus solvents and cleaners come in various concentrations, so use due diligence and test it out on an inconspicuous spot.
Cheers,
James
Good info!
Mike and Ben,
Thanks so much for answering my question on air! The info was great. I was doing the opposite of what Mike said and assuming that my "square" reference was based off of a square fence. But since hearing your response I've gone for a square work piece and the shooting board works great. (Great design Mike).
You guys are awesome. Thank you for relevant, entertaining content. Keep up the good work.
Wes
Log in or create an account to post a comment.
Sign up Log in