How To Create New SketchUp Textures For Your Models
SketchUp includes a few different wood grain textures, and they can work, but they have their shortcomings. In this blog, Dave Richards shows you how to make your own texturesOne of the benefits of modeling your projects in SketchUp is that you can make your model look quite realistic without a lot of work. Part of that is being able to apply wood grain textures for your furniture projects.
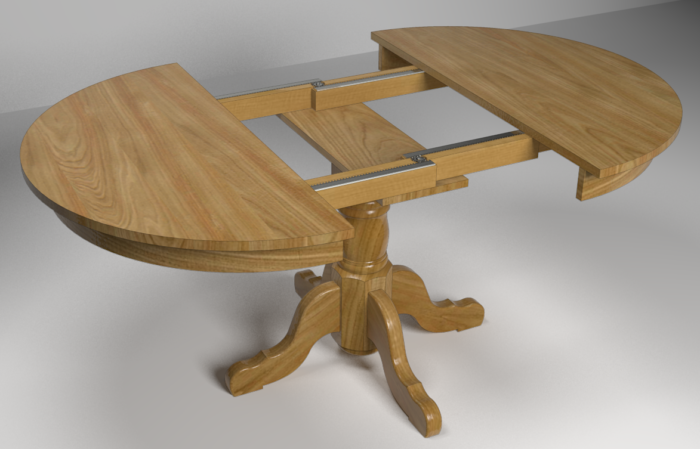
SketchUp includes a few different wood grain textures and they can work but they have their shortcomings. The primary one is that they aren’t very realistic. A texture is just an image file that gets applied to the faces in your model. If the faces are larger than the area covered by the image, the image must be repeated. That’s fine for texture images of tiles or patterned wall paper but for wood, it’s not so wonderful because you wind up with the same features repeated which ruins the illusion. For wood grain textures in SketchUp, I prefer to make my own. Here’s how I do that. In the video, I’m going to make a maple version of this pedestal table. The version shown below is chestnut.

In the video, I am beginning with adding the textures into SketchUp but there’s a little work to do prior to that. I start with images of full length boards. With care you can make your own photos. Just make sure the lighting is even and the camera is positioned square to the board. Here are images of three maple boards which I’ve combined into a single image and added some color to make them look like they are stained. I generally make textures for multiple boards from a single log so I have more texture to work with. By editing them in the image editor, I can more easily give them the same coloring. I normally keep a set of raw wood images as well. These boards were all the same length but different widths.

After I have the “boards” set up, I crop the image and save to make the single board images you’ll see in the video. I know from the original photos how long the boards are. These maple boards are 10-1/2 feet long. I don’t bother to keep track of how wide they are because that dimension will take care of itself. With three or more textures that size, it’s easy to pick out different parts of the texture images for different parts of the piece of furniture. I’ll show you that in the video, too.
-Dave
More on FineWoodworking.com:
- How to use SketchUp to help create illustrative carvings
- Dovetails in SketchUp — the Easy Way
- Full-size Templates—A Unique Way


Comments
Dave,
Excellent presentation. Will help me considerably in future SKU models. I am using Affinity Photo as my external editor on the MAC.
How do you create "live edge" textures for slabs?
Kevin, I do it like this: https://www.finewoodworking.com/2015/08/15/drawing-a-live-edge-slab
Log in or create an account to post a comment.
Sign up Log in