Hinge mortises with a simple jig
A basic MDF template makes it easy to install cabinet hinges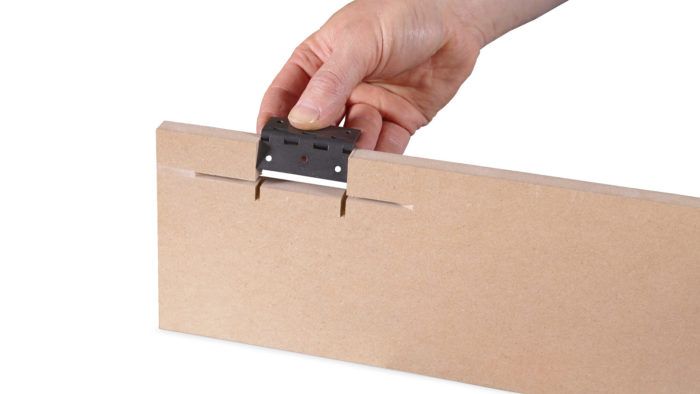
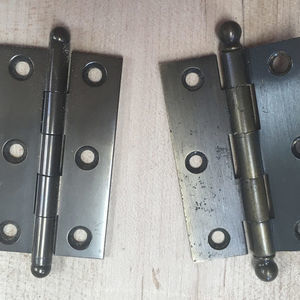
Synopsis: When it comes to installing butt hinges on a cabinet, this template design by Craig Thibodeau is much simpler and more reliable than cutting the mortises freehand and chiseling them square. The template allows you to rout hinge mortises in the door and cabinet and be confident they are in the right place with perfect alignment every time. Thibodeau makes the template from MDF on the tablesaw.
In the past, I routed butt-hinge mortises freehand and chiseled them square one at a time. Though I had success with the method, it was time-consuming, and I frequently ended up with some slight misalignment between the door and the cabinet mortises. I’ve since come up with a better way to rout hinge mortises. I use my tablesaw to make a simple MDF template that I then use to rout the mortises in both the door and cabinet. With the template, little to no measuring is required for the hinge install, and the alignment between door and cabinet mortises is perfect every time.
Begin by dry-assembling the cabinet, having already fitted the door(s) to the opening. Set a door in the opening and place spacers at the bottom to ensure a consistent gap, or reveal. Save the spacers because you’ll use them later. Now mark the hinge locations on the edge of the door. If you have two doors, mark the hinges on the second one as well.
Make a template from a piece of 1⁄2-in. MDF about 6 in. wide and long enough that it will fit snug inside the height of the door opening. Mark the direction the template sits in the cabinet as well, so you’ll know which way to orient it when routing later.
The next step is to cut the template openings on the tablesaw. Those cutouts will guide the router work. Start by transferring the hinge location marks from the door to the edge of the template. From there, mark the inset of the hinge leaf on the face of
the template.
At the tablesaw, the first step is to mark the center of the blade on the face of the rip fence. The first cut you’ll make will be along the line marking the back edge of the hinge leaf. Use the square to adjust the rip fence to cut just at the line—you want the blade on the hinge side of the line.
For the full article, download the PDF below:






Log in or create an account to post a comment.
Sign up Log in