Brass Stretcher Brightens a Bench
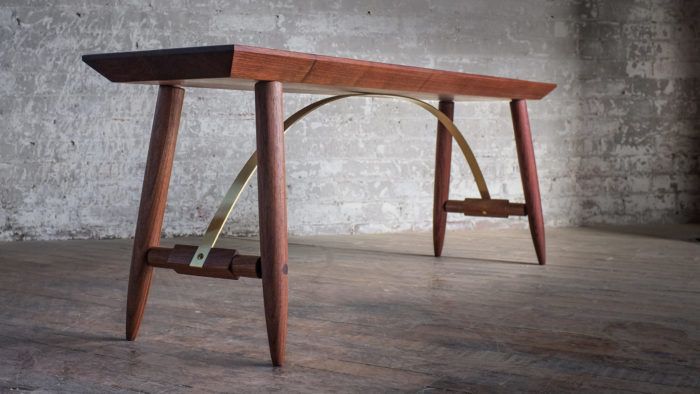
A bowed bar of brass gives this strong, classic form a note of originality.

Synopsis: With its knife-edge seat and turned legs, this bench has the classic proportions and simplicity of a Shaker piece, but designer Michael Robbins felt it needed something original to make it stand out. A curved brass bar connecting the seat with the lower stretchers proved to be just what was needed to bring the form together. The legs are turned and join the seat at an angle, using wedged through-tenons. The stretchers are turned with a flat center section that is rotated to hold the flat brass bar at the correct angle. From issue #267—Mar/Apr 2018
This bench came into being in two stages. It existed as a top and four legs for a year or so, moved from here to there around the shop, all the while unfinished and collecting dust. I knew the bench needed something. With its knife-edge seat and splayed turned legs, it had the classic proportions and simplicity of a Shaker bench, but it lacked a voice of originality.
At the time I had recently built a chair with a steam-bent crest rail, and that curve seemed to bring the chair together in a way that seldom happens with squares and angles. So I began a quest for a curve that would tie the bench’s form together. I had some flat bar steel leaning in the corner of the shop, and I began playing with that.
After kinking a few pieces, I figured out how to bend the steel to a smooth arch, one with enough tension built in to provide structure while achieving the visual flow I’d been seeking to resolve the design. I’ve gone on to build several dozen benches of this design, and now I typically use brass for the arch.
I begin the bench by gluing up the seat. I use 8/4 hardwood stock—walnut, in this case—and mill it down to 1-3⁄4 in. thick. After gluing it up, I cut the seat to size and then bevel all four edges at a 45° angle, leaving a 3⁄8-in.-wide flat at the top of the edge. Once the edges are shaped, I’m ready to drill holes to accept the legs.

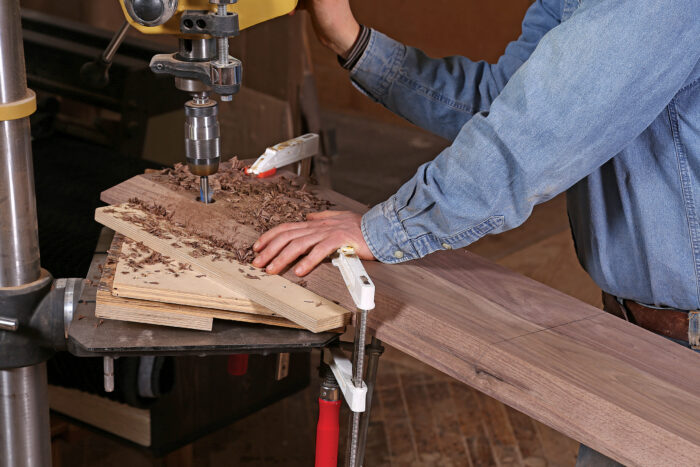
I drill the holes so the legs will have both rake and splay angles of 5°. A shopmade angle jig that I clamp to the drill-press table makes cutting these holes straightforward. Using a 1-1⁄8-in.-dia. Forstner bit and setting a depth stop, I drill the holes with the seat facedown. I drill to just shy of going through the seat. When I’ve drilled all four holes, I take the seat to the bench and use a hand drill to finish the holes. A backing block clamped in place prevents blowout when the bit comes through.
For the full article, download the PDF below.
More on FineWoodworking.com:
- Michael Robbin’s was featured in this Masters of the Craft video and the article Marriage of Metal and Wood
- A Modern Bench – Straightforward joints, graceful curves, and a woven cord seat
- A Bench That Fits Every Room – Tapered seat is comfortable, elegant, and easier than it looks


Log in or create an account to post a comment.
Sign up Log in