How to Develop a Piece of Furniture in SketchUp – Part III, Joinery
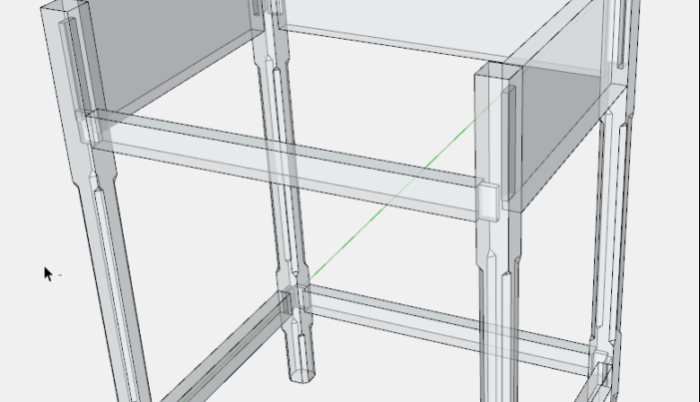
This is the third of a series on the Chamfered Post Table developed in my eBook “SketchUp Guide for Woodworkers.” I’m including videos in this series (not included in the original book) of material covered in Chapter Nine – How to Begin and Develop a Piece of Furniture (see video below).
In this article, I show the modeling of the main table mortise & tenon joinery for the Rails, Stretchers, Sides, and Back. Note that I usually delay joinery until all major components are in place and final sized. Otherwise, you risk needless re-working detail joinery each time components are changed.
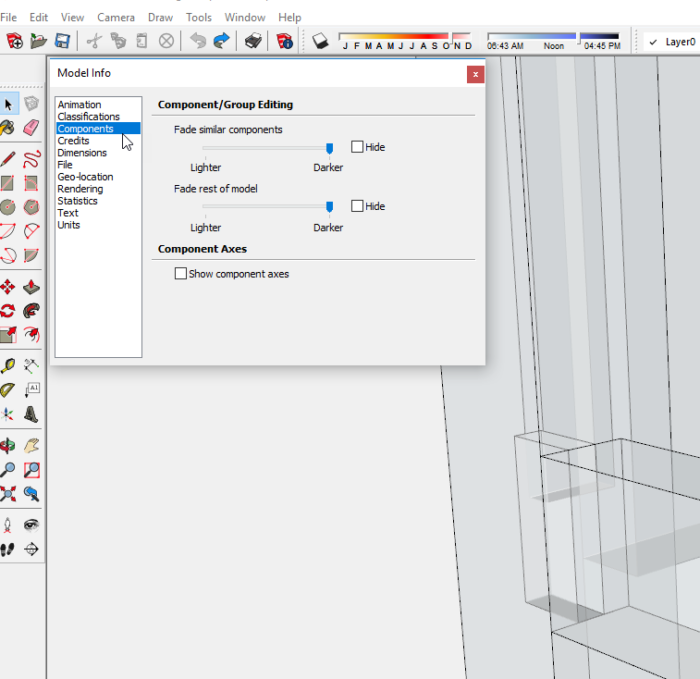
Unlike in the shop, I do tenons first. Then mortises are made in the assembled carcase, using the tenons as templates. This method necessitates changing to X-ray Style, so that tenons in the assembly are visible. A default setting in SketchUp makes it hard to see the joinery in X-ray Style, so it is important to make a setting adjustment as follows:
- Click on the Window Tab and select Model Info
- In the Model Info Dialog Box, click on Components (see picture below)
- Move the two slide bars to the extreme right, Darker
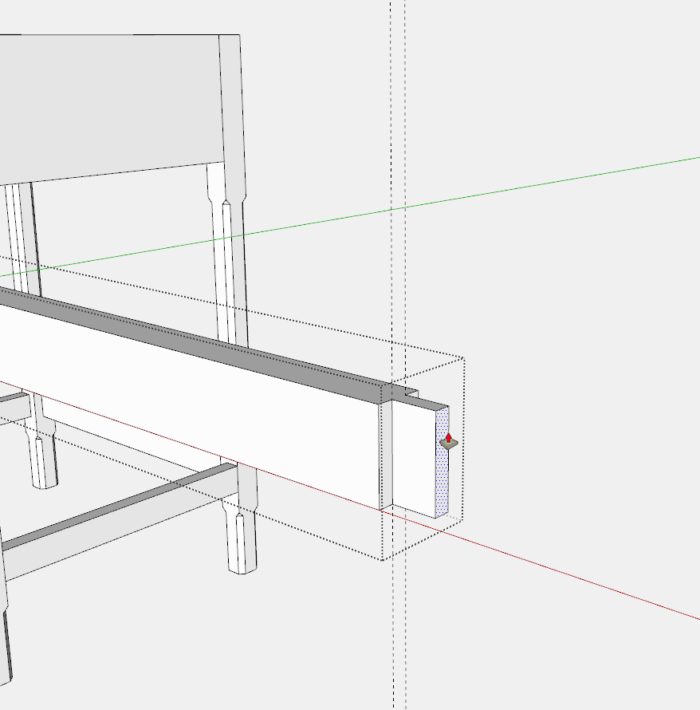
In making the tenons first, I pull a copy of the Rail or other component out of the assembly. Then with guidelines, Line Tool, and Push/Pull Tool, a tenon is added to one end of the component. This tenon is then copied to the opposite end. After making the tenons, the copied component is deleted.
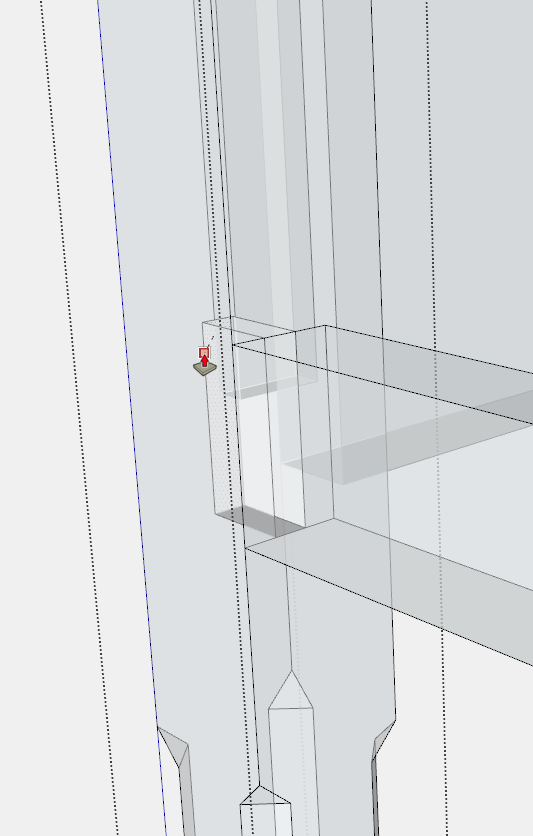
After the tenons are made, I return to the assembly, open a Post for Edit, turn on X-ray Style, and use the Rectangle Tool to trace over the tenon boundary as it enters the Post (see new face selected on the Post surface.
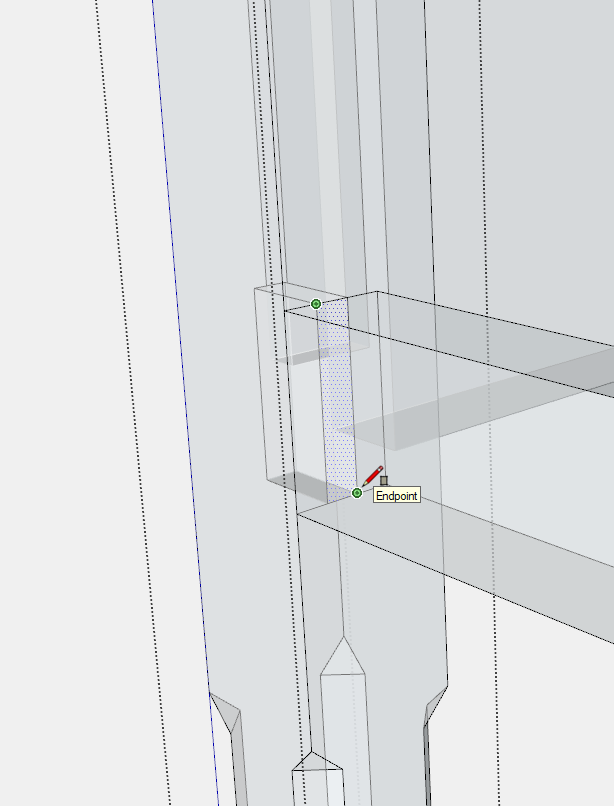
Then using the Push/Pull Tool, the mortise is made at the same depth as the tenon.
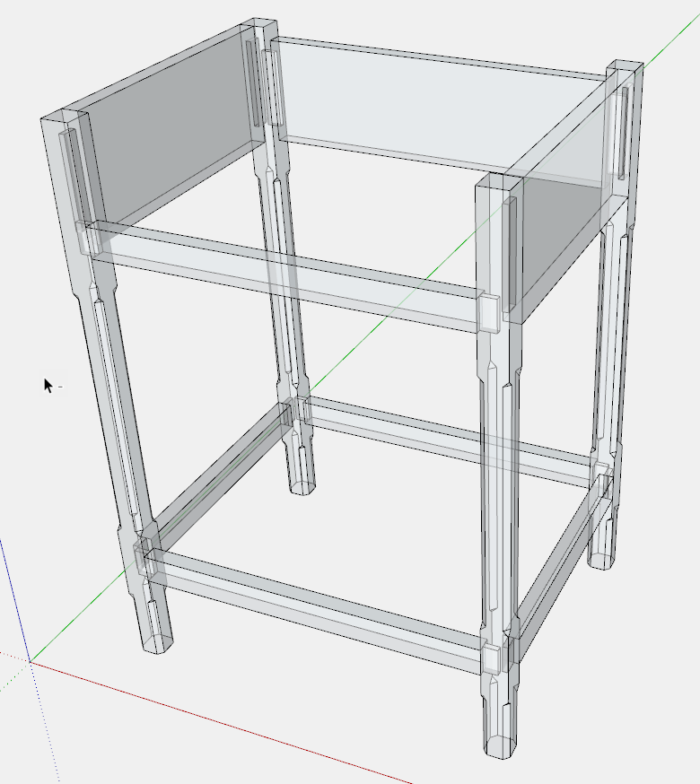
Here in X-ray, you can see all the completed joinery in the Table carcase.
Here is the video showing the modeling of all mortise & tenon joinery.
Tim
@KillenWOOD
Fine Woodworking Recommended Products

Drafting Tools

Compass








Comments
Tim
Thanks for your in-depth lesson on building this table in SketchUp. One question I have is instead of exploding and then deleting the rear legs, why didn't you use the make unique command to make them different than the front legs?
ScarletJim, yes you can use the Make Unique Command and that works. However, that ends up naming the component something like "Leg #1". Then I would need to alter that name to "Back or Rear Leg" probably using Entity Info. So I just Explode and rename with the proper title at the start, and I'm done.
Tim
Log in or create an account to post a comment.
Sign up Log in