How to Resaw by Hand
Sawing by hand will usually take longer than feeding the board through a bandsaw, but unless you have a massive pile to cut, it’s not so bad.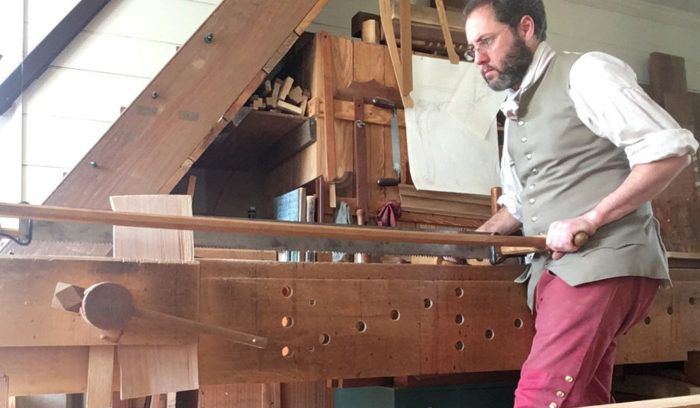
“I can’t imagine having to do all of that by hand.” Woodworkers express this sentiment quite often as I demonstrate 18th-century cabinetmaking at Colonial Williamsburg. My goal has always been to get them to not only imagine it, but also to understand how hand techniques still have an important place in contemporary shops. I don’t ask anyone to give up their tablesaw. Instead, I try to lead people to consider things momentarily from another point of view. In most cases, I can demystify the old ways and put them in context. Sometimes I can even talk somebody into giving a traditional hand-tool method a legitimate shot in their own shop. There is, however, one area where I can demystify things but can’t quite convince folks to try it for themselves and that’s hand-powered resawing.
Why is that? Well, pushing a handsaw through an 8-in.-wide board over a length of 18 in., for example, just looks awfully tiring. Of course, there’s also a lot of nervousness around following the line as well. Neither thing is that hard or arduous, but it takes trying a few times to realize that. It also takes a good sharp saw (good and sharp, not necessarily great and perfectly sharpened).
The advantages of resawing are well known: It gives you complete control over dimensions (no need to limit yourself to only the dimensions available at the lumber yard); book-matching grain; and getting the most economical use of your material. Everything written about resawing mentions this and almost everything written about resawing is about bandsaws. There’s a good reason for that, but what if you don’t have a bandsaw or one that’s up to the task? Most handsaws can be tuned up for this task without a tremendous amount of effort. Sure, sawing by hand will usually take longer than feeding the board through a bandsaw, but unless you have a massive pile to cut, it’s not so bad. If you’re just starting out with woodworking or looking to move toward a hand-tool approach, give resawing a shot and see how it goes. Here’s how I do it.
As far as saws go, use the largest, most aggressive saw you deem appropriate for the job. It’s important that the teeth be filed for ripcutting and have some set, but not too much. Generally a typical handsaw with a 26-in.-long blade works well (more on big frame saws later). For most resawing I use a 5½ ppi (points per inch*) ripsaw. For really aggressive jobs like cutting up backboards, I might go with something coarser (3½ to 4 ppi). Conversely, when I cut veneer (usually about 1/16 in. to 1/12 in. thick) I prefer a finer saw (8-10 ppi). If you only have room in the budget for one saw, I’d recommend a 7 ppi ripsaw. You’ll also need a sturdy bench and a strong vise due to the amount of force generated while resawing. I’ve resawn plenty of large boards in a Workmate workbench, so it’s possible, but not recommended.
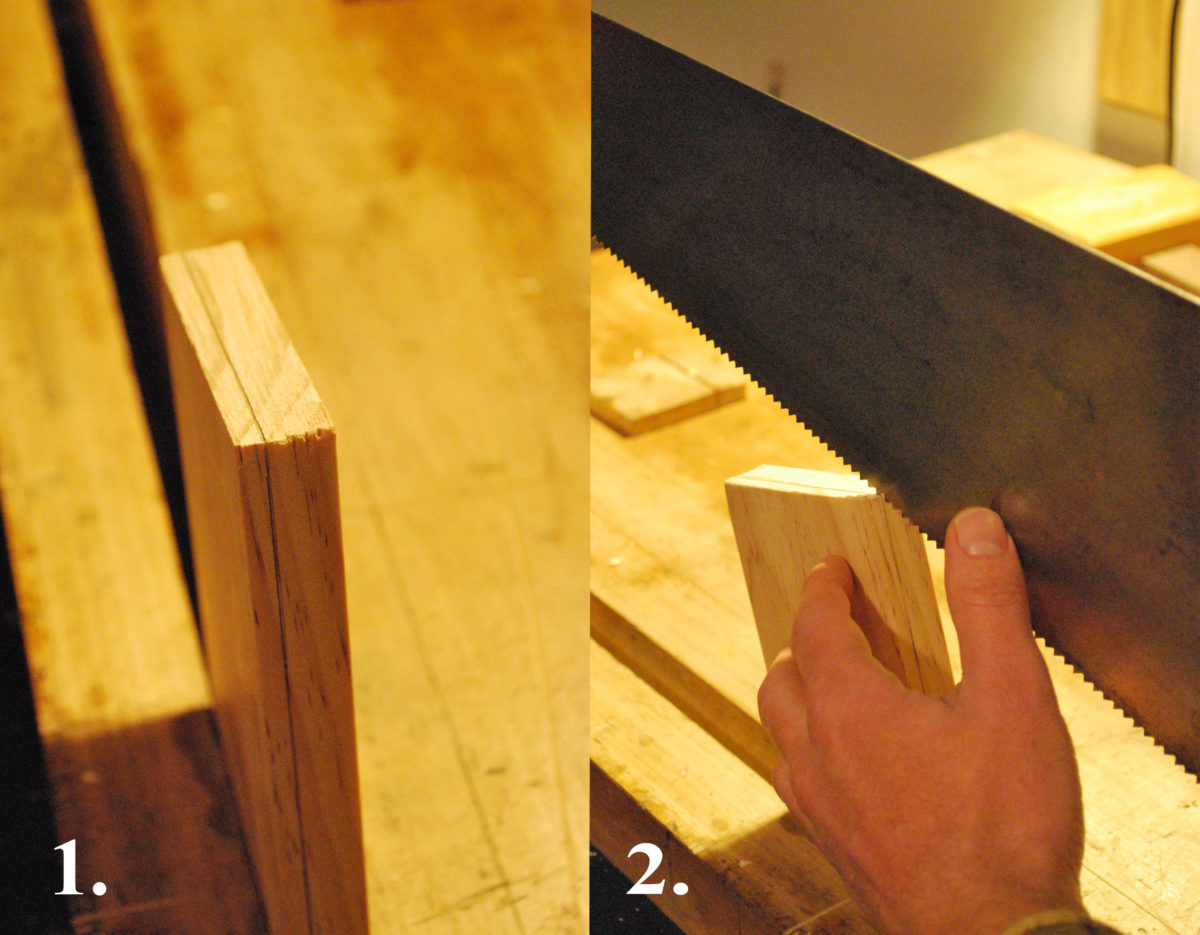
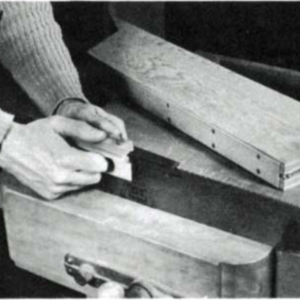
Begin by scribing a line around a board from the reference face to the desired thickness (3/16 in. in the photos) and then clamp the board in the vise angled slightly away from you (1). Begin sawing at the near corner, taking great care to advance the blade simultaneously across the top and the edge facing you (2). Starting is the hardest and most crucial part. It’s at this point that the blade’s great width will feel unwieldy, so do your best to steady it with the thumb of your off hand. In no time at all, that seemingly wobbly blade will become your best friend in the process as its width will help guide the cutting edge. The wide blade was designed to keep you on track, but it means you need to establish a good track from the start, so go slow at first. Here’a a tip: I like to begin with the waste side to my right because it allows me to start with my line on the left where it’s easier to see – this stacks the odds in my favor a little. Generally, I saw just a hair off of my line toward the waste to give me a little room for error and a little extra thickness that can be planed way later if the board reacts poorly to being resawn.
Saw at this angle until you reach the far corner (3). At this point stop, turn the board around, and begin from the new corner as before (4). 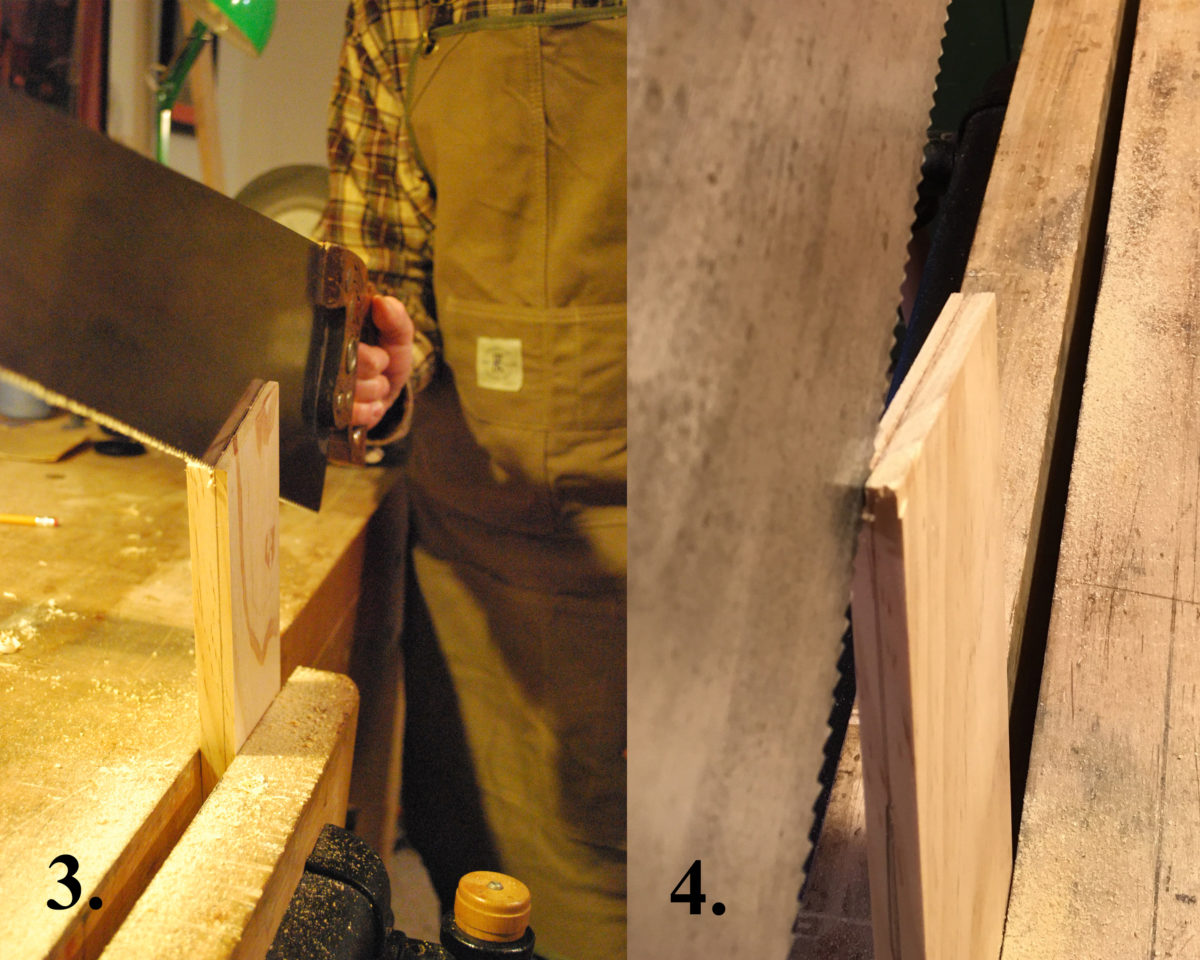
Here’s a guiding principle in resawing by hand: only advance the saw down a line you can see. Within a couple of strokes from the new side, the saw will fall into its track and you simply keep going until you bottom out in the first cut. Once that happens, switch back to the first side and saw at an angle again until you bottom out in the last cut. Repeat this process as long as necessary (5). Don’t race with the saw and don’t force it. Use the full length of the blade with purposeful strokes, but don’t grip too hard or bear down on anything. Take a relaxed pace and follow the old cliché: Let the saw do the work. A proper resawing job shouldn’t wear you out. Let yourself fall into a good rhythm and learn to let up a little on the return (pull) stroke. If the saw starts to drift, it’ll happen slowly, so you have time to course correct. Avoid twisting the saw in the cut to bring it back on track, as this will only work on the edge – the saw will still be off course in the middle of the board. Instead, apply a little lateral pressure and allow the set in the teeth to push the tool back closer to your line. If your saw keeps wandering off course, blame the tool. It’s probably not you. Stop and sharpen or set the saw as needed and get back to work.
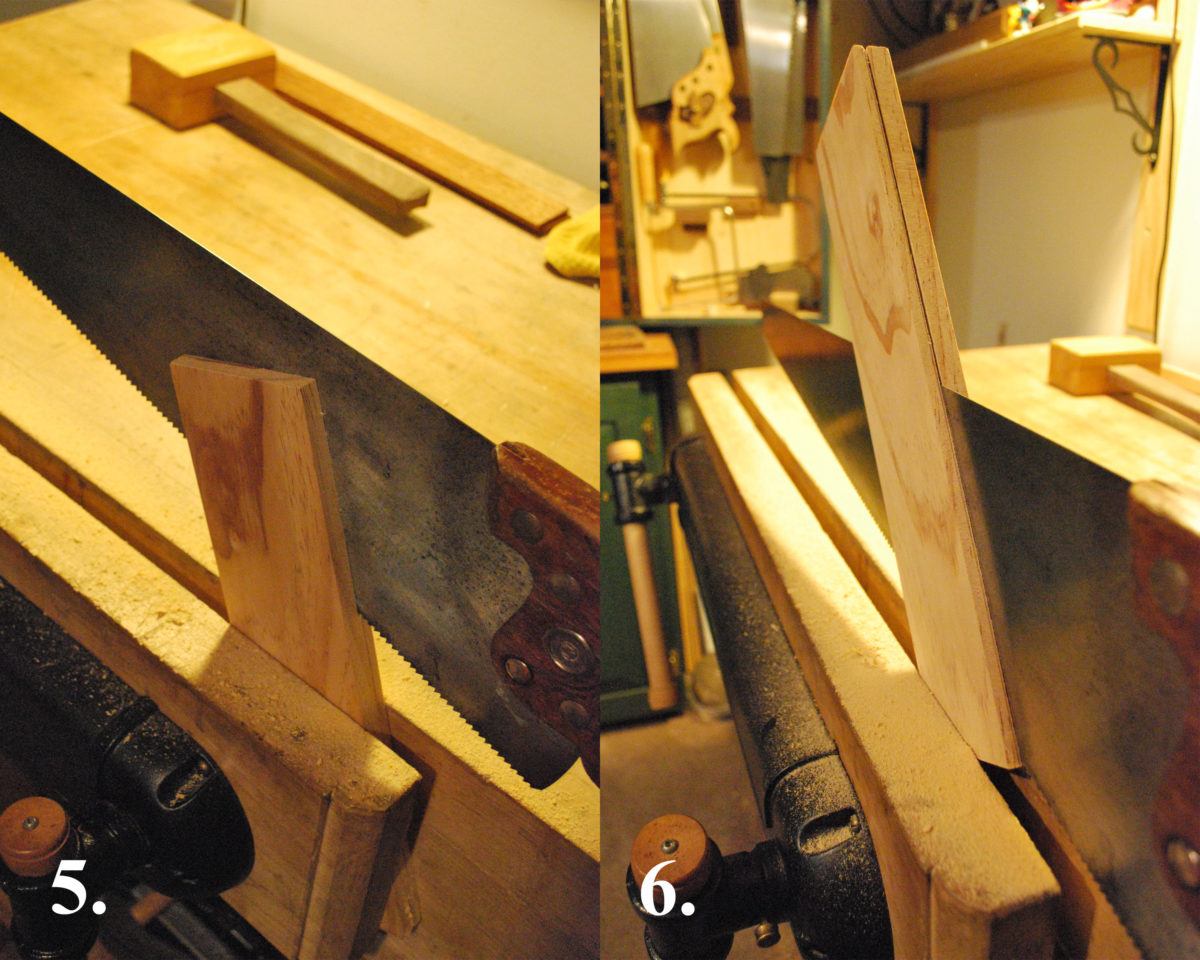
Eventually you’ll run out of board to clamp in your vise. When you reach that point, flip the board end for end and start over again until your cuts meet. Often, I advance the saw all the way to the bottom edge of the board before flipping it over, so I know exactly where to start (6). If all goes well the cuts will meet beautifully. Sometime during the last stroke all the resistance below the blade disappears and “thwuump” you’re through. That moment almost always comes as a sweet little surprise (7). If the kerfs don’t meet, but they’re all past the point where they should have met, pull the boards apart and plane away the little bridge of wood that remains. It doesn’t feel good when that happens, but you’ll still have a usable piece and it’ll be better the next time around!
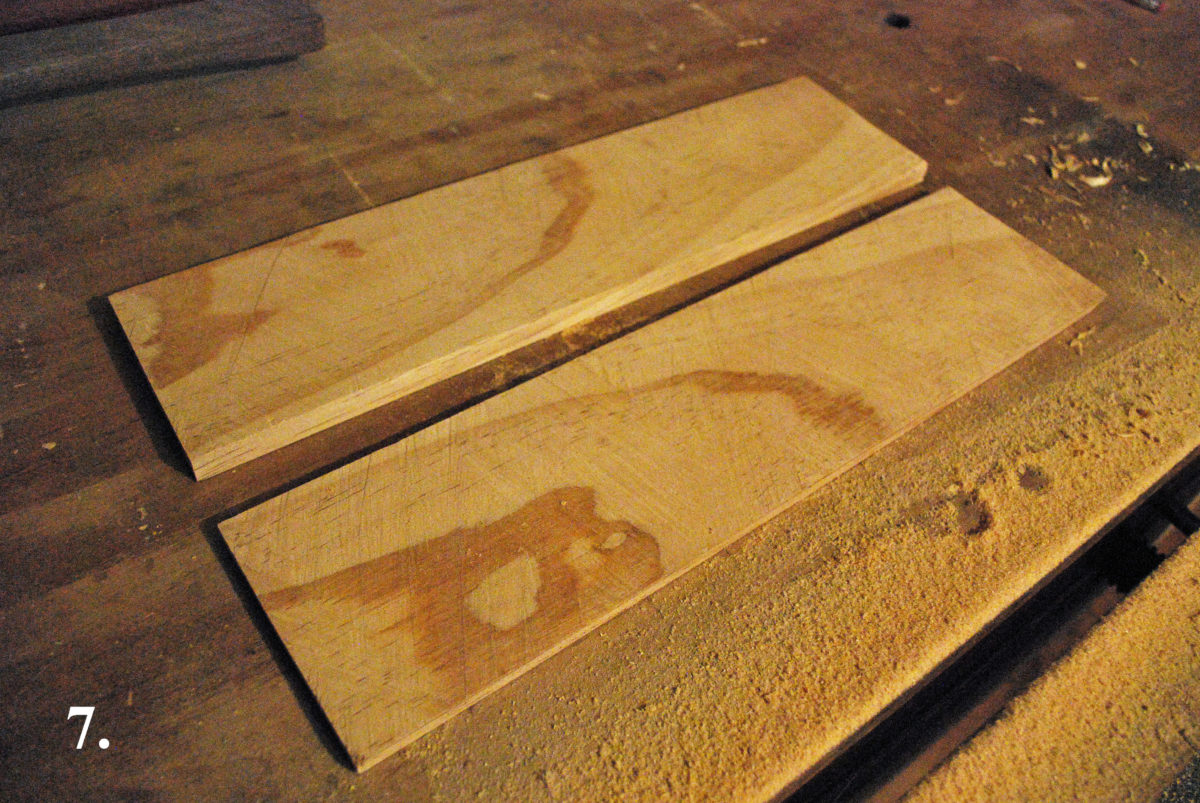
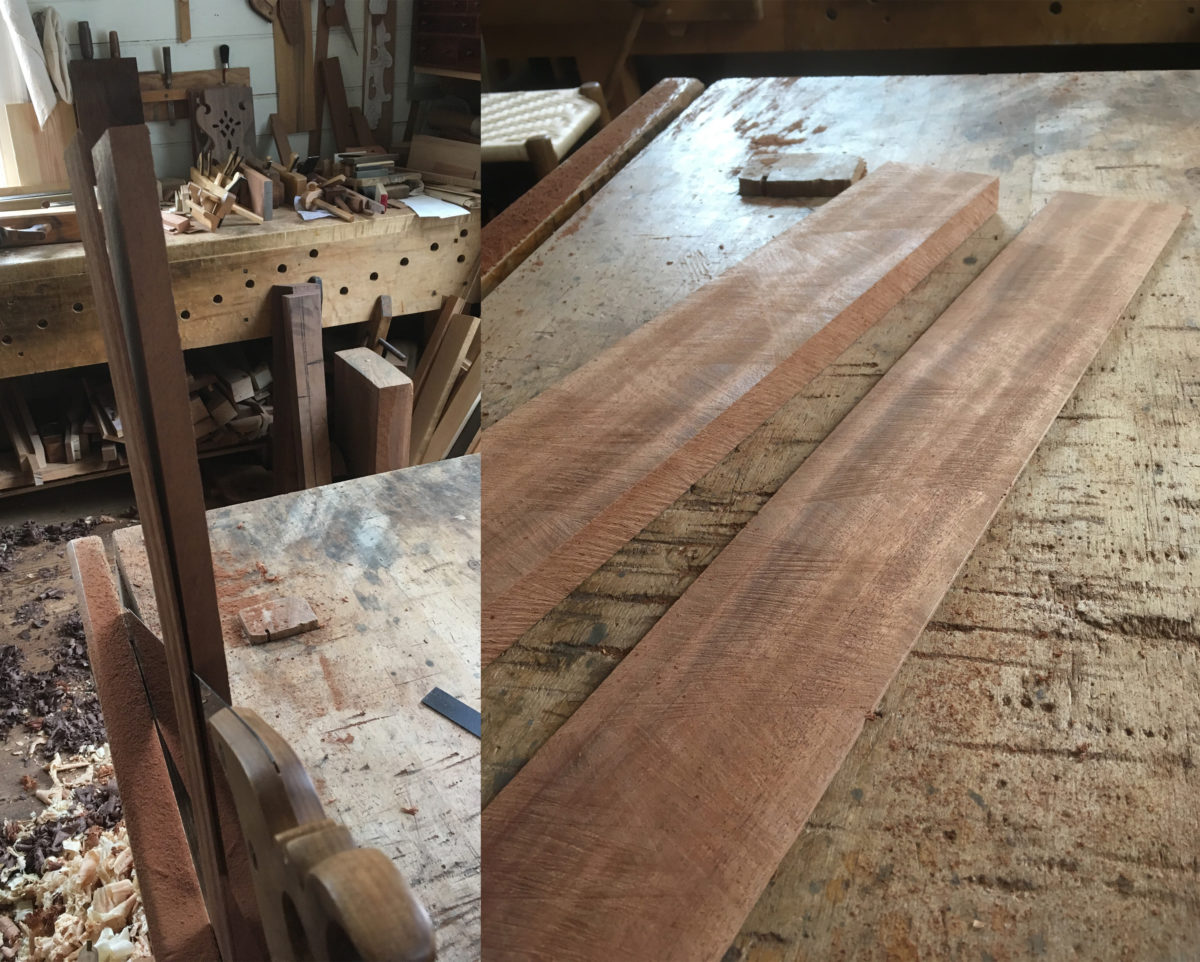
I do most of my resawing this way as long as the board is under 10 to 12 in. wide. Once things get over that limit, I prefer to switch over to a 4-ft.-long, two-person frame saw. I’ve used such a saw solo a few times and some woodworkers have mastered that approach, but I’m happy for help when I reach that point. Fortunately, most of the resawing we do while making furniture falls within the comfort zone of a typical handsaw.
In all honesty, it’s easier to resaw than to write or read about it. Yes, it can take a little time, but the pine I cut in the photos above only took four minutes, so that’s not bad at all. I’d say that I dare you to try it for yourself if you don’t believe me, but there’s nothing daring about it all. Instead, I invite you to add this to your arsenal of techniques. Your projects will feature properly sized parts, you’ll waste less wood, and you’ll turn yourself into the most versatile bandsaw in the neighborhood.
*Web Producer’s note – If you were as confused as I was about Bill’s use of P.P.I as opposed to T.P.I., check out this blog on our friend Matt Cianci’s old website. -Ben Strano
More on FineWoodworking.com:
- If you still think Bill is crazy, check out this great video series on bandsaw setup!
- Hammer Veneering – Veneer the whole world, without clamps
- How to Sharpen a Handsaw – Make your saws cut straight and fast
Fine Woodworking Recommended Products
Incra Miter 1000HD
Veritas Wheel Marking Gauge

Starrett 12-in. combination square







Comments
I am a beginning woodworker. Maybe I've got 200 hours at the bench at this point over the last two and half years so not much time.
It really didn't take me that long to be able to saw straight. All the tips listed above helped. Mostly, just practice, practice, practice. The biggest gain I got was when I learned not to tense up my hand when sawing (leads to increased drift).
As the article points out, it's not that bad for what I mostly need to do. And, if I get a little sweaty, it is better exercise than a tread mill.
Log in or create an account to post a comment.
Sign up Log in