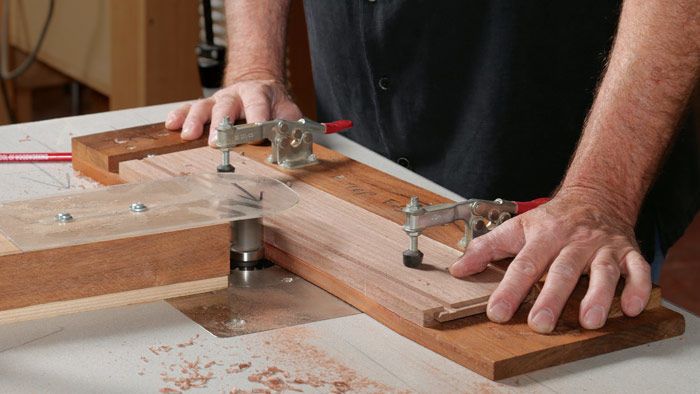
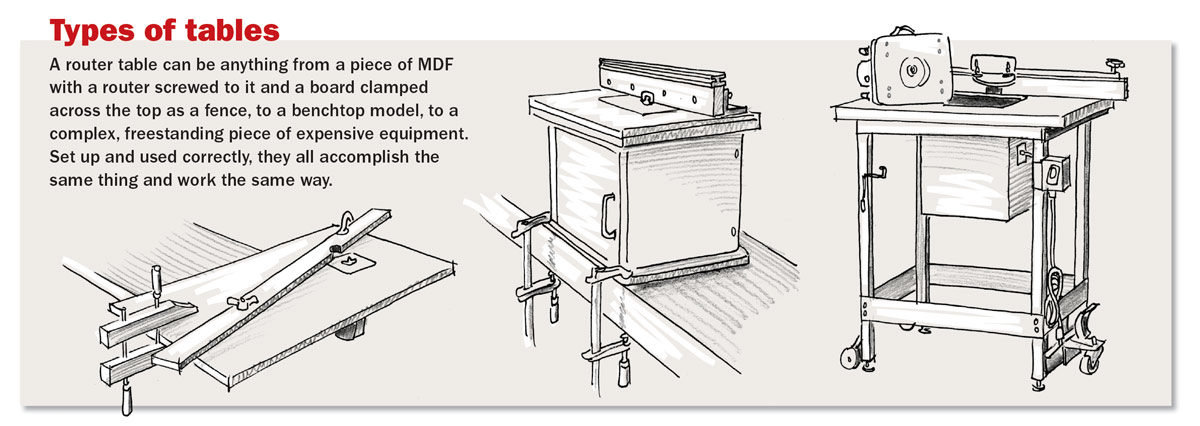
Synopsis: When set up correctly, a router in a table is often simpler and more stable to use than a handheld router. It also helps to increase the accuracy of your work. Whether you choose a basic MDF square with a router attached to it or a complex piece of manufactured equipment, this Fundamentals will show you the basic setup, including table, lift, and fence, and the basic joinery cuts where this setup does its best work.
What began years ago as a simple homemade device to hold a router has evolved into a common, and often indispensable, piece of shop equipment. Regardless of its level of sophistication, when set up correctly, a router in a table is frequently simpler and more stable to use than a handheld router and, in many cases, will increase the accuracy of your work. I’ll explain what you’ll want from a router table, the basics of using them, and the tasks at which they excel.
Why a router table?
Router tables have many advantages over handheld routers, and I gravitate toward them when possible. One of the biggest advantages is that you bring the work to the router. This means that you do not have to devise ways to hold the work in place, thus eliminating the need for the clamps, hold-downs, or wedges that frequently get in the way when routing handheld.
Additionally, because the router, router table, and fence are all one unit, cuts are much less likely to go astray. Handheld routers, on the other hand, are sometimes difficult to hold steady, so the risk of ruining a workpiece increases.
Third, furniture work usually requires accurate repetition. Stop blocks are typically the best way to ensure this, and using them on the router table is straightforward. Although you can clamp stop blocks to a workpiece while handheld routing, it is usually more cumbersome and slow.
The basic setup:
Before you get started using a router table, you need to know the basics: the table and the fence.
A router table must be heavy, or at least secured to a stable surface. A table that moves when you push a workpiece through is not only frustrating, but potentially dangerous. Second, the table must be flat and smooth, with no bumps around the router plate, insert ring, or lift system. Plastic laminate, extremely smooth and easily waxed, makes a great router table surface.
For the full article, download the PDF below.
More on FineWoodworking.com
- Router-Table Basics – Are you getting the most from this workshop fixture?
By Gary Rogowski #190–Mar/April 2007 Issue - Video Workshop: Build a Router Table with Matt Kenney
- How To Build a Horizontal Router Table – This easy-to-build table cuts tenons fast and accurately
By Ernie Conover #147–Jan/Feb 2001 Issue - Tool Test: Router Tables – The best offer flat tables, versatile fences, and good dust collection
By Roland Johnson #237–Tools & Shops 2014 Issue
Fine Woodworking Recommended Products
DeWalt 735X Planer
Rikon 10-3061 10-in. Deluxe Bandsaw
The saw has two speeds: 3,280 sfpm (surface feet per minute) for wood and 1,515 sfpm for soft metals and some plastics.
Forrest Woodworker II Blade








Log in or create an account to post a comment.
Sign up Log in