A Survey of Period Drawer Bottoms
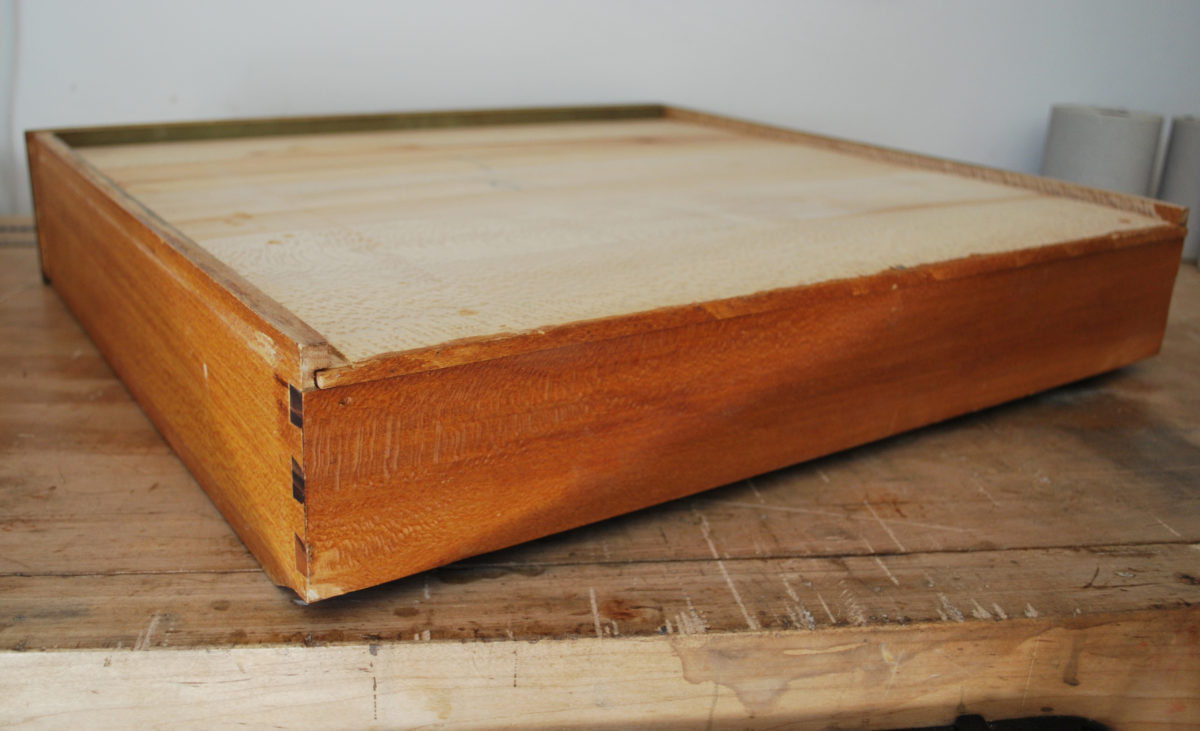
The rough surfaces and tool marks left behind on old drawer bottoms show their makers' dedication to efficiency and wise cost-cutting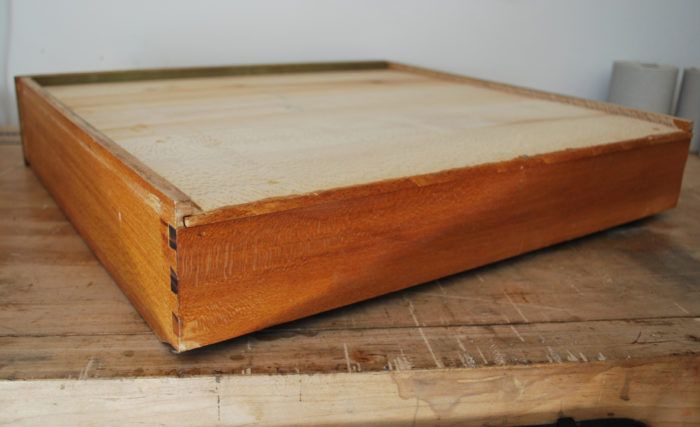
Without question, my least favorite part of building a large case piece by hand is making drawer bottoms. Often, there’s a lot of sweat poured into these important, yet unglamorous parts—planing, resawing, and edge-joining over and over again. Don’t get me wrong, it’s better than returning emails all day long, but it can be tedious.
Period makers likely felt the same way. Though the rough surfaces and multitude of tool marks left behind on old drawer bottoms certainly betray a dedication to efficiency and wisely-calculated cost-cutting, I sometimes wonder if we’re also seeing traces of impatient hands in and among all those plane tracks. Modern makers of fine furniture may view surface preparation differently and take pride in finished, beautiful drawer bottoms, but most 18th- and 19th-century makers operated under a different philosophy: drawer fronts need to be pretty and smooth, sides need to be stable, and drawer bottoms simply need to be there. How they were put there is, to my mind, where drawer bottoms start to get interesting.
Cabinetmakers have devised many ways to affix bottoms to the basic dovetailed drawer box. The challenge has always been to strike a proper balance between utility (strength and durability), ease of construction, and the seasonal expansion of wood. Probably the most well-known and often the best approach is the type of arrangement pictured here on this nice, factory made piece from the last century.
With grain that runs parallel to the front, a bottom slid into grooves in the sides and front can move toward or away from the back as humidity changes. Often a couple of small nails or screws in elongated holes or slots keep the bottom attached to the drawer back while still allowing movement (the nails will flex some). While this is a strong, elegant solution, it’s not always the best way and it’s certainly not the only way pieces were made in the past. Below I’ll illustrate a handful of period techniques for placing drawer bottoms in rabbets instead of grooves. These approaches, as expected, have their advantages and disadvantages. Some are probably best left to the most legalistic period furniture makers, while others are still worthy of a place among sound 21st-century construction techniques. All but one of the photos below were taken from accurate reproductions of specific antiques that we’ve made in the Hay Shop at Colonial Williamsburg over the years.
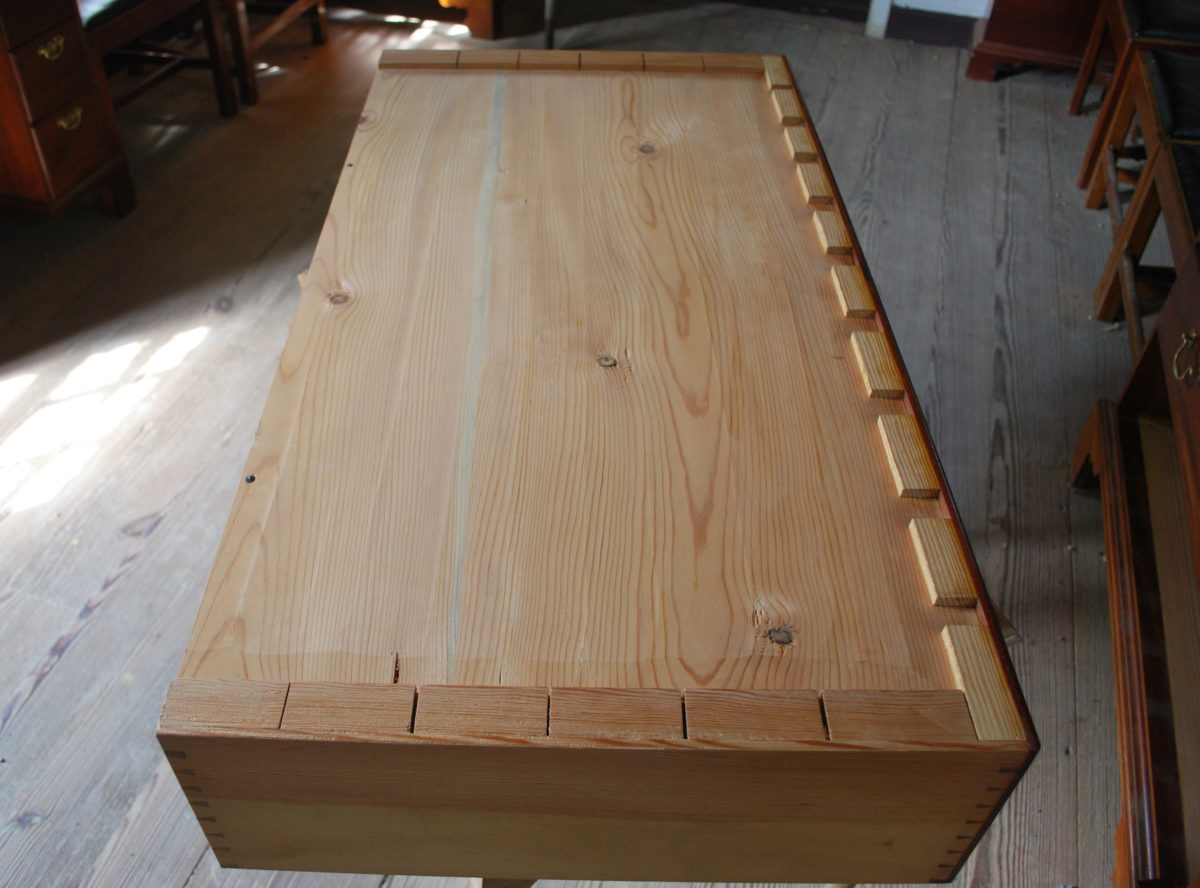
One of the more sophisticated approaches to drawer bottom installation dating to the 18th century is pictured above. Here the bottom is dropped into a rabbet on the front and sides of the drawer. Like the classic groove approach, the grain is run parallel to the front and allowed to move toward the back, where it is fastened with a couple of nails that will—theoretically—flex as the wood moves. Holding the bottom to the sides and front are series of glue blocks. The bottom is not glued directly to the drawer. Instead, it is dropped into the rabbet dry and the small blocks are glued to the bottom and the side. To account for the long stretches of cross-grain construction along the drawer sides, a small gap (about 1/8 in.) is left between each glue block. In effect this creates an expansion joint. Does it work? Yes, but not always. The drawer pictured here is 25 years old and like many 250-year-old drawers I’ve seen, it’s in great shape. Sometimes the bottom will crack, but that rarely amounts to anything catastrophic for the drawer itself. Perhaps it sounds absurd that a crack might not be catastrophic, but as long as the bottom is still held firmly in place any slight crack would only amount to a cosmetic flaw in a place where cosmetic flaws aren’t really a problem. Unless you’re storing sand in the drawer, nothing should fall through the crack. More troubling is when the bottom pulls itself away from the front. This tends to quickly lead to failure of the whole system of glue blocks.
One of the great things about rabbets and glue blocks is how they create a much wider bearing surface where the drawer makes contact with the runners/drawer dividers. The narrow lower edge created by grooved construction is both vulnerable to breakage and likely to wear a groove into the runners over time, which will undermine the drawer’s ability to work smoothly. Some drawers with grooved bottoms also feature glue blocks for this very reason.
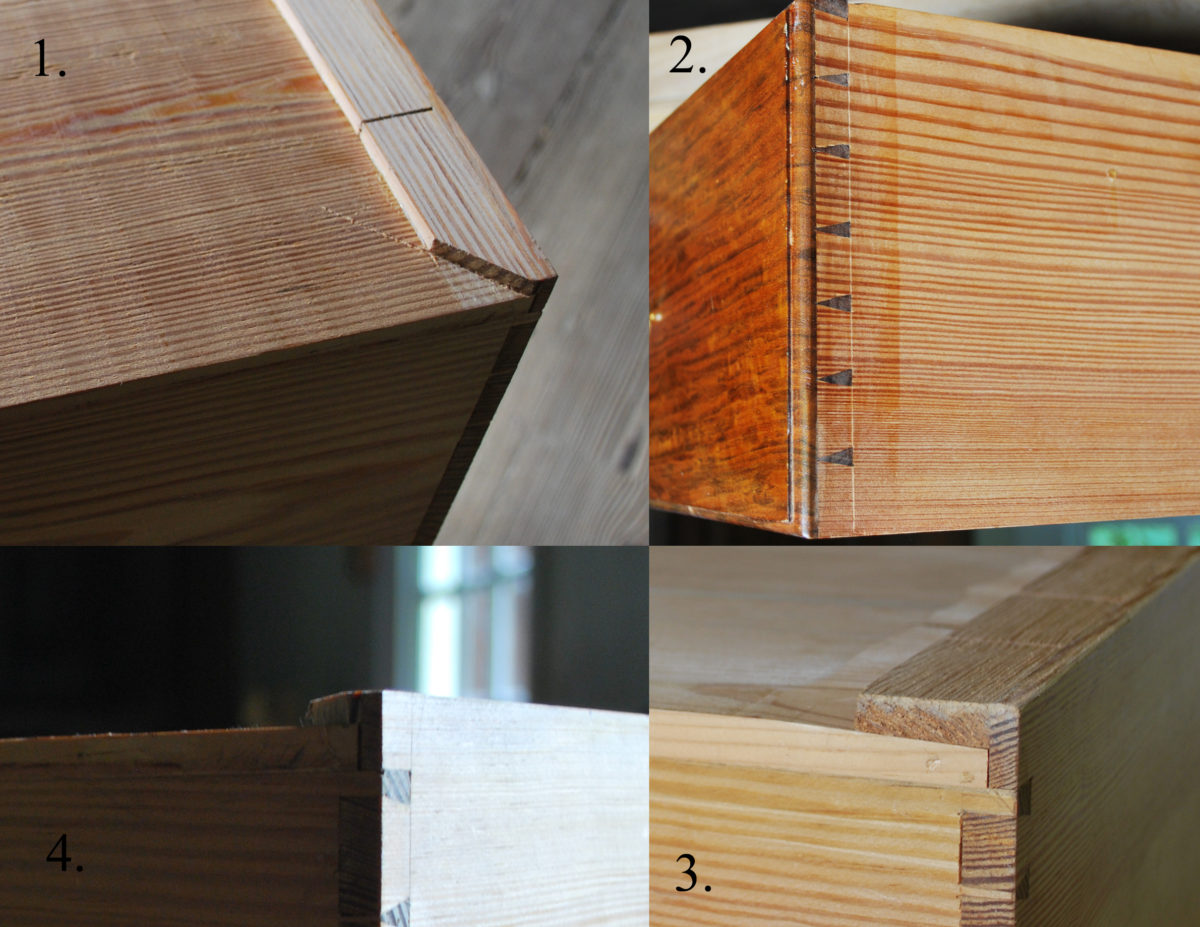
This image shows a few notable aspects of this construction approach. Let’s consider them in turn, moving clockwise from the upper left. 1. To aid with smooth operation—though its usefulness is debatable—many makers cut the rearmost block at a 45° angle (see picture above at upper right) so it was less likely to catch on anything. Evidence often reveals that this cut was made after the block was glued down. 2. A rabbeted approach to bottom installation makes dovetail layout different. Typically, to conceal the rabbet from view the corners are dovetailed with a half-pin at top and—gasp!—a half-tail at bottom. At some point, it became standard practice to define proper dovetails as terminating with half-pins at both ends. This rule was foreign to countless period drawer makers and they seem to have suffered little from that supposed ignorance. Sometimes it’s easier to coordinate a rabbet with the dovetailed corners than a groove. 3. The drawer bottom is often beveled off at the edges to give the blocks more surface-to-surface contact with the drawer sides. 4. Often enough, the drawer bottom is not beveled off at this intersection.
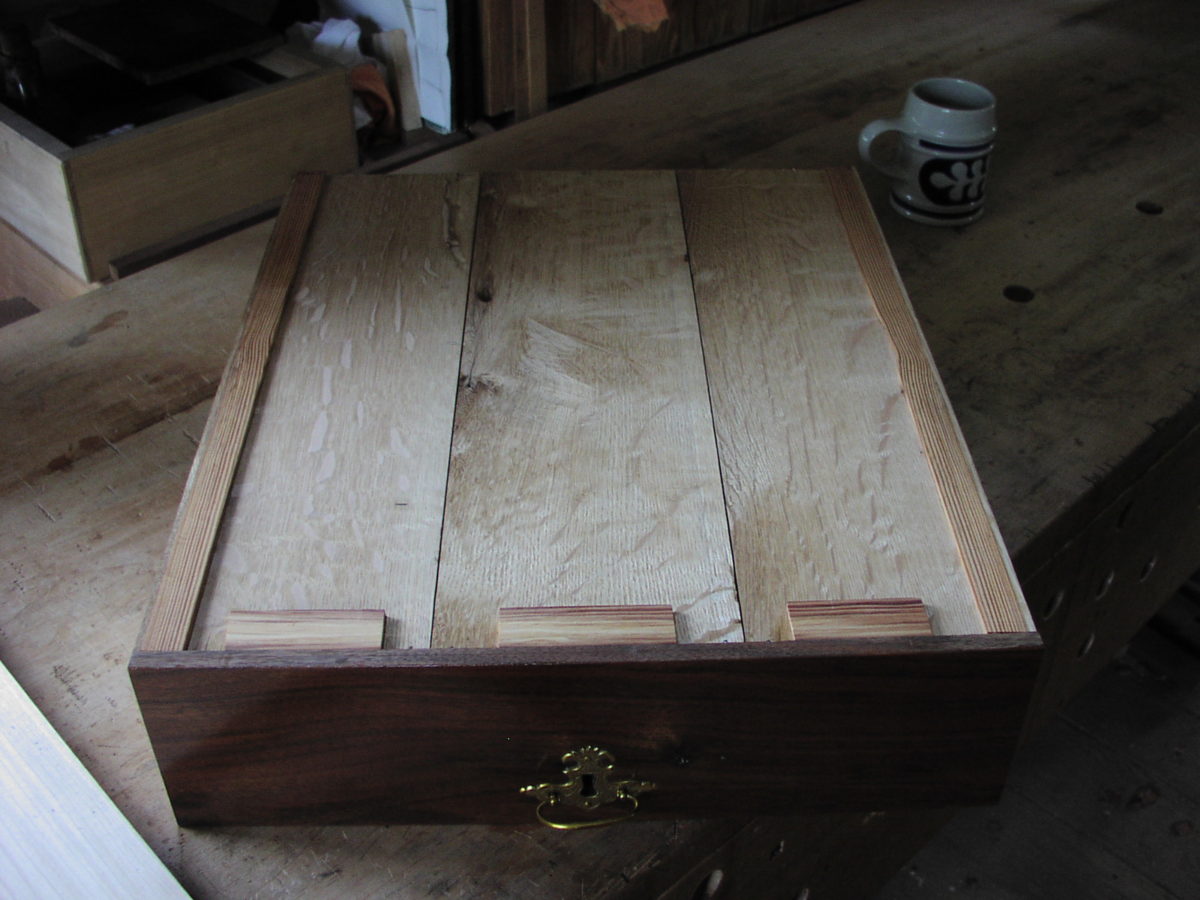
Here’s another approach to a rabbeted drawer bottom in which the bottom’s grain runs perpendicular to the front. As in the first method, glue blocks are employed along the front and sides and nails at the back. Unlike that first approach, single strips can be used at the sides where the bottom and sides now have parallel grain orientations. On most of the successful old drawers I’ve encountered with this structure, the bottom boards appear to have never been glued together, as pictured here on my reproduction of a late 1720s desk. In this drawer, each narrow board that makes up the bottom is allowed to move on its own instead of as one large unit. When they are all glued together, their expansion and contraction tends to push or pull the drawer’s sides apart at the rabbet’s shoulder. It’s not necessarily pretty, but this early approach is fast and durable.
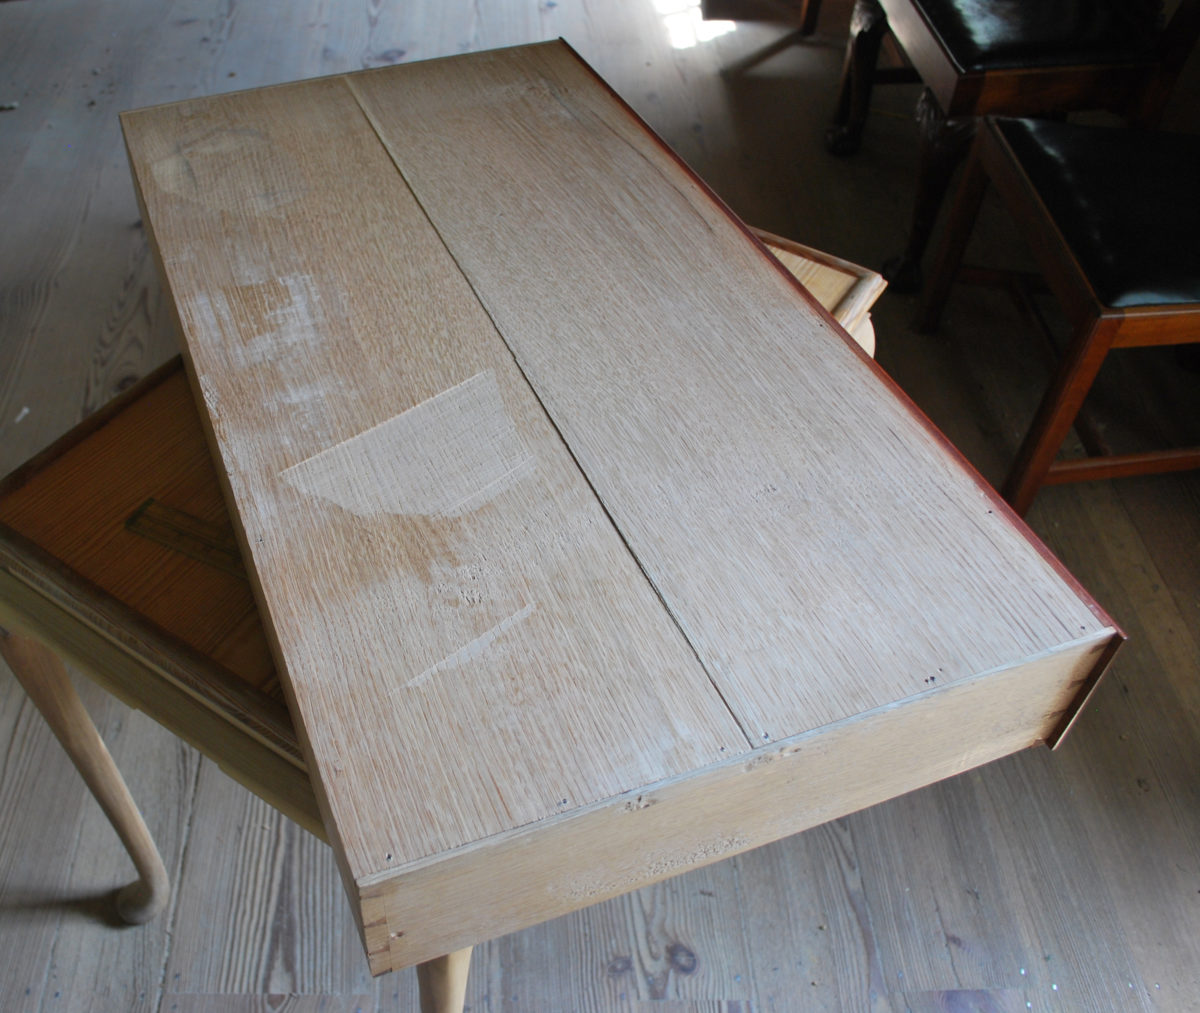
Here the bottom runs parallel to the front, but instead of glue blocks it is simply nailed into the rabbets. Once again, the boards that make up the bottom are left unglued to better allow for wood movement.
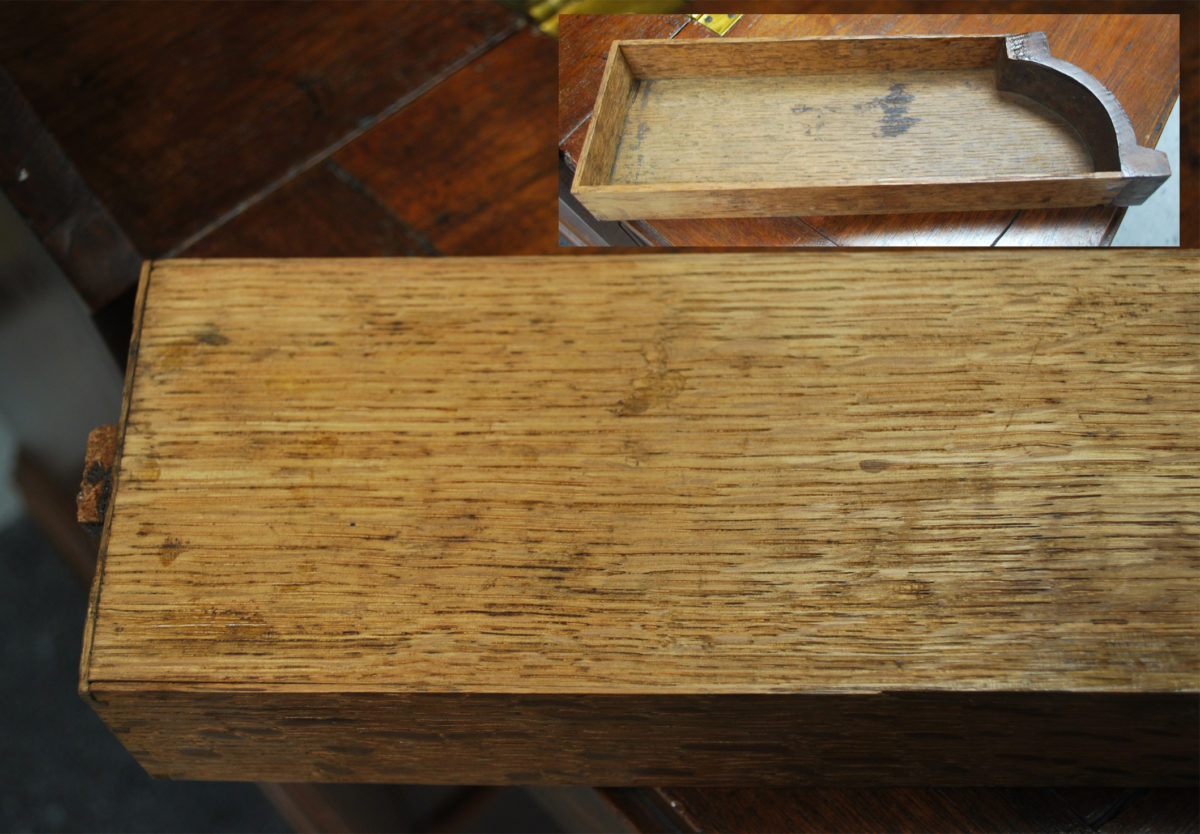
On small drawers like this antique example from the 1760s or ’70s, grooves can pose two challenges. Because they need to be plowed far enough up from the lower edge of the sides to maintain strength, grooves can reduce the already limited amount of interior storage space. Additionally, the drawer sides need to be thicker to allow for a groove. On certain refined pieces it is common to find drawer sides that are 3/16 in. thick or even thinner. A groove bottom that is only 1/16 in. away from the outer face of the drawer side is not going to work. However, a 1/16-in. ledge beyond a rabbet usually works out well, as on the antique drawer pictured above. Obviously there are limits as to how a drawer like this can be used, but it has fared quite well for two and a half centuries. The bottom here, with its grain perpendicular to the front, is fully captured by a rabbet on all sides and glued all the way around. While this structure seems to ignore wood movement altogether, the drawer’s size coupled with smart material selection accommodate this apparent deficiency. At only 4 in. or so in width, the drawer bottom wasn’t likely to move too much over time, and the carefully selected, fine-grained quartersawn oak adds considerable dimensional stability to the structure. In the photo above, it is clear that the bottom has pulled away from the back corners a little, but if that’s all it’s done after this period of time, let’s call it a success!
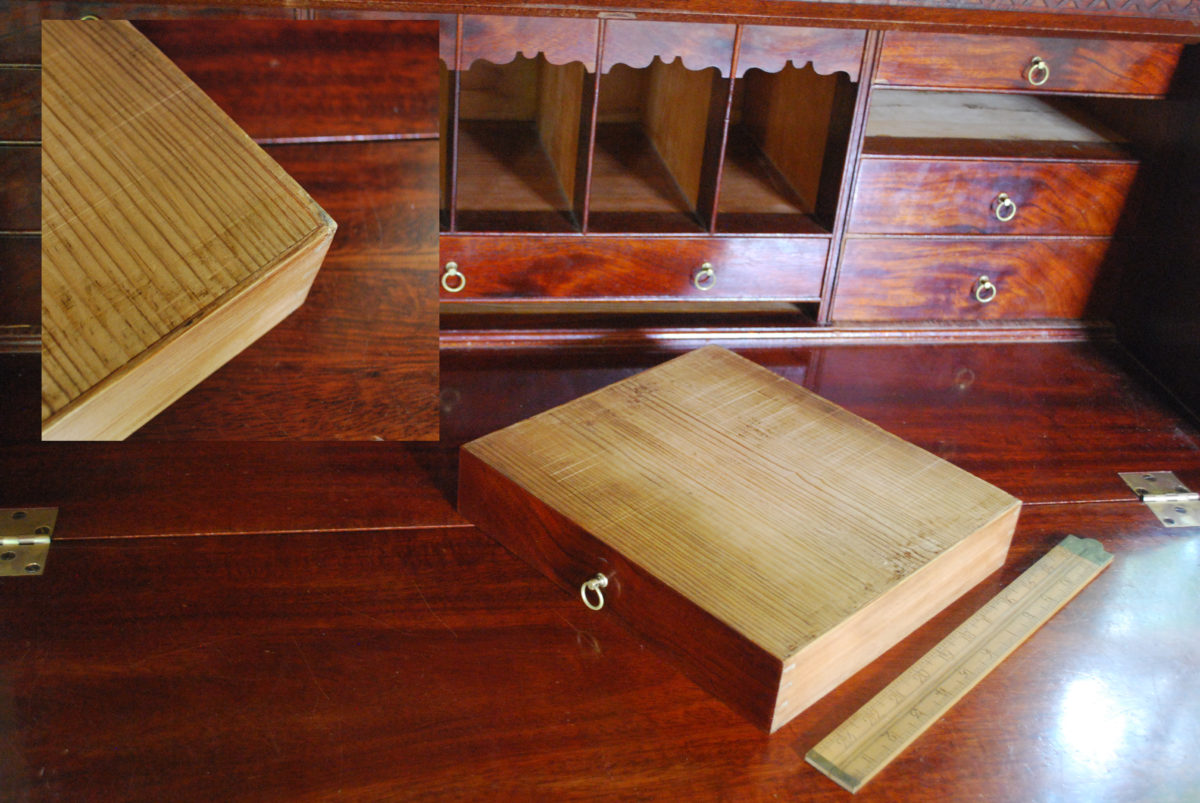
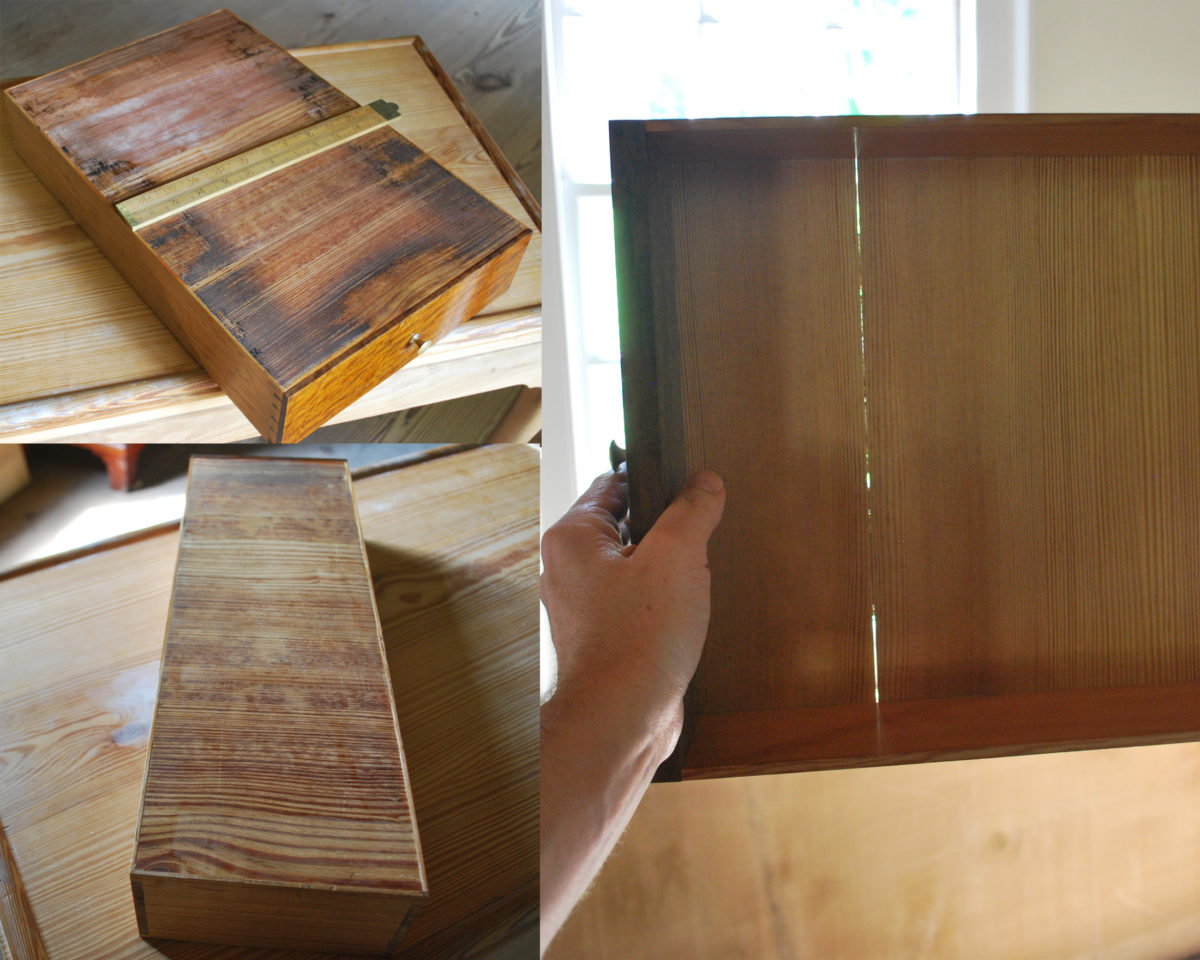
We also see bottoms of small drawers where the grain is parallel to the front and, as in the last example, glued into a rabbet around all four edges. The success or failure of these bottoms is again tied up with size and material selection. In all of the examples above the wood is very tight-grained, quartersawn, and well-seasoned Southern yellow pine—very stable stuff. With an overall measurement front to back just under 10 in., the drawer at top has held up for over 30 years. The drawers in the following image measure 6 in. larger in that dimension and that appears to have made a difference. Several of the 13 small drawers in this piece have developed cracks or pulled away from their front or back edges. Once again, cracks in the drawer bottom can be tolerable. However, when the bottom pulls away from the drawer sides, there’s no longer anything holding things together. These problems are very fixable though—the bottom can be glued back in place and the drawer can serve us for a long time to come.



Comments
Thanks for Sharing Bill, the blog posts are an awesome addition to my FWW subscription. It's so interesting to see how the building practices that are tried and true are demonstrated as you demonstrate in the examples of the 25 year old and 250 year old construction.
dunno what got posted above. Bad copy and paste...
Thanks for Sharing Bill, the blog posts are an awesome addition to my FWW subscription. It's so interesting to see well researched examples of drawer construction. Your examples of 25 year old and 250 year old drawers offer some really helpful info
Very interesting piece. Thank you. I've often wondered why, in the case of grooved drawer bottoms, with grain running parallel to the drawer front, the bottoms were not glued/nailed only at a point v close to the drawer front, leaving the drawer bottom otherwise free to contract and expand unencumbered..
Log in or create an account to post a comment.
Sign up Log in